Every yard has one. The patch by the fence where grass gave up years ago, the strip beside the driveway that bakes all afternoon, the corner nobody looks at because there is nothing to see. Low water garden landscaping can turn that forgotten spot into the prettiest part of your property in about two days, and you do not need a big budget or a landscaping crew to pull it off.
Think of it the way you would style a bookshelf or a console table. Indoors, a good vignette has height, layers, texture, and one thing that catches the eye. Outdoors, the same rules apply. You are simply working with agave instead of a vase and a boulder instead of a stack of books.
One corner is also small enough to finish in a weekend. It makes a low-risk test run before you take on the whole yard, and it lets you learn what grows well on your lot without spending a fortune.
Fresh inspiration is everywhere right now. Current lawn design trends favor layered textures, gravel paths, and plants that look sharp without a hose. A small vignette borrows all of that at a size one person can manage.
Why a Low Water Corner Is the Perfect Weekend DIY
Before you grab a shovel, it helps to know what you are getting in exchange for a sore back on Monday. A small water-wise bed delivers a lot for a little.
- Lower water bills. Drought-adapted plants need regular watering only during their first season. After that, many get by on rainfall plus an occasional deep soak.
- Less mowing and edging. Every square foot of lawn you replace is a square foot you never have to cut again.
- Instant curb appeal. Stone and structure look finished on day one, which makes a big difference if you are prepping a home for listing photos or just want a better first impression.
- A design playground. A small bed is a safe place to test colors, textures, and plant combos before committing to a larger project.
- Budget-friendly. Most corner projects land somewhere between a nice dinner out and a new piece of patio furniture, depending on how much stone you buy.
Your Weekend at a Glance
Here is the full game plan. Print it, stick it on the fridge, and check things off as you go.
| Day & Time | Task | Approx. Time |
|---|---|---|
| Friday evening | Study the spot, sketch the layout, make a shopping list | 1–2 hours |
| Saturday morning | Clear the area, loosen soil, shape the bed | 3–4 hours |
| Saturday midday | Place boulders, install edging, lay path material | 2–3 hours |
| Saturday late afternoon | Plant in the cooler hours and water in | 2 hours |
| Sunday | Mulch, add decor and lighting, final styling | 2–3 hours |
Friday Evening: Study the Spot
Walk the corner around three in the afternoon, when the sun is at its worst. Count the hours of direct light it gets during the day. Six or more hours means full sun, and that single fact decides which plants will thrive and which will fry.
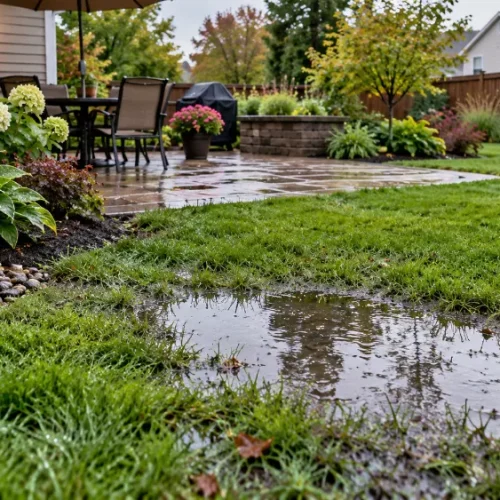
Check drainage next. After a rain, a patch that holds standing water needs a raised mound or a different location altogether. A patch that dries out within an hour is ready to go as is. If you are not sure whether a soggy spot is a surface issue or a bigger problem, sort that out before you plant anything.
Measure the space and sketch it on paper. A bed about six feet by eight feet is plenty for a first try. It is big enough to feel intentional and small enough to finish before Sunday dinner.
Then do what designers do in a living room: find the sight lines. Stand at the street and at the window you look out of most often. Those two views show where the eye naturally lands, and that spot gets your tallest plant or your boulder. Just like a focal wall indoors, the corner needs one clear “look here” moment.
Your Friday Night Shopping List
- Plants for three layers (see the palette below)
- One large boulder plus a few smaller accent rocks
- Decomposed granite, pea gravel, or river rock
- Edging material and stakes
- Shredded bark mulch for flowering perennials
- A small bag of compost
- Drip line or soaker hose with a timer, if you want hands-off watering
- Landscape fabric only for path areas (skip it under plants)
- Tools: flat shovel, garden fork, hard rake, wheelbarrow, hand tamper, gloves, measuring tape
Build a Plant Palette in Three Layers
A vignette looks planned when it has height, a middle tier, and a ground cover. It is the same layering trick you use when you style a mantel: tall piece in back, medium pieces in the middle, small details up front.
Pick one plant for each layer, then repeat it in groups of three or five. Odd numbers look natural. Even numbers look like a parking lot.
For height, red yucca and agave hold their shape in heat and need almost no care once settled. Texas sage works in the middle tier. It tends to flower after summer rain, which gives the bed a burst of color right when most yards look tired. Blackfoot daisy or Mexican feathergrass can fill the low layer with soft texture.
Here is a quick-reference palette to help you mix and match.
| Layer | Plant | Look & Texture | Bloom Color | Good to Know |
|---|---|---|---|---|
| Tall (focal) | Red yucca | Grassy, arching leaves | Coral-red spikes | Hummingbirds love the flowers |
| Tall (focal) | Agave | Bold, sculptural rosette | Rarely blooms | Plant away from walkways because of the sharp tips |
| Middle | Texas sage | Silvery, soft foliage | Lavender to purple | Blooms after rain; avoid overwatering |
| Middle | Salvia (autumn sage) | Bushy, fine leaves | Red, pink, white | Long bloom season |
| Low | Blackfoot daisy | Low, mounding | White with yellow centers | Needs sharp drainage |
| Low | Mexican feathergrass | Wispy, flowing | Blond seed heads | Adds movement in a breeze |
A designer tip that works indoors and out: choose a simple color story. Silver and blue-green foliage with purple and white flowers feels calm and modern. Green foliage with coral, orange, and yellow blooms feels warm and lively. Pick one direction and let your accessories echo it later.
Shop at a local nursery and ask which plants have proven themselves in nearby yards. Staff there know what survived last August, and their advice will beat any generic plant list for your specific region.
Saturday Morning: Clear and Shape the Bed
Strip the grass and weeds first. Pull out the roots, too, since any left behind will come back by June. Loosen the soil about eight inches down with a garden fork.
Resist the urge to enrich the soil heavily. Drought-adapted plants prefer lean ground, and rich soil makes them floppy and short-lived. A light mix of compost near each planting hole is enough.
Shape the bed into a gentle curve or a clean triangle. Curves feel relaxed and cottage-like, while triangles and straight lines feel crisp and modern, so let the style of your home guide you. Mound the center a few inches higher than the edges. That small rise sheds water away from the roots, which protects plants from rot during heavy storms.
Let Stone Do Some of the Work
A weekend project benefits from using rocks for landscaping because stone adds structure on day one. Plants take months to fill in. A boulder looks finished the moment it lands.
Set one large boulder off center and bury about a third of it. A rock sitting on top of the soil looks dropped. A rock sunk into the soil looks like it has been there for a century. If you add smaller accent rocks, cluster them near the big one in the same color family so the grouping feels natural.
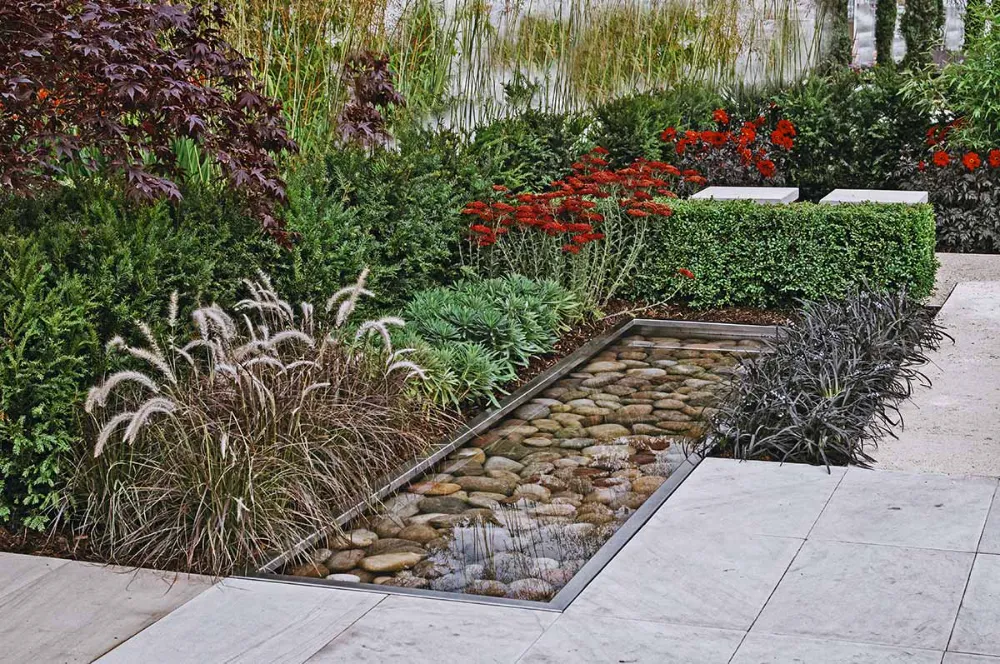
Decomposed granite makes a firm, tidy path between plants. A shallow dry creek bed made from river rock can also carry runoff past the bed instead of through it. Use gravel as mulch around succulents and grasses.
Keep shredded bark around flowering perennials, because rock mulch holds heat and can bake tender roots.
Choosing Your Stone
| Material | Best For | Look | Approx. Cost* |
|---|---|---|---|
| Decomposed granite | Paths and seating pads | Soft, earthy, compacts firmly | $ |
| Pea gravel | Mulch around succulents, casual paths | Smooth, rounded, comes in many colors | $ |
| River rock | Dry creek beds, drainage channels | Polished, natural, varied sizes | $$ |
| Crushed rock | Mulch and modern beds | Angular, stays put on slopes | $ |
| Boulders | Focal points and structure | Bold, permanent, sculptural | $$–$$$ |
*Costs vary widely by region and by whether you buy bagged or bulk. Buying in bulk from a landscape supply yard is usually far cheaper than bagged stone from a big-box store.
Define the Edges
Clean landscape edging keeps gravel from drifting into the lawn and gives the bed a crisp outline. Without it, even a handsome vignette looks unfinished within a month. Edging is to a garden bed what a frame is to wall art.
Steel edging is thin and nearly invisible, which keeps attention on the plants. Natural stone and brick make a bolder border. Flexible steel handles curves well, while straight pavers suit a geometric layout.
Dig a narrow trench along the planned line. Set the edging so its top sits just above the soil, then backfill and press it down firmly.
Edging style cheat sheet:
- Modern home: Steel or aluminum edging with dark gravel
- Farmhouse or cottage: Reclaimed brick or tumbled pavers
- Rustic or ranch: Natural flagstone or stacked fieldstone
- Tight budget: Plastic edging works, but bury it well so the lip stays hidden
Saturday Afternoon: Plant in the Cool Hours
Late afternoon is the kinder time to plant. Heat stresses roots, and a shaded evening gives them a head start.
Set every pot on the bed before you dig a single hole. Shuffle them until the layout feels balanced from the street, the same way you would rearrange frames on the floor before hammering nails into a gallery wall. Take a quick phone photo from your two sight lines. A photo often reveals gaps or crowding that your eye misses in person.
Then dig each hole twice as wide as the pot and only as deep as the root ball. Plants sitting too low collect water around the stem and suffer for it.
Tease apart any circling roots, drop the plant in, and fill around it. Water each one slowly until the soil is soaked.
Spring and fall are the best seasons for this job in hot climates. A summer planting can still succeed, but the new roots need closer attention.
Spacing reminder: Check the mature width on each plant tag and space accordingly. A bed that looks a little sparse on day one will look full and lush by next year. A bed that looks full on day one will look crowded and overgrown.
Water Wisely After the Work Is Done
New plants need steady moisture during their first growing season. After that, they settle in and ask for very little.
A drip line or soaker hose beats a sprinkler here. It delivers water to the roots and wastes none on the gravel. Soak the bed deeply a couple of times a week at first, then taper off as growth appears. Deep, infrequent watering pushes roots downward, and deep roots survive dry spells.
Spread two to three inches of organic mulch around the perennials. Keep it a few inches back from each stem so moisture does not collect against the base.
A Simple First-Year Watering Guide
| Timeframe | How Often | Notes |
|---|---|---|
| Weeks 1–2 | Every 2–3 days | Keep the root zone evenly moist |
| Weeks 3–8 | 1–2 times per week | Water deeply, then let the top inch dry |
| Months 3–12 | Every 1–2 weeks in heat | Skip watering after a good rain |
| Year 2 and beyond | Only during long dry spells | Most plants are now self-sufficient |
Adjust for your own climate and soil. Sandy soil drains fast and may need water more often, while clay holds moisture longer.
Sunday: Add the Finishing Details
Plants and stone make the bed. Small touches make it a destination. This is the fun part, and it is where your personal style really shines through.
Set a glazed pot near the boulder. Tuck a solar path light beside the walkway. A weathered bench at the edge invites someone to sit and look. One focal object is enough. Two start to compete.
Budget-friendly decor ideas for your vignette:
- Painted pot: Refresh a thrift-store terra-cotta pot with exterior paint in a color pulled from your blooms.
- DIY stepping stones: Pour concrete into a simple mold and press leaves into the top for texture.
- Solar lanterns: Hang one from a shepherd’s hook for a soft evening glow.
- Repurposed seating: A sanded and sealed old bench or a sturdy stump makes a charming perch.
- House numbers: If the corner faces the street, mount numbers on a small post or a stone for function and style.
Step back and view the corner from the street again. Move any pot that feels off. Rake the gravel smooth and sweep the pavers clean. Then take a “before and after” photo, because you earned it.
Common Mistakes to Avoid
Even a small project can go sideways. Keep these pitfalls in mind:
- Planting too deep. Water pools at the stem and invites rot.
- Over-amending the soil. Rich soil leads to weak, leggy growth in drought-tolerant plants.
- Skipping the edging. Gravel creeps into the lawn and the bed loses its shape fast.
- Using rock mulch everywhere. Tender perennials can overheat under stone.
- Overcrowding. Plants need room to reach full size.
- Too many focal points. One boulder or one pot holds attention. Several fight for it.
What Will It Cost?
Every yard and region is different, but here is a rough idea of what a six-by-eight-foot corner might run if you do the work yourself.
| Item | Typical DIY Range |
|---|---|
| Plants (9–13 total, mixed sizes) | $90–$250 |
| Boulder and accent rocks | $50–$250 |
| Gravel, decomposed granite, or river rock | $40–$150 |
| Edging | $30–$120 |
| Compost and bark mulch | $15–$40 |
| Drip line or soaker hose kit | $20–$60 |
| Decor and lighting | $20–$100 |
| Estimated total | $275–$970 |
Ways to save: buy smaller plants, which catch up quickly; ask friends for divisions of grasses and perennials; check online marketplaces for leftover stone and pavers; and pick up a boulder yourself instead of paying for delivery.
Where the Idea Can Go Next
A finished corner proves how little a small space demands. The same three-layer formula works along a fence line, around a mailbox, or beside a front step. Planners of residential landscaping for hot, dry climates can repeat the recipe across a whole property, one weekend at a time.
Done well, the project pays back quickly. Water bills stay lower, weekend mowing shrinks, and a once-bare corner becomes the first thing a visitor notices. Homeowners who finish one corner rarely stop there.
Frequently Asked Questions
It is a style of landscaping that uses drought-tolerant plants, smart soil prep, mulch, and efficient irrigation to create an attractive yard that needs far less water than a traditional lawn. It is sometimes called xeriscaping or water-wise gardening.
Yes. The layering, stone, and edging principles work anywhere. Just swap in drought-tolerant plants suited to your region and focus on good drainage, since wet winters are often harder on these plants than dry summers.
Usually not. Fabric can trap debris on top and restrict healthy soil life. It is more useful under gravel paths than in planting areas.
Most beds look established by the end of the second growing season. Stone and edging carry the design while the plants grow in.
Many drought-tolerant plants are fine, but agave and yucca have sharp tips. Place spiky plants away from paths and play areas, and check pet safety for any plant you choose.