
Every October, my front walk becomes the busiest path on the block. For about three hours on Halloween night, dozens of kids in floppy hats and oversized masks march up to my door, and most of them can’t see their own feet. That’s why getting your front walk ready ahead of time matters so much. It isn’t only about looks. It’s about making sure every princess, astronaut, and slightly-too-tall ghost reaches your candy bowl and gets back to the sidewalk without a scraped knee.
The good news? You don’t need a big budget or a lost weekend. You need a plan, a few basic tools, and about three weeks of lead time. Here’s exactly how I approach it, step by step.
Why Your Front Walk Deserves Attention Before October 31
Think about who’s walking up your path on Halloween. Small children. Excited children. Children wearing masks that block their side vision and costumes that drag on the ground. Many of them are running, not walking!
Now add darkness. By the time trick-or-treating hits its peak, dusk has turned to full night in most neighborhoods. A tiny lip in the concrete that you step over without thinking becomes a real trip hazard for a seven-year-old in a dinosaur suit.
There’s also a practical side for homeowners. You’re generally expected to keep your property reasonably safe for invited guests, and handing out candy is an open invitation. A little preparation protects your visitors and gives you peace of mind.
Start With a Slow, Honest Walk-Through
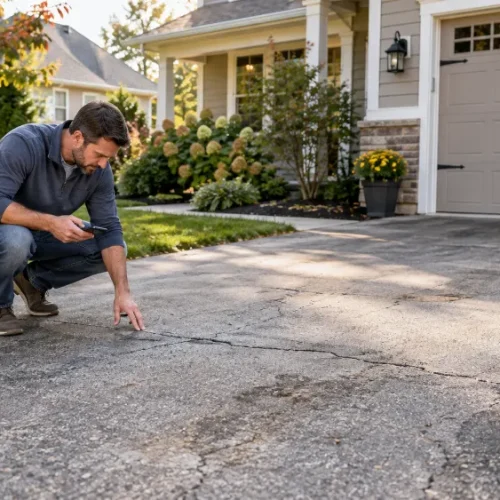
Before you buy a single decoration, walk your path at dusk. Go slowly. Then do it again while crouching to roughly the eye level of a young child. It feels a bit silly, but I promise you’ll spot things you’ve never noticed.
Look for these common problems:
- Slabs that have lifted or sunk, creating an uneven edge
- Loose or rocking pavers and stepping stones
- Wobbly handrails on porch steps
- Branches hanging low enough to catch a hat or a face
- Garden hoses, sprinkler heads, and edging that stick into the walking lane
- Doormats with curled corners
Write everything down. Getting your front walk ready is far easier when you work from a list instead of from memory.
Your Front Walk Prep Timeline
Spreading the work out keeps getting your front walk ready manageable. Here’s the schedule I follow:
| When | What to Do | Why It Matters |
|---|---|---|
| 3 weeks out | Do the dusk walk-through, list repairs, order lights and supplies | Leaves time for shipping and booking any contractors |
| 2 weeks out | Deep clean the surface, make repairs, trim plants | Patches and sealants need time to cure, and concrete needs to dry fully |
| 1 week out | Install and test lighting, set timers | Gives you time to replace dead bulbs or dim solar units |
| 2–3 days out | Place decorations and secure all cords | Lets you test the full setup after dark |
| Halloween day | Sweep, do a final dusk check, turn off sprinklers | Catches fresh leaves and anything that moved |
Prepare the Route From the Sidewalk to Your Door Before You Decorate
Here’s the mistake I see every year. Homeowners haul out the skeletons and inflatables first, then try to work the walkway around them. Flip that order! The route from the public sidewalk to your front door is the foundation of everything else, and it’s much easier to clean, repair, and measure before anything is sitting on it.
Treat that route as one continuous path. It starts where the sidewalk meets your walk, runs across any driveway or lawn crossing, climbs the porch steps, and ends at the landing where kids hold out their bags. Every foot of it should be clear, firm, and easy to see.
Clear Fallen Leaves Early and Often
Wet leaves are almost as slick as ice. Seriously! They also hide the very things you’re trying to find, like cracks, uneven joints, and sprinkler heads.
Clear the entire route with a leaf blower or a stiff push broom, working from the door outward so you aren’t blowing debris back onto clean concrete. Pay extra attention to three spots:
- The corners where your walk meets the sidewalk, where leaves drift and pile up
- The base of each porch step, where they collect against the riser
- Shady stretches under trees, where leaves stay damp all day
Bag the leaves instead of pushing them onto the lawn edge. A soggy pile beside the path tends to creep back onto it. And plan on a second sweep on Halloween afternoon, because late October trees drop leaves daily.
Clean Accumulated Dirt Off the Concrete
Once the leaves are gone, take an honest look at the surface. Months of tracked-in soil, tree sap, algae, and mildew build up on concrete walkways, especially in shaded areas. You may not notice it on a dry afternoon. Add a little evening dew, though, and that thin film becomes slippery fast.
This is the moment to deep clean, before a single decoration goes down. Once props, stakes, and cords are in place, you can’t clean around them properly, and you’ll be stuck with a grimy path for the busiest night of the year.
For light buildup, a scrub brush and an oxygen bleach solution (mixed according to the label) usually does the job. Let it sit for 10 to 15 minutes, scrub, and rinse thoroughly.
For heavier grime, a pressure washer works wonders. Most concrete handles 2,500 to 3,000 PSI well. Use a 15- or 25-degree nozzle or a rotary surface cleaner, keep the tip about 12 inches from the surface, and work in overlapping passes to avoid stripes. Skip the 0-degree nozzle entirely; it can etch concrete and loosen sand between pavers.
Not comfortable running the machine yourself? That’s completely reasonable. Professional pressure washing services can strip years of buildup in an afternoon, and they’ll handle stained steps and driveway crossings too. If you live in Virginia’s Historic Triangle, booking one of the Williamsburg pressure washing services for concrete walkways is a smart move, especially when grime has settled under mature shade trees. Whoever you hire, schedule them at least two weeks out so the walk dries completely before you add lights or decorations.
Fix Trip Hazards
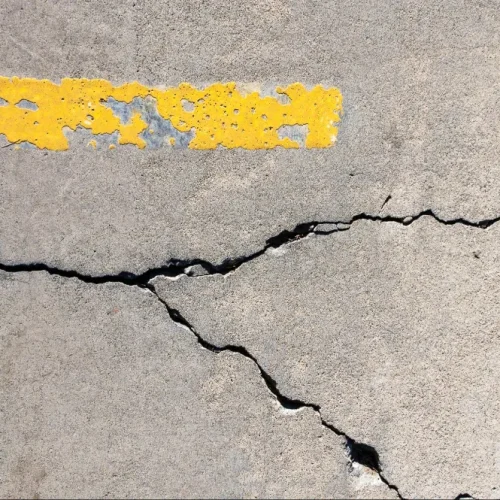
A clean surface reveals the problems. Here’s a useful benchmark: accessibility guidelines treat any change in level greater than a quarter inch as a potential trip point. Grab a ruler and check every joint you flagged.
Your options depend on the problem:
- Lifted slabs: A concrete contractor can grind down the high edge or raise the low slab with slab jacking.
- Loose pavers: Pull the paver, add and level fresh paving sand, reset it, and sweep polymeric sand into the joints.
- Small cracks: Fill them with a concrete crack sealant. Check the label for cure time, which is often 24 to 48 hours.
- No time for repairs? Mark the edge with bright reflective tape or exterior paint so it’s visible after dark.
The temporary fix isn’t perfect. Still, a visible hazard is much better than a hidden one.
Keep Low Decorations Out of the Walking Lane
Before you decorate, decide exactly where the walking lane ends. I mark mine with a few garden stakes along each edge. Nothing decorative crosses that line.
Low decorations are the sneakiest hazards on Halloween. Kids in masks look straight ahead, not down. A pumpkin on the second step, a small tombstone at the edge of the walk, or a plastic hand poking up from the grass becomes a tripping point the moment a child cuts the corner.
A few simple rules help:
- Keep pumpkins and props at least a foot back from the edge of the walk
- Leave porch steps completely clear, or place pumpkins only at the far outside corners of wide steps
- Avoid ground-level stakes, wire hoops, and fake spiderweb anchors near the path
- Raise small decorations onto planters, railings, or hay bales so they sit at eye level
Your display will actually look better this way, since kids can see what’s at eye level!
Route Cords Away From Foot Traffic
Trailing cords are a classic Halloween hazard. They’re dark, thin, and nearly invisible at night.
Plan your power before you place a single lit decoration. Figure out where your outdoor outlets are, then map each cord’s route so none of them crosses the walking lane. Use outdoor-rated extension cords, plug into a GFCI outlet, and run cords along the outside edge of the lawn or planting beds. Where a cord absolutely must cross a path, use a flat, high-visibility cord cover and tape down both ends.
Better yet, skip the cord. Battery-powered LED lanterns and solar lights work well for anything placed near the walk.
Make Room for Families Coming From Both Directions
Trick-or-treaters arrive from both ends of the street. They also travel your walk in both directions at once, with one group heading up as another heads back down with full bags.
Measure your walk’s width. A typical front walk runs about three to four feet wide, which is fine for one person but tight when a parent with a stroller meets three excited kids. Two people passing comfortably need closer to five feet.
You can’t widen concrete overnight, but you can make the most of what you have:
- Light and clear both corners where your walk meets the sidewalk, so groups approaching from either side can see the entrance
- Keep the porch landing open so families have room to wait, turn around, and step aside
- Create an exit route by lighting a clear path down the driveway, which lets departing groups leave without squeezing past arriving ones
- Move the candy bowl closer to the sidewalk on very busy streets, where a small table at the base of the steps keeps traffic flowing
Getting your front walk ready for two-way traffic takes a little thought, but it prevents the bumping and jostling that leads to falls.
Light the Path Like You Mean It
Lighting does more for safety than anything else when getting your front walk ready. Your goal is simple: every inch of the walking surface should be visible, and every step should be clearly defined.
I like to space path lights every six to eight feet along both edges and aim them down at the walking surface rather than up into people’s eyes. For the walking lane itself, choose warm white light in the 2700K to 3000K range. Save the orange and purple bulbs for accents on the porch, the bushes, or the house.
Here’s how the most common options compare:
| Lighting Type | Pros | Cons | Best For |
|---|---|---|---|
| Solar stake lights | No wiring, easy to move, low cost | Often dim by mid-evening in late October | Supplemental edge lighting |
| Low-voltage LED path lights | Bright, reliable, run on a timer | Requires a transformer and some installation | Long-term upgrades |
| Battery LED lanterns or luminaries | Festive, no cords, safe near kids | Batteries need checking | Lining steps and short walks |
| Motion-sensor floodlight | Lights the whole approach instantly | Can create harsh glare if aimed poorly | Driveways and dark porches |
| Outdoor string lights | Great ambiance, wide coverage | Cords can become hazards | Overhead or along railings |
One quick warning about solar lights. Days are short in late October, and a cloudy week can leave them glowing weakly by 7 p.m. Test them after dark a week before Halloween. If they fade, back them up with battery-powered lanterns.
Don’t forget the steps! Each riser should be lit or marked. Small battery LED step lights or a strip of reflective tape on each edge makes a huge difference for kids who are watching their candy bags instead of their feet.
Clear the Edges and the Airspace
Getting your front walk ready also means thinking about what surrounds it, not just the surface underfoot.
Start with plants. Trim branches so they hang at least seven feet above the walk, which keeps them clear of adults walking with their kids and tall costume headpieces. Cut back shrubs or ornamental grasses that spill into the path, since they narrow the lane and hide the edge.
Then clear the clutter:
- Coil and stow garden hoses
- Put away rakes, bikes, scooters, and toys
- Flag sprinkler heads near the walk, or remove protruding ones
- Turn off irrigation on October 31 so the path stays dry
- Replace curled doormats with a flat, non-slip option
Decorate Smart, Not Hazardous
I love a good Halloween display. Truly! But decorations cause more stumbles than almost anything else. The rule I follow is simple: the walking lane stays completely clear, and everything decorative lives on the lawn side.
A few specific tips make a big difference:
- Switch to LED candles. Real flames in jack-o’-lanterns can catch a dangling cape or a fabric costume in seconds.
- Use fog machines carefully. Fog sinks and pools, which can hide steps and edges. Place the machine away from the path and run it in short bursts.
- Rethink jump scares. Startled kids jump backward. Keep animatronics and motion-triggered props away from steps so nobody tumbles.
- Anchor everything. Tombstones, inflatables, and cutouts should be staked down. A gust of wind can push them right into the walkway.
When getting your front walk ready, walk through your finished display after dark with the lights on. If you have to step around anything, move it.
Plan for the Weather
October weather can be unpredictable, and getting your front walk ready means planning for it. Check the forecast a few days before Halloween and prepare for what’s coming.
If rain is expected, place an absorbent, non-slip mat at the top of the steps and keep a towel handy for wiping the landing. Painted concrete and smooth stone get especially slick when wet, so consider adding anti-slip grit tape to any glossy surfaces. In colder regions, frost can show up by late evening. Keep a bag of pet-safe ice melt or traction sand by the door just in case.
Wind matters too. Secure decorations, close umbrellas on porch furniture, and bring in anything lightweight that could blow into the path.
Make Your Walk Welcoming for Everyone
Not every trick-or-treater moves the same way. Some kids use wheelchairs or walkers. Some families push strollers. Some children are nervous about dark spaces or loud noises.
Getting your front walk ready with everyone in mind is easier than it sounds. If your home has several steps, consider setting up a candy station at the bottom of the stairs or at the end of the driveway. A small table, a bright lantern, and a bowl of treats work beautifully. It’s also a nice option for anyone who’d rather skip the spooky porch.
A few more welcoming touches:
- Light up your house number so families can find you easily
- Offer non-food treats like stickers or glow sticks, and place a teal pumpkin out front to signal allergy-friendly options
- Keep pets inside and away from the door, since even friendly dogs can frighten small kids
- Turn down sound effects if you notice younger children hesitating
Your Final 24-Hour Checklist
The day before Halloween, run through this quick list. It takes about 20 minutes.
- Sweep or blow the walk clear of new leaves
- Turn on every light and replace any dead bulbs or batteries
- Confirm timers are set to turn on before dusk
- Check that cords are covered and secured
- Walk the path at dusk one last time, crouching to kid height
- Turn off the sprinkler system
- Stock extra candy, because you’ll run out faster than you think!
A Safe Walk Is the Best Treat
Getting your front walk ready for trick-or-treaters isn’t complicated. It’s a series of small, smart choices made ahead of time: clean the surface, fix the trip hazards, light every step, and keep decorations out of the walking lane.
Start three weeks early and the work never feels rushed. And on Halloween night, you get to sit back, hand out treats, and enjoy the parade of costumes knowing every visitor has a safe path to your door. Honestly, that’s the best part of getting your front walk ready. The kids remember the full-size candy bars. You’ll remember that nobody went home with a skinned knee.