We purchased a large upholstered ottoman for our spacious family room in our previous home. Though it’s a bit oversized for our current space, it remains the ultimate cozy spot for resting your feet while enjoying a football game in front of the fireplace. Naturally, we decided it still deserved a prime spot in the family room. However, one persistent issue has always been the lack of a solid surface to place food or drinks on, especially when entertaining guests.

Over the years, I tried different solutions. Small trays worked to an extent, and at one point, I even used a framed mirror. While the mirror was aesthetically pleasing, it wasn’t exactly practical—especially with three energetic kids who don’t always handle things gently. To avoid inevitable disaster, the mirror found a safer home on the wall, leaving me back at square one with my ottoman dilemma.

After searching endlessly for a large, budget-friendly tray, I realized that the best option was to build my own ottoman tray. Inspiration struck when I “inherited” some beautiful nautical charts from my parents-in-law. One particular map was the perfect size and color for the project, making the tray not only functional but also a personalized decor piece for our family room.
DIY Ottoman Map Tray – Step-by-Step Guide
This project is simple and requires only a few tools and basic woodworking skills, making it ideal for beginners. It’s a great way to create something unique that reflects your personality while solving a practical problem.
1 | Selecting and Preparing the Base
I started by purchasing a 1/4” oak plywood sheet. Oak was my choice because it was the least warped among the available plywood options, but birch would also work well due to its smooth surface. I had the store cut the plywood down to just slightly larger than the dimensions of the map. The extra space would be covered by the trim later.
2 | Attaching the Map

To create a smooth and durable surface:
- I sanded the edges of the plywood to remove rough areas.
- Using Mod Podge, I carefully adhered the nautical chart to the plywood base, ensuring there were no bubbles or wrinkles.
- I then coated the top of the map with Mod Podge to seal and protect it from spills or stains. This step is crucial for longevity, as the tray will inevitably encounter food and drinks over time.
3 | Cutting and Painting the Trim
To create a sturdy border around the tray:
- I measured and cut trim pieces to frame the edges of the plywood, ensuring the map was neatly encased.
- Each piece was spray-painted black to give the tray a polished and sophisticated finish.
- Before assembly, I pre-drilled holes for the handles to ensure a seamless installation later on.
4 | Attaching the Trim to the Base
Once the trim pieces were dry:
- I applied wood glue along the edges of the plywood.
- Using my nail gun, I secured the trim with crown staples every 2 inches to create a firm and lasting hold.
- The trim not only provides stability but also enhances the overall design, making the tray look polished and professional.
5 | Finishing Touches

With the tray structure complete:
- I spray-painted the entire tray sides and bottom with glossy black paint for a sleek look. The contrast between the dark frame and the light-colored map added a refined aesthetic.
- Quick Spray Paint Tip: Always turn the spray paint can upside down and spray until only air comes out—this prevents clogging and extends the life of your paint cans.

6 | Adding the Handles
Finally, I installed cabinet door pulls as handles:
- I inserted the screws from the inside of the trim, filled over them with putty, and then touched up with paint for a flawless look.
- The handles not only make the tray easy to carry but also contribute to its stylish and functional appeal.
And just like that, my custom ottoman map tray was complete!
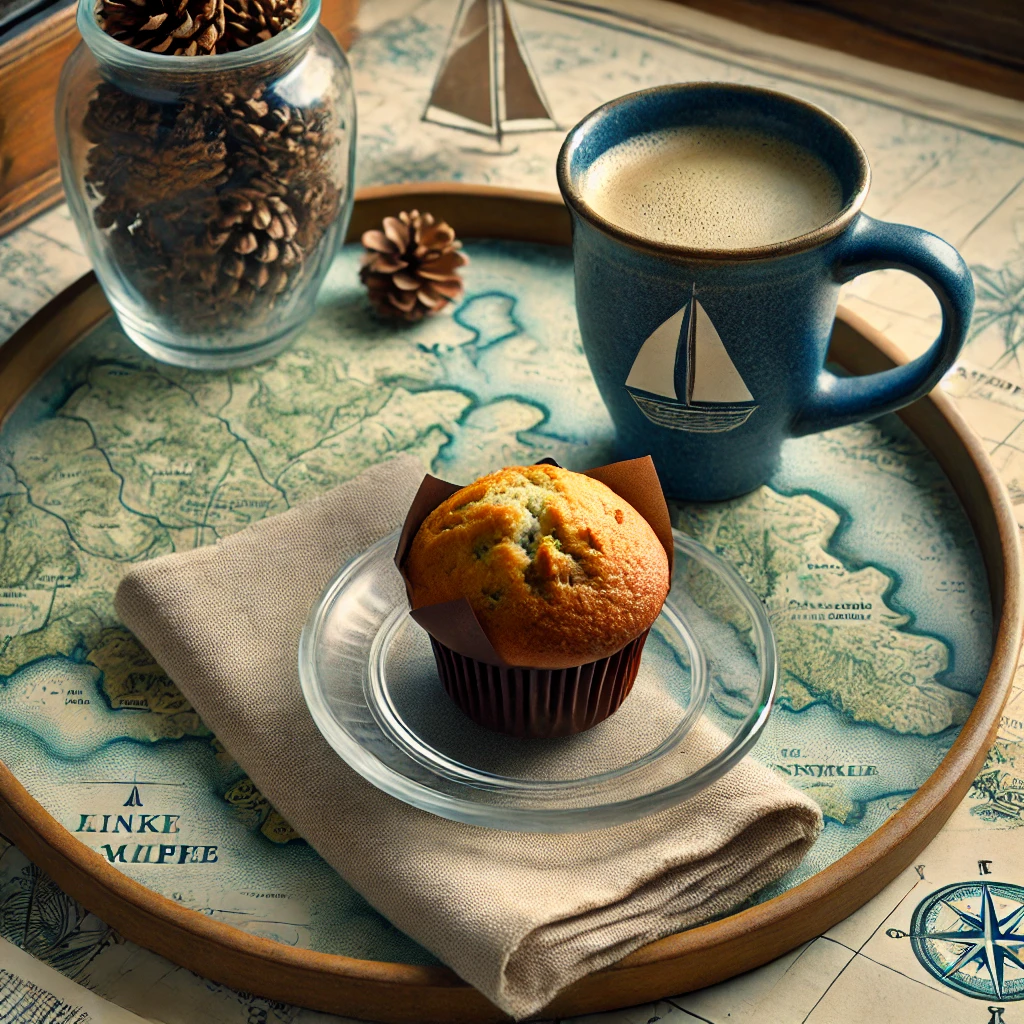
The Finished Ottoman Map Tray

The final product turned out better than I had imagined. The Lake Winnipesaukee map fits perfectly within the tray and complements the existing color palette of our family room. It’s both functional and sentimental, as the lake is one of our family’s favorite vacation spots.

While the tray isn’t massive, it’s large enough to hold refreshments and provides a stylish focal point on the ottoman. It also helps balance the oversized ottoman by giving it more of a coffee table feel rather than just looking like a cushioned bench in the middle of the room.
Why This Project Works for Any Home
One of the great things about this DIY project is its versatility. You can customize it to match your decor by choosing different maps, colors, or trim styles. Whether you prefer a coastal, vintage, or modern aesthetic, this tray can be adapted to suit your taste.

It’s also an eco-friendly project because it allows you to repurpose materials. Instead of buying an expensive tray, you can make one using materials you already have or can source inexpensively.
Enjoying the New Addition
I can already picture cozy nights ahead—
🔥 A warm fire in the fireplace.
🍷 A glass of red wine on my new map tray.
📺 A relaxing evening watching our favorite shows.
Sounds perfect, doesn’t it?
Final Thoughts
So, that’s the story of my DIY ottoman map tray! If you’re struggling to find a tray that fits your space, consider making your own. It’s a fun, easy, and cost-effective project that allows you to personalize your decor while adding practicality.
Looking for more map-inspired DIY projects? Check out this post at Simple Details!
Hope you all have a wonderful weekend ahead!


")


")

