There’s something magical about a mirror makeover. With just a bit of paint, some sanding, or a creative twist, an outdated or forgotten mirror can turn into the showpiece of a room. And the best part? You don’t need to spend hundreds of dollars on high-end décor. Whether you’re decorating on a budget or curating your home with unique, one-of-a-kind treasures, a mirror makeover is one of the most rewarding DIY projects you can take on.
Mirrors are already powerful décor tools—they bounce natural light, open up small spaces, and create a sense of luxury. But when you apply your own creativity, they become so much more than just reflective surfaces. They turn into personality pieces that showcase your style.
Let’s dive into everything you need to know about giving your mirrors a fresh start.
Choosing the Right Mirror for a Makeover
Not every mirror has to be designer-made to deserve a second life. The most satisfying mirror makeover projects often start with the humblest finds.
Thrifted treasures
Thrift stores, antique malls, flea markets, and even yard sales are prime hunting grounds. Oversized gold mirrors from the 70s? Grab them. Smaller oval frames with chipped finishes? They’re goldmines for DIY lovers.
Antique vs. modern
Antiques often come with intricate detailing—scrolls, floral carvings, and moulded frames—that pop beautifully once painted and distressed. Modern mirrors, meanwhile, can benefit from bolder treatments like black matte paint or decoupage.
Size and placement
Before you start a makeover, think about where the mirror will live. A grand piece suits a living room or entryway. A mid-sized mirror is ideal for bedrooms. And small mirrors? They’re perfect for gallery walls or bathrooms. Placement dictates not just size but also style.
Step-by-Step Mirror Makeover Process
A successful mirror makeover doesn’t require a degree in design—just patience and the right tools.
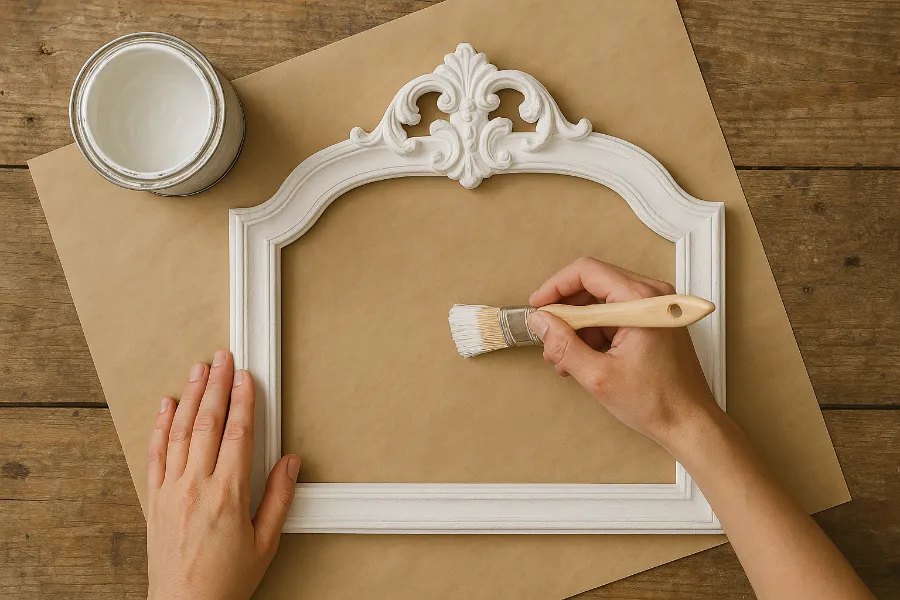
1. Clean and prep
Remove dust, grime, or peeling finishes. For thrifted pieces, give the frame a gentle scrub with mild soap and water. If possible, remove the mirror from the frame so you can work without worrying about overspray or drips.
2. Painting techniques
Paint is where the transformation begins.
- Classic white: Timeless, airy, and perfect for farmhouse or coastal interiors. White instantly brightens details and makes the mirror versatile.
- Matte black: Sleek and elegant. Black camouflages imperfections and pairs beautifully with gold accents.
- Distressing: After painting, lightly sand raised details to let the original color peek through. This gives an authentic vintage look.
- Bold colors: Don’t be afraid of navy, emerald, or blush pink for a playful twist.
3. Sealing and protecting
A clear spray sealer in satin or matte protects the paint job while keeping brush strokes soft. For frames with deep carvings, sprays are easier than brush-on finishes.
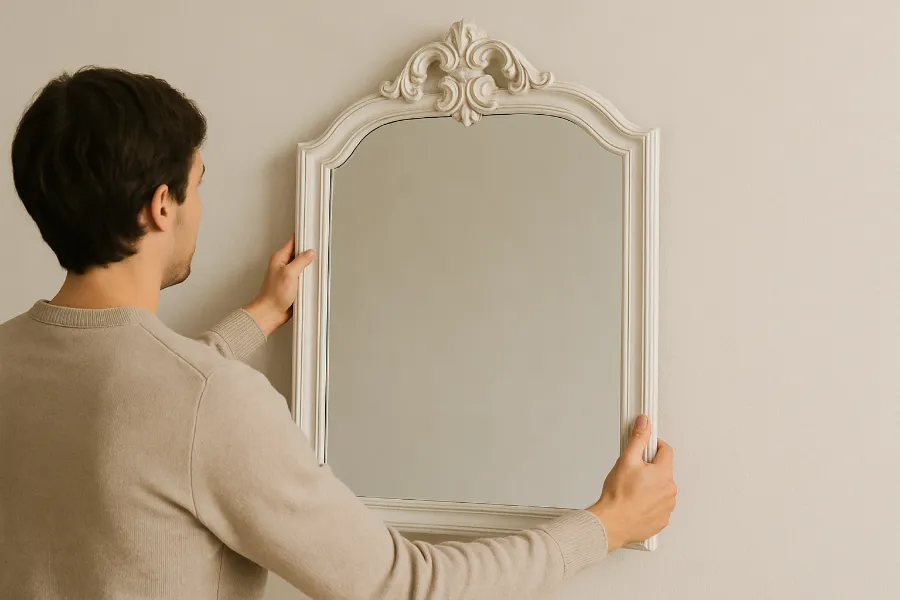
4. Reassembly and finishing touches
Once painted and sealed, reassemble the mirror securely. Add backing paper for a polished look and hardware like D-rings for sturdy hanging.
Popular Mirror Makeover Styles
From thrift to chic, here are some of the most popular mirror makeover styles making waves.
The clean white mirror
White painted mirrors look stunning above mantels, entryway tables, or paired with rustic furniture. Distressing adds dimension while keeping things neutral.
Black and gold elegance
A black mirror frame with gold gilding wax on the raised edges creates instant drama. This style works especially well in modern, glam, or moody interiors.
Decoupage details
Adding patterned or textured paper to the back or edges of a mirror frame is a unique way to personalize it. From floral motifs to geometric designs, decoupage adds charm.
Oversized statement pieces
Large mirrors are trending—oversized pieces lean against walls or serve as focal points in living rooms. Their sheer size amplifies light and space, making rooms look expansive.
Styling and Decorating with Mirrors
A mirror makeover isn’t complete until you style it in your home.
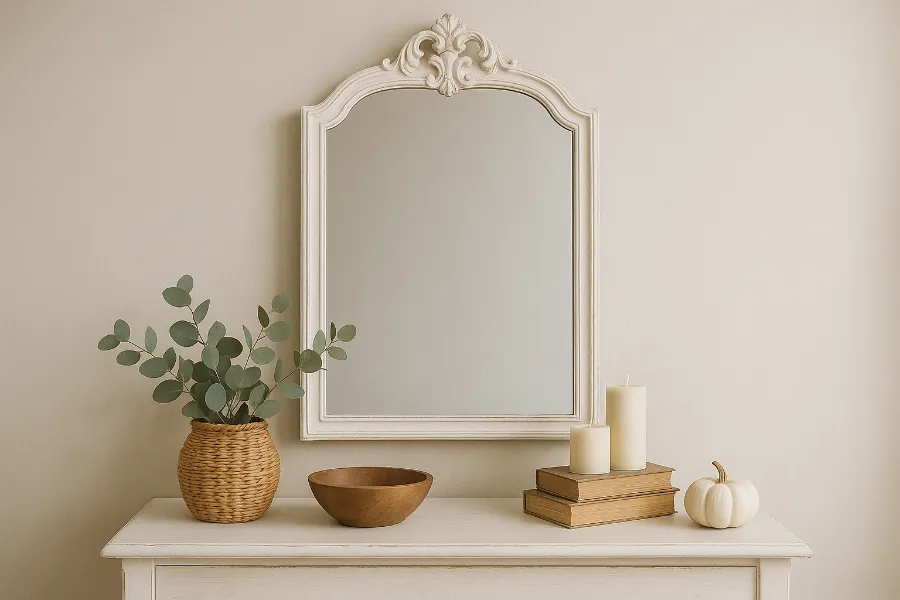
Above the mantel
A mirror over the fireplace instantly elevates the space. Layer greenery, candlesticks, or seasonal décor in front for a warm, inviting look.
Entryway impact
Placing a mirror in the entryway is practical and stylish. It offers a quick last-minute check before leaving the house and makes small foyers feel bigger.
Bedroom and living room
In bedrooms, mirrors add light and function above dressers. In living rooms, try grouping mirrors into a gallery wall for an eclectic touch.
Seasonal layers
Mirrors are also perfect backdrops for seasonal décor. Hang a wreath on a round mirror during the holidays, or place small pumpkins and greenery around it in autumn.
Budget & Selling Tips
Many DIYers not only enjoy the creative process of a mirror makeover, but also sell their updated pieces for profit.
- Thrift store pricing: You can often find mirrors for under $15.
- DIY costs: Paint, sealers, and gilding wax are relatively inexpensive.
- Resale value: A well-finished mirror can sell for $50–$200 depending on size and style.
- Booth or online sales: Local antique malls, flea markets, Etsy, and Facebook Marketplace are all great outlets for resale.
Why Mirror Makeovers Are Timeless
A mirror makeover is more than just a DIY project—it’s a way to tell a story through design. Each brushstroke, each layer of wax, each detail you highlight transforms a forgotten piece into something beautiful and meaningful. Unlike store-bought décor, these mirrors carry personality, charm, and a sense of accomplishment.
Whether you’re after a sleek black-and-gold piece or a soft distressed white, the process is simple, budget-friendly, and endlessly customizable. And the result? A stunning mirror that reflects not just your space, but your creativity.
So next time you spot a lonely mirror at a thrift shop, don’t walk past it. Pick it up, grab your brushes, and give it the makeover it deserves.


")


")