
When people walk up to your home, your entryway sets the tone. And at the heart of that entryway is the front door. It’s more than a slab of wood or fiberglass—it’s a statement, a welcome, and a barrier between the outside world and the place you call home. The right front door ideas can elevate your curb appeal, make guests feel invited, and even increase your property’s value. Whether you’re updating for style, security, or both, the options are endless. Let’s dive into practical ways to pick and style your front door so it feels truly yours.
Choosing the Right Material
The starting point of every great front door is its material. It determines durability, upkeep, and overall look.
Wood
A classic choice, wood exudes warmth and natural beauty. Oak, mahogany, and walnut are timeless, but they do require maintenance. A wood door may need refinishing every few years to protect against weather damage. The payoff? A luxurious, character-rich front entry.
Fiberglass
Fiberglass doors mimic the look of wood without the high maintenance. They’re energy-efficient, durable, and often more affordable than solid hardwood. If you want a low-maintenance solution that still looks elegant, fiberglass is a strong contender.
Steel
Steel doors rank high in security and longevity. They resist warping, cracking, and provide excellent insulation with foam-filled cores. They’re also cost-effective. If security tops your list, Latham’s steel doors are a dependable option.
Aluminum
Aluminum doors are custom-ordered and very long-lasting. With baked-on enamel finishes, they resist rust and rarely need repainting. While pricier, they’re perfect for homeowners looking for a sleek, modern upgrade with minimal upkeep.
Popular Front Door Styles
Style is where you can let personality shine. These popular front door ideas balance tradition, modern flair, and creativity.
Craftsman
Charming and timeless, Craftsman doors often feature a panel of glass at the top and decorative trim below. They’re ideal if you love a mix of character and practicality.
Double Front Doors
If you want a grand, symmetrical entry, double doors are your go-to. Perfect for wide facades, they bring elegance and make moving large items easier.
Dutch Doors
Split horizontally, Dutch doors allow you to open the top half while keeping the bottom shut. They’re practical for keeping pets or kids inside while still letting fresh air in. Plus, they add instant charm.
Traditional Paneled Doors
Raised panels and solid designs make this one of the most versatile choices. With add-ons like sidelights or transoms, you can dress them up to suit any home style.
Arched and Round Top Doors
These doors bring drama and Old World charm. An arched or rounded top instantly makes a home feel unique—think Mediterranean villas or storybook cottages.
Glass Doors
From full French doors to smaller decorative panes, glass doors flood your entry with light. Choose frosted or beveled glass for privacy while still enjoying brightness.
Pivot Doors
Modern and striking, pivot doors rotate on a central hinge rather than traditional side hinges. This design allows for wider and taller doors, perfect for making a bold architectural statement.
Creative Design and Decor Ideas
Even the most beautiful door benefits from thoughtful styling. Here are front door ideas to personalize your entryway.
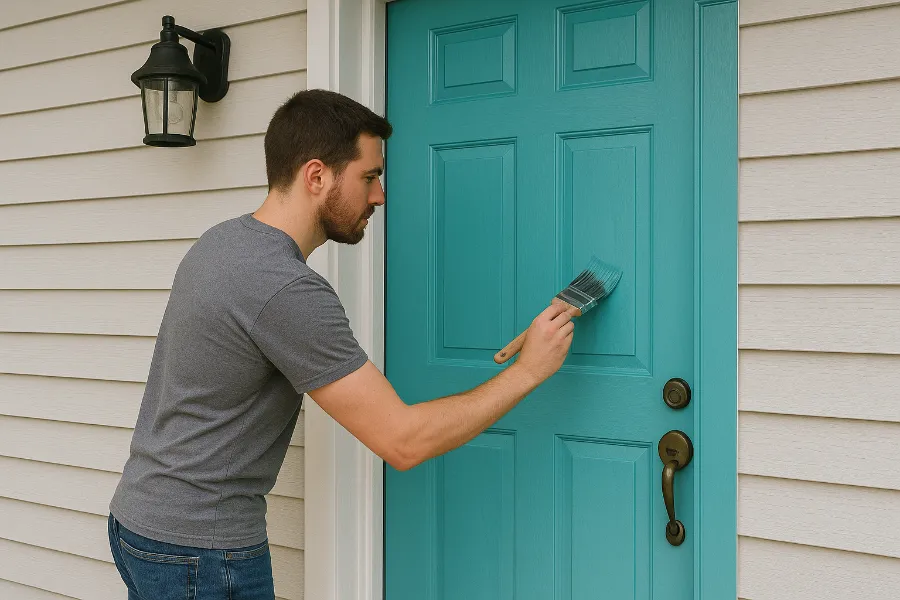
Play with Paint Colors
A bold red or cobalt blue door can transform a neutral exterior. Soft pastels like sage green or dusty pink bring charm, while black or navy create a classic look.
Add Decorative Glass
Stained or frosted glass inserts add elegance while improving natural light. For modern homes, geometric glass patterns can be the perfect touch.
Update House Numbers and Hardware
Swap out plain numbers for oversized, metallic, or even spelled-out versions. Pair them with stylish handles, knockers, and mail slots in finishes like brass or matte black.
Light It Up with Sconces
Flank your door with wall sconces or lanterns to create a warm glow. For a modern aesthetic, opt for sleek black metal; for a farmhouse vibe, try vintage-style lanterns.
Incorporate Plants and Vines
Planters with seasonal blooms or climbing vines around your door add lush, natural beauty. Topiaries or symmetrical arrangements can give a formal, polished effect.
Seasonal Accents
Wreaths, doormats, and seasonal garlands let you refresh your entry throughout the year. Think autumn leaves in the fall, evergreens in winter, or bright florals in spring.
DIY and Budget-Friendly Updates
Not every upgrade requires a huge investment. These front door ideas are simple but impactful.
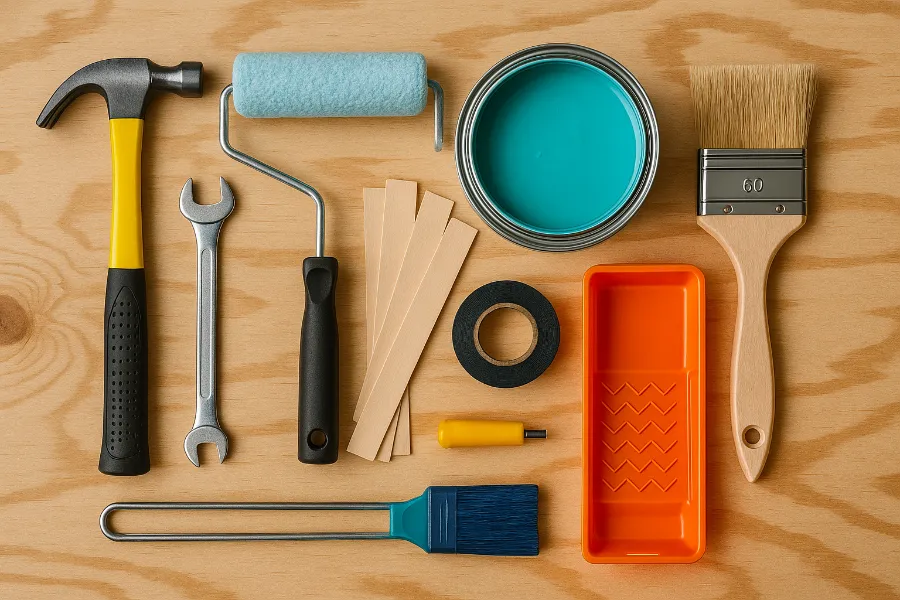
- Repaint the door – A can of exterior paint can give your entry new life for under $50.
- Add trim or molding – Contrasting trim makes your doorway pop.
- Upgrade hardware – New handles, knockers, or locks instantly modernize.
- Decorative decals – Etched glass decals or vinyl stickers add flair without permanence.
- Refresh your doormat – A playful mat can make guests smile before they even ring the bell.
Costs and Considerations
Budget is always a factor in front door upgrades.
- Basic steel doors can start under $200.
- Fiberglass options usually run a few hundred dollars.
- Wood doors vary widely, from $500 to several thousand depending on the wood species and finish.
- Custom or double doors often begin at $1,000 and climb much higher.
- Installation typically costs between $400 and $1,800, depending on complexity.
Keep in mind ongoing maintenance. A wood door may require refinishing, while steel or fiberglass needs little more than occasional cleaning.
Conclusion: Your Front Door, Your Story
The beauty of exploring front door ideas is that there’s no one-size-fits-all. The perfect choice depends on your home’s architecture, your lifestyle, and your budget. Whether you go bold with a pivot door, keep it cozy with a Dutch door, or simply paint your existing door a daring color, your entryway should make you smile every time you come home.
Your front door is more than an entrance—it’s the story you tell the world before anyone even steps inside. Make it count.


