
There’s something magical about waking up on Christmas morning to see stockings hung with care, stuffed full of surprises. But what if you don’t have a fireplace or mantel to display them on? For many of us, that’s the reality. And that’s exactly where the Christmas stocking post comes in—a stylish, functional, and endlessly customizable way to hang stockings without a traditional mantel.
I’ve lived in homes with no fireplace, no mantel, and sometimes no real wall space to hang stockings. That challenge inspired me (and countless other creative DIY-ers) to explore different ways to showcase stockings. Among the most practical and festive solutions, the Christmas stocking post stands out as my favorite.
Let’s dive into why this idea works so well, how to build your own, creative decorating options, and some fun alternatives if you’re feeling adventurous this holiday season.
Why Choose a Christmas Stocking Post?
The beauty of a Christmas stocking post is its versatility. Unlike a fixed mantel, it doesn’t lock you into a single location or style. Here’s why so many people are turning to this solution:
- Mantel-Free Friendly: If your home doesn’t have a fireplace or mantel, a stocking post gives you that “classic Christmas feel” without needing one.
- Flexible Placement: You can place it wherever it makes sense—in your entryway, beside the tree, in a hallway, or even near the dining room for extra holiday cheer.
- Decorative Piece: Beyond holding stockings, a stocking post becomes a centerpiece in your seasonal décor. Think of it as both functional and festive.
- Customizable: Whether you prefer sleek and modern, rustic farmhouse, or whimsical North Pole-inspired, a stocking post adapts to any style.
DIY Christmas Stocking Post: Step-by-Step Guide
Building your own Christmas stocking post is easier than you might think. Even if you’re not a seasoned woodworker, you can create a beautiful, sturdy holder for your family’s stockings.
Here’s a simple step-by-step plan:
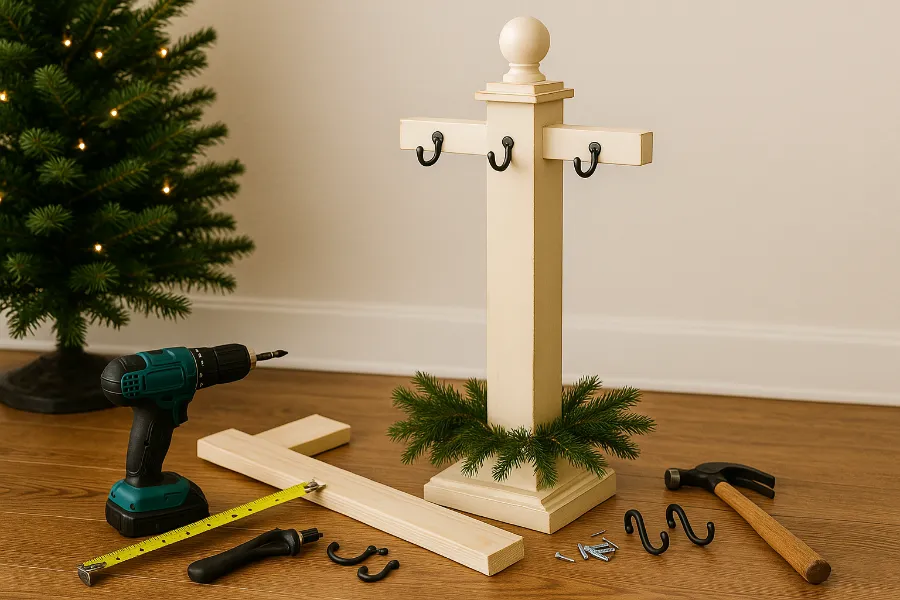
Materials You’ll Need
- 1 wood post (a 4×4 or 2×4 works well, cut to about 4–5 feet tall)
- Base supports (scrap wood or cut boards to stabilize the post)
- Hooks (sturdy coat hooks or decorative knobs)
- Screws and wood glue
- Drill, saw, and sandpaper
- Paint or stain of your choice
- Optional: Decorative bells, ribbon, garland, or a topper (like a finial or faux lantern)
Steps
- Cut the Post: Decide on the height—4 to 5 feet is ideal so stockings hang without touching the floor.
- Build the Base: Attach cross-shaped supports at the bottom for stability. You can bevel the edges for a polished look.
- Sand and Prep: Smooth rough edges with sandpaper.
- Attach Hooks: Evenly space hooks near the top of the post. Add as many as you need for your stockings.
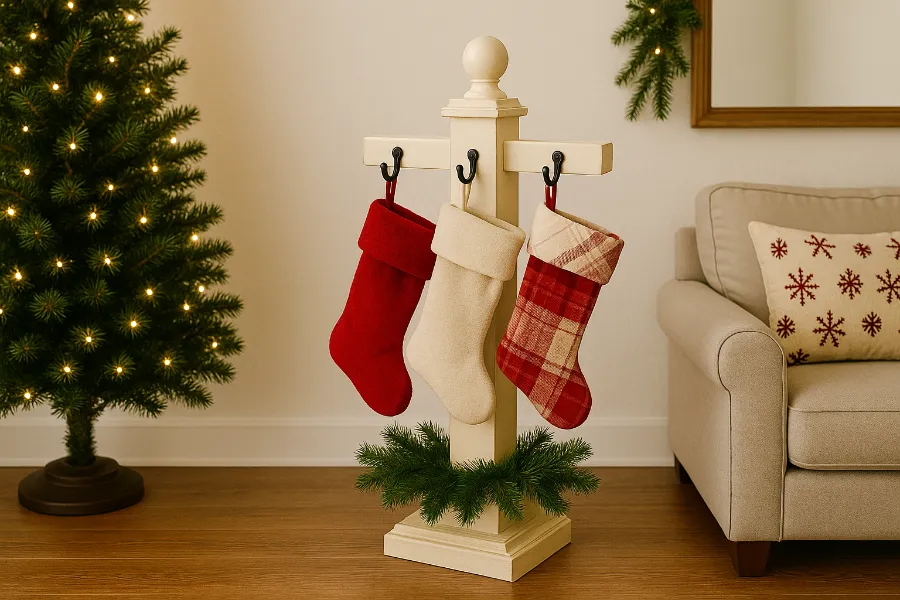
- Decorate the Post: Paint or stain the wood to match your holiday style. White, red, or rustic finishes are most popular.
- Add Seasonal Details: Tie on ribbons, wrap with garland, or top with a festive ornament for extra charm.
That’s it—you’ve built your own stocking post in just a few simple steps!
Creative Decorating Ideas for Your Christmas Stocking Post
One of the most exciting parts about having a stocking post is personalizing it. Here are some festive ideas to make yours stand out:
- Rustic Farmhouse Look: Stain the wood in a deep walnut or gray and add wrought-iron hooks. Wrap a garland with pinecones and berries around the post.
- North Pole Theme: Paint the post candy-cane red and white. Add a nameplate or sign that says “Santa’s Stop Here.”
- Minimalist Modern: Keep it sleek with black paint and brass hooks. Add simple, neutral stockings for a chic look.
- Personalized Touches: Add wooden or acrylic initials to each stocking hook so every family member has their own designated spot.
- Multi-Functional Twist: After the holidays, remove the garland and let it serve as a coat rack by your entryway.
The possibilities really are endless. Your stocking post doesn’t just hold stockings—it becomes a conversation starter.
Alternative Ideas for Hanging Stockings Without a Mantel
While a Christmas stocking post may be the star of the show, there are other creative ways to display stockings if you want to mix things up. From the document inspiration, here are a few favorites:
- Blanket Ladder: Lean a ladder against the wall and drape stockings on the rungs. Bonus: you can also use it to hold cozy throws.
- Stair Railings: Wrap garland around your banister and attach stockings with ribbon or hooks. This makes for a beautiful, cascading display.
- Wall Hooks or Board and Batten: Install small hooks along a decorative wall treatment. Stockings pop against shiplap, beadboard, or board-and-batten walls.
- Cabinets or Furniture: Hang stockings from the knobs of a china cabinet, dresser, or TV console.
- Windows and Doors: Use suction hooks or over-the-door hangers to display stockings in unexpected places.
- Vintage Finds: An old sled, upright piano, or even a coat rack can double as a charming stocking display.
The key is to think beyond the fireplace and incorporate your home’s natural features.
Tips for Style and Function
When it comes to creating a stocking display that’s both beautiful and practical, a few small tweaks make all the difference.
- Match Your Décor: Choose stockings and post decorations that coordinate with your tree and overall holiday color scheme.
- Prioritize Sturdiness: If kids will be tugging at stockings on Christmas morning, make sure hooks and bases are secure.
- Think Long-Term: Build your stocking post from solid wood and it will last for years. A reusable decoration is both budget- and eco-friendly.
- Balance Display Height: Hang stockings high enough to avoid dragging but low enough for kids to admire them.
- Add Lighting: String fairy lights or wrap a lighted garland around the post for extra glow.
Why I Love the Christmas Stocking Post
Every home I’ve lived in has forced me to be creative with holiday traditions. No mantel? No problem. The Christmas stocking post gave me a way to hold onto that cozy Christmas tradition without compromise.
It’s easy to build. It’s endlessly customizable. And when Christmas morning arrives, it creates that picture-perfect moment of stockings filled with surprises, ready to be opened.
So, whether you decide to DIY a stocking post or buy one pre-made, I promise it’s a tradition worth starting.
Conclusion
The Christmas stocking post is more than just a practical solution for hanging stockings without a mantel. It’s a creative, decorative, and customizable piece that can grow with your family’s holiday traditions. From rustic farmhouse styles to whimsical North Pole vibes, the stocking post allows you to add personality and function to your seasonal décor.
And remember, if DIY isn’t your thing, you can always find beautiful pre-made stocking posts online or in stores. The point is to make your home feel festive and full of joy. After all, that’s what Christmas decorating is all about—creating a warm, inviting space that brings people together.
So grab some wood, a few hooks, and your imagination. This holiday season, let your Christmas stocking post take center stage in spreading holiday cheer!


")


