
The DIY dining bench has quickly become a staple in modern homes. It’s more than just extra seating. It’s an affordable way to add charm, functionality, and character to your dining area. Whether you’re a seasoned woodworker or a complete beginner, building your own dining bench can save money while giving you the freedom to customize every detail. And let’s be honest—it feels incredibly rewarding to sit at a table and say, “I built this.”
In this guide, we’ll walk through the tools, materials, step-by-step instructions, styling options, and tips to make your DIY dining bench project a success.
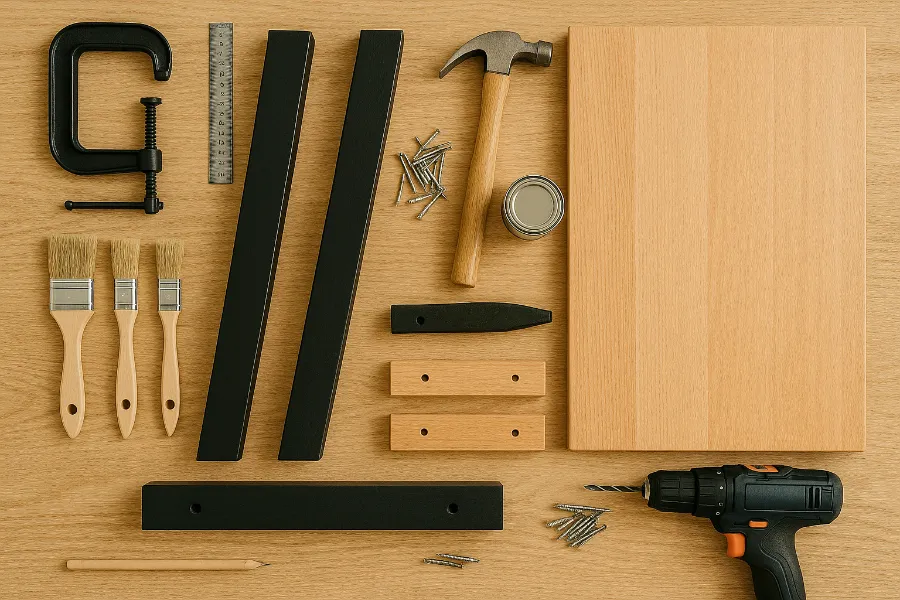
Materials and Tools You’ll Need
Before diving into cutting and sanding, gather your materials. A well-prepared work area sets the tone for a smooth project.
Essential materials:
- Solid wood boards (pine, oak, or reclaimed wood work best)
- Screws or wood bolts
- Wood glue
- Sandpaper (120–220 grit)
- Wood filler
- Stain, paint, or sealant for finishing
Tools checklist:
- Tape measure
- Circular saw or miter saw
- Drill with wood bits
- Clamps
- Square and level
- Safety goggles and gloves
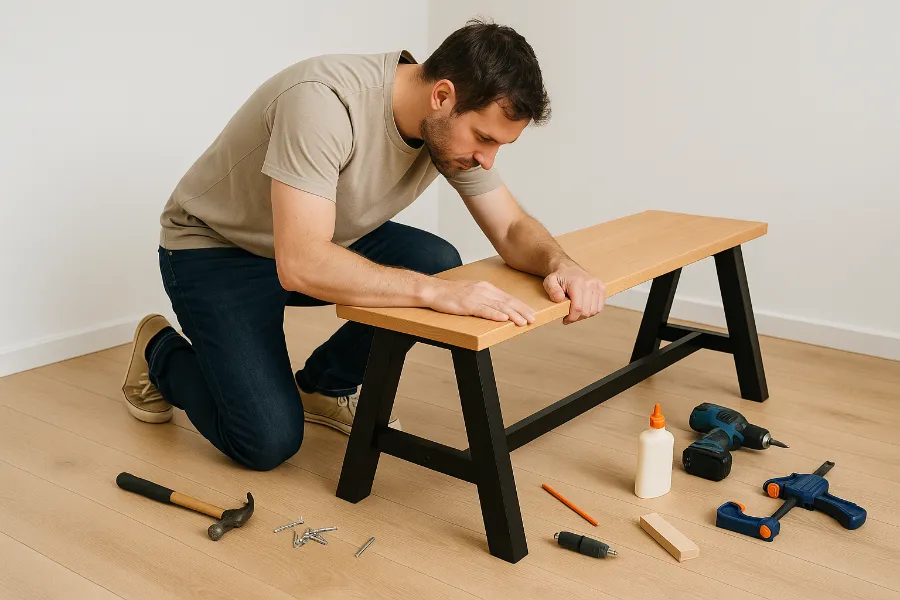
Step-by-Step Instructions
Measure and Cut the Wood
Decide on the bench size first. A standard length is around 60 inches, which comfortably fits three people. Mark measurements carefully and cut the wood using a circular or miter saw.
Assemble the Frame
Lay out the legs and side rails. Screw or glue them together, making sure the structure is square. For a sturdy option, consider an A-frame or trestle-style base.
Add Support Braces
Support is everything. Attach a stretcher bar across the middle of the bench. If you’re going longer than 60 inches, add diagonal braces for extra stability.
Attach the Seat
Clamp the bench top securely to the frame, then drill in screws from the underside. This prevents visible screw holes on the seat’s surface.
Sand and Finish
Smooth every edge with sandpaper. Apply stain, paint, or a clear sealant depending on your preferred look. For families with children, consider a non-toxic finish.
Customization Ideas
This is where the fun really begins. Once your DIY dining bench is built, you can give it personality.
- Storage Integration: Add lift-top lids or built-in baskets underneath.
- Upholstery: Foam padding and fabric turn a plain bench into a cozy seat.
- Rustic Style: Leave the wood natural, emphasizing knots and grains.
- Modern Look: Sleek legs and dark matte paint give a minimalist vibe.
Bench Seating in Small Spaces
Dining benches are space-saving heroes. Unlike chairs, they tuck neatly under the table when not in use. For tight dining rooms or apartments, a bench can visually open up the space while offering flexibility.
Maintenance and Styling
A bench is only as good as how it’s maintained. Regularly dust and wipe down with mild soap and water. For styling, swap out cushions seasonally or drape a throw blanket for a cozy touch.
Pro tip: Match the bench finish to your dining table legs for a seamless look.
Safety and Compliance Tips
If you’re building for a family or hosting guests often, keep safety in mind:
- Seat height should be around 18 inches for comfortable dining.
- Ensure edges are rounded or sanded smooth.
- Use child-safe finishes if little ones will be around.
Longevity and Resale Value
A solid DIY dining bench isn’t just a weekend project—it’s an investment. Strong joinery (like mortise and tenon) increases durability. Keep receipts and document your work with photos if you ever plan to sell it—handmade furniture carries unique value.
Frequently Asked Questions
How much does it cost to build a DIY dining bench?
On average, around €100 depending on wood type and finishes.
How long will it take?
Set aside at least 6 hours, spread over a weekend, especially if you’re staining or painting.
Do I need advanced woodworking skills?
Not at all. This project is beginner-friendly with the right tools.
Cost and Time Breakdown
| Item | Average Cost (€) | Time Required |
|---|---|---|
| Wood (pine/oak) | 50–70 | — |
| Screws/Glue/Filler | 15–20 | — |
| Stain/Paint/Sealant | 20–30 | — |
| Labor (your time) | Priceless | 6 hours |
Final Thoughts
Building a DIY dining bench is the perfect combination of practicality and creativity. It’s a project that adds comfort, saves money, and gives your dining area a personal touch. With a few tools, some lumber, and a free weekend, you can create a bench that not only seats your loved ones but also becomes part of your home’s story.
So roll up those sleeves—your dining room is about to get a serious upgrade!
")


")
")
")
")

")


")


