Tiling a bathroom floor is one of the most effective ways to improve both the functionality and appearance of the space. The floor is well tiled and thus more durable, attractive, and increases the value of the entire house. In many renovation projects, construction estimating services help homeowners plan materials, costs, and quantities before starting, which reduces waste and improves accuracy. Although the process demands attention and the use of the right tools, with proper planning and technique, many homeowners can accomplish it.
When everyone knows every stage (including preparations of surfaces, laying tiles, and applying grout), it will provide a smooth implementation and a durable finish. Whether you update a small powder room or renovate a whole bathroom, knowing how to tile a bathroom floor will make you accomplish the project with confidence and without making typical mistakes, as well as provide a result of professional quality.
Steps to Tile a Bathroom Floor
A bathroom floor can be a complicated task to tile, but with proper instructions and planning, it can be a DIY task that can be accomplished and rewarding. The trick is to take all the steps as accurately as possible, measure properly, and use correct materials. In some projects, homeowners also use flooring estimating to figure out how many tiles and materials they need before starting.
The following is a step-by-step tutorial to aid in realizing how to tile a bathroom floor.
1. Gather Tools and Materials
Prepare everything in advance before starting by having everything you need. This reduces time wastage and provides accuracy in work.
Tools Needed
- Tile cutter or wet saw
- Notched trowel
- Tape measure
- Tile spacers
- Chalk line
- Level
- Rubber mallet
- Grout float
- Sponge
- Bucket
Materials Needed
- Floor tiles
- Thin-set mortar
- Grout
- Sealant (if required)
- This is an underlayment or cement board.
- Screws and adhesive
Proper equipment enhances the precision and eases the installation.
2. Prepare the Subfloor
Long-time tile installation requires a good and sturdy subfloor.
Steps to Prepare:
- Eliminate previous flooring like vinyl, laminate, or broken tiles.
- Check the subfloor whether it is damaged or moldy, or not. Fix any weak areas or concave ones.
- Lay cement board to use as the underlayment to offer protection against moisture and the durability of the base.
- Screw the underlayment using screws and thin-set mortar beneath.
- Preparation is also a guarantee that tiles will not crack or move with time.
3. Create a Layout Plan
The adhesive should be applied after planning your layout to achieve a good and professional appearance.
How to Plan:
- Measure the width and the length of the bathroom.
- The center of the room should be marked with a chalk line.
- Install dry-lay tiles and then work toward the center.
- Rotate the design in such a way that the cut tiles will be on the edges rather than the middle.
- Make sure there is alignment of tiles and doors.
A properly created layout minimizes wastage and gives equal spacing.
4. Mix and Apply Thin-Set Mortar
The tiles are bonded to the underlayment by means of a thin-set mortar.
Application Technique:
- Combine the thin-set as directed by the manufacturer.
- Spread it using a notched trowel.
- Place mortar in small portions to avoid drying up ahead of the tiles.
The wings left by the notched trowel aid in the adhesion of the tiles.
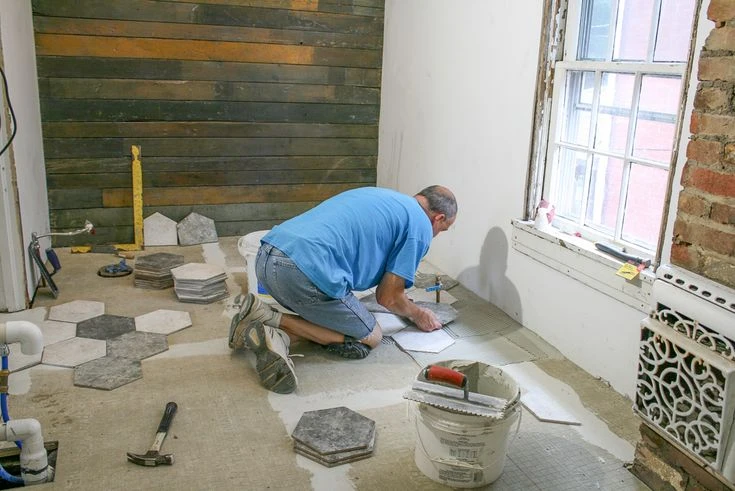
5. Lay the Tiles
This is the procedural stage at which accuracy is paramount.
Steps for Laying Tiles:
- Position the first tile in the middle of the room according to your chalk lines.
- Knead it into the mortar.
- Place tile spacers in between each tile to achieve equal gaps.
- Keep laying the tiles row after row.
- Install tiles at the perimeter or around objects by using a tile cutter or wet saw.
Always ensure that the tiles lie flat, level with slight tapping of a rubber mallet.
6. Allow Tiles to Set
After all the tiles are laid, leave them to dry and the thin-set mortar.
Curing Time:
- Allow the tiles to dry after 24 hours.
- Never use grout before the tiles are completely firm.
- Correct curing is to avoid shifting and have a solid bond.
7. Apply Grout
The gaps between tiles are filled with grout and provide more stability.
Steps to Apply Grout:
- Remove tile spacers.
- Mix the grout until smooth.
- Make grout fill into the gaps with a grout float.
- Clean up the excess grout using the float at an angle.
- Clean the haze by wiping tiles with a wet sponge.
- Grout normally cures after 24-48 hours.
8. Seal and Finish
Sealing might be required depending on the type of tiles and grout.
Finishing Steps:
- Use a grout sealer to ensure protection against moisture and stains.
- Install baseboards or trim.
- Wash the tile surface.
Sealing makes the floor more durable, and the floor in the bathroom appears new.
Safety Tips
- Put on safety goggles and gloves when cutting tiles.
- When working with mortar and grout, make sure that it is well-ventilated.
- Do not hurry; better to be accurate than fast.
Common Mistakes to Avoid
- The failure to prepare the surface can result in lumpy tiles.
- The incorrect trowel size can result in a lack of adhesion.
- Failure to keep a constant distance creates a chaotic look.
- Prematurely walking on tiles can cause them to move and disturb the alignment.
Knowing these mistakes prevents any complications during the process of installation.
Conclusion
A bathroom floor can be tiled as a home improvement project that can be handled with a lot of planning, correct technique, and proper tools. Starting with subfloor preparation and finishing with tile laying and grout application, all these steps are important in ensuring that the floor is durable and attractive. With proper planning, including accurate residential estimating of materials and costs, homeowners can make a beautiful bathroom floor with enough patience and keen attention to detail, ensuring it does not wear out easily.
FAQs
Yes, amateurs can do it with good equipment, planning, and step-by-step instructions.
The majority of the projects are 2-3 day projects, with mortar and grout drying periods.
Porcelain tile should be used due to its durability, resistance to water, and ease of maintenance.


