If you’ve ever stared at a greasy stovetop after cooking dinner and thought, “There has to be a better way,” you’re not alone. The kitchen is the hardest-working room in the house, and it shows. Splatters, crumbs, spills, sticky drawer handles, that mysterious layer of grime on top of the cabinets — it all adds up to hours of scrubbing every single week.
Here’s the good news: you don’t need a full renovation or a professional cleaner to make your kitchen dramatically easier to maintain. A handful of small, affordable DIY kitchen upgrades can completely change how much time you spend cleaning. I learned this the hard way after years of battling baked-on grease and stained countertops, and I want to share the five upgrades that actually made a difference in my home.
Grab a coffee, roll up your sleeves, and let’s dive in.
Why a “Cleaning-Friendly” Kitchen Design Matters
Before we get to the upgrades, let’s talk about why this approach works so well. Traditional cleaning is reactive — you cook, you make a mess, you clean it up. A cleaning-friendly kitchen is proactive. You set up small barriers, organizers, and surface treatments that either prevent messes from happening or make them ten times easier to wipe away.
The result? Instead of deep-cleaning your kitchen for two hours every Saturday, you maintain it in five-minute bursts throughout the week. It’s the same philosophy behind capsule wardrobes and meal prep — a little upfront effort saves you enormous time later.
And the best part? Every single upgrade on this list costs less than $50, and most of them take under 30 minutes to install.
1. Install a Stove Top Protector (The Game-Changer)
If you only make one upgrade from this entire list, make it this one. A quality stove top protector is hands down the single biggest cleaning time-saver I’ve ever added to my kitchen.
The Problem It Solves
No matter how careful you are, cooking creates splatter. Tomato sauce bubbles over, bacon grease pops, pasta water boils over the edge. All of that lands in the little crevices around your burners — the hardest, most frustrating spots to clean. You end up with baked-on residue that requires serious scrubbing, harsh chemicals, or worst of all, a cotton swab and a prayer.
A stove protector is a thin, heat-resistant mat that sits right on top of your cooktop, creating a protective layer between your cooking and the stove surface itself. When something spills, it lands on the protector instead of seeping into the cracks and burner wells. At the end of the night, you simply lift it off, wipe it down, and put it back.
How to DIY-Install Your Stove Protector
- Measure your stovetop carefully (electric coil, glass top, and gas ranges all have different requirements)
- Clean the existing stove surface thoroughly with a degreaser
- Let it dry completely
- Lay the protector flat, making sure it sits flush around each burner opening
That’s it. No tools, no adhesive, no commitment. And if you’re the type of cook who makes elaborate Sunday sauces or fries things regularly, this upgrade will pay for itself in saved cleaning time within the first month.
Bonus: Add a Stove Guard for Extra Safety
I also recommend looking into a proper stove guard if you have little ones running around or pets that like to jump up where they shouldn’t. It adds an extra layer of safety by creating a barrier around the hot cooking zone, which is a nice bonus on top of the cleaning benefits.
2. Add Peel-and-Stick Backsplash Film Behind High-Splatter Zones
Your backsplash works overtime. Every time you sauté, fry, or even just open a bottle of olive oil a little too enthusiastically, tiny droplets hit the wall behind your stove. Over months, these build up into a sticky, yellowish film that’s nearly impossible to remove from textured paint or grouted tile.
Enter peel-and-stick backsplash film. This stuff is a renter’s dream and a homeowner’s secret weapon. It comes in dozens of styles — subway tile, marble, geometric patterns, matte metal — and installs in an afternoon with nothing but scissors and a smoothing tool (a credit card works fine).
Quick Installation Tips
- Clean the wall thoroughly and let it dry for at least 24 hours
- Measure twice, cut once — always leave a half-inch overlap for adjustment
- Start from the bottom corner and work up and out, smoothing air bubbles as you go
- Use a blow dryer on low heat to help the film mold around outlets and corners
Once it’s up, cleaning is as simple as wiping with a damp cloth. No more scrubbing grout lines with a toothbrush. When it eventually wears out (usually after 2–4 years depending on the product), you just peel it off and put up a fresh piece. Instant refresh.
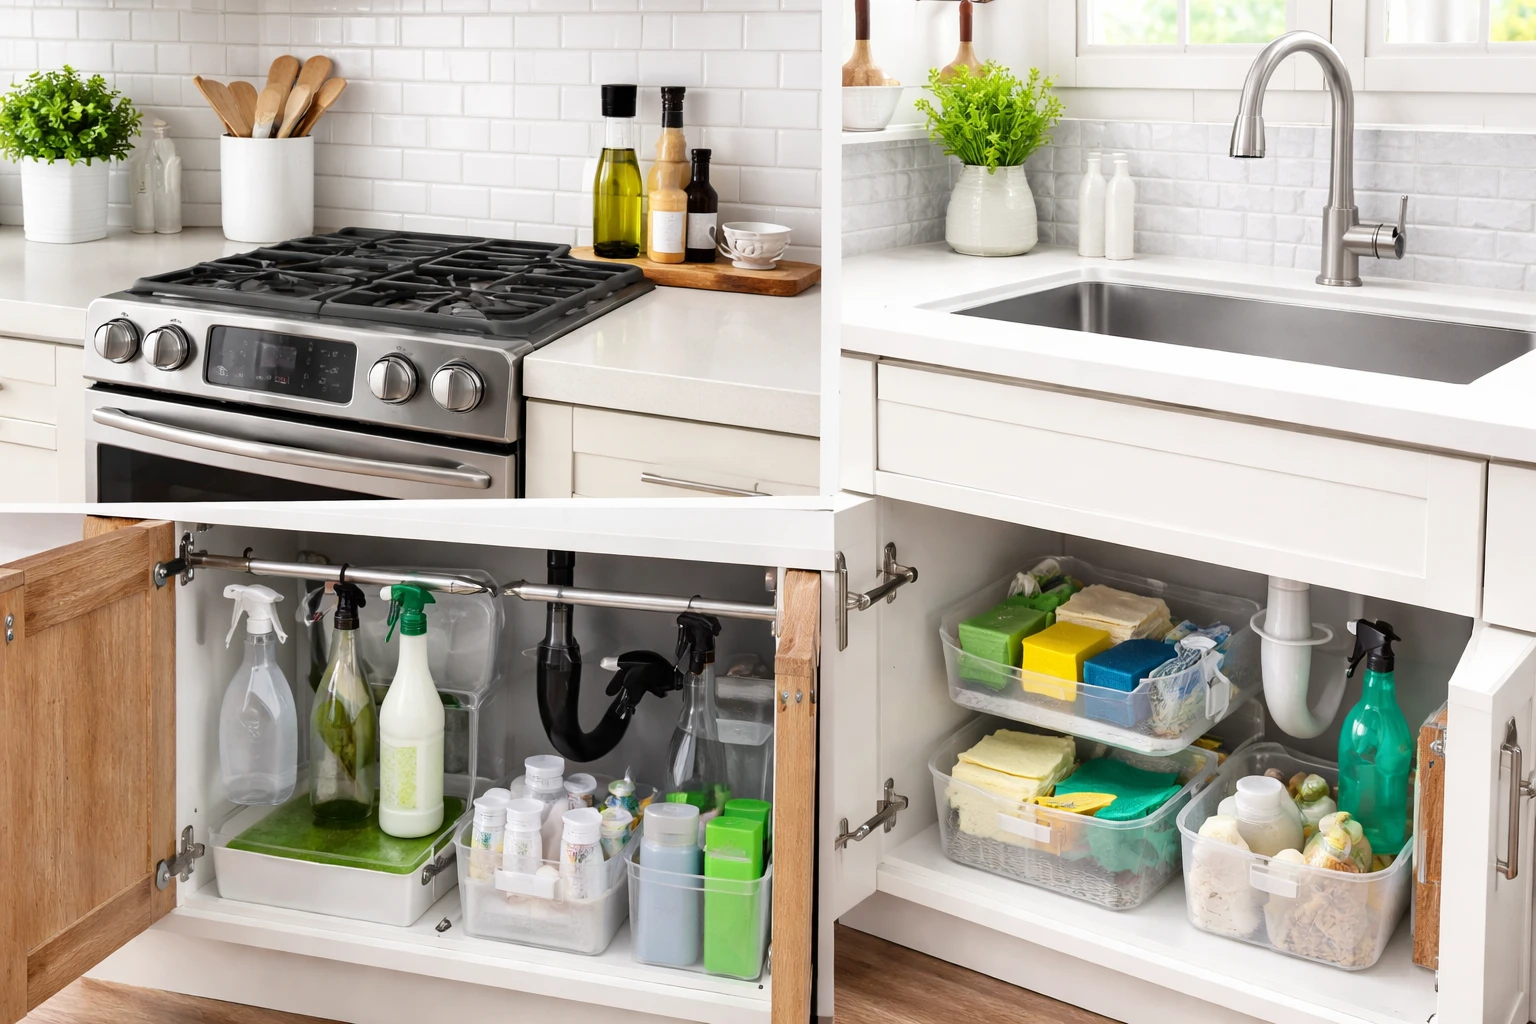
3. Organize Under-Sink Chaos With Stackable Bins and a Tension Rod
The cabinet under the kitchen sink is the Bermuda Triangle of most homes. Old sponges, half-used cleaning sprays, a random wrench, three types of dish soap — it’s chaos. And because it’s chaos, you never clean it. The garbage disposal drips, the pipes sweat, and before you know it, you’ve got mildew growing on a box of trash bags.
Fix This in One Hour
- Empty everything out. Seriously, everything. Toss expired products and consolidate duplicates.
- Wipe down the cabinet floor with a mix of white vinegar and warm water. If there’s any moisture damage, address it now.
- Install a tension rod horizontally across the cabinet, about 8–10 inches from the top. This becomes the perfect place to hang spray bottles by their trigger handles, freeing up the entire floor space.
- Add stackable clear bins for sponges, scrub brushes, and microfiber cloths. Clear bins are key — if you can see it, you’ll actually use it and notice when something needs to be replaced.
- Lay down a waterproof liner. A simple silicone drip tray or even a cut-to-size vinyl mat will catch leaks and can be rinsed off in seconds.
This tiny upgrade transforms not just how your cabinet looks, but how you clean. When your supplies are organized and visible, you actually maintain your kitchen more consistently.
4. Swap Standard Cabinet Knobs for Touch-Friendly Hardware
This one sounds too simple to matter, but stay with me. Think about how many times a day you open a cabinet or drawer with greasy, doughy, or wet hands. All of that residue ends up on your hardware — and from there, on your fingers the next time you open the cabinet. It’s a constant cycle of grime transfer.
The fix is a hardware swap, and it’s genuinely one of the most satisfying 20-minute DIY projects you can do.
What to Look For in Cleaning-Friendly Hardware
- Smooth, non-porous finishes. Brushed nickel, stainless steel, and matte black powder-coated finishes wipe clean with a single swipe. Avoid anything with deep engravings, crystal accents, or fabric-wrapped surfaces — they trap grease.
- Simple shapes. Round knobs and straight bar pulls are easier to clean than ornate designs with curves and crevices.
- Larger pulls instead of knobs. A long bar pull lets you open cabinets with your forearm or the back of your hand when your fingers are messy.
Tools and Installation
All you need is a screwdriver. Old screws usually fit new hardware if you stay within the same standard measurements (most cabinet hardware uses 3-inch or 3.75-inch center-to-center spacing). For under $50, you can do your entire kitchen in an afternoon and cut a noticeable chunk out of your cleaning routine.
5. Apply a Food-Safe Sealant to Your Countertops and Grout
Your countertops might look clean, but if they’re made of natural stone, butcher block, or have tile grout lines, they’re almost certainly porous. That means every spill — wine, oil, coffee, tomato sauce — is slowly soaking in. Over time, you get permanent staining and a surface that needs aggressive cleaning just to look presentable.
A food-safe sealant is the solution. It creates an invisible barrier on top of your counters and grout, so spills bead up and wipe away instead of seeping in.
Step-by-Step Sealing Process
- Clean surfaces thoroughly and let them dry for a full 24 hours
- Apply sealant with a clean microfiber cloth in thin, even coats (read the specific product instructions — application methods vary)
- Let it cure for the time recommended by the manufacturer, usually 24–72 hours
- Reapply every 6–12 months for stone, and every 1–2 years for grout
Pro Tip for Grout Lines
For grout specifically, consider using a small applicator bottle with a roller tip to apply sealant directly into the lines without staining the surrounding tile. It’s a tedious 30 minutes, but the results last for months.
Once sealed, your daily cleaning becomes effortless. A damp cloth handles almost everything, and you can say goodbye to scrubbing coffee rings and tomato stains.
Final Thoughts: Pulling It All Together
Here’s the thing about these five DIY kitchen upgrades: individually, each one saves you a little time. Together, they fundamentally change your relationship with your kitchen. Instead of dreading cleanup after every meal, you’ll find yourself wiping things down in seconds and moving on with your life.
Where to Start
Start with the stove — it’s the messiest zone and offers the biggest return on your time. From there, tackle the upgrades that address your specific pain points. If your grout is always grubby, start with sealant. If your under-sink cabinet is a disaster, begin there.
The philosophy is simple: make the surfaces easier to clean, and you’ll clean them more often. A clean kitchen isn’t about working harder. It’s about designing smarter.
Spend one Saturday tackling these five projects, and by next weekend, you’ll wonder why you ever put up with the old way of doing things. Your future self (and your sponge budget) will thank you.
FAQs
A stove top protector is the most effective upgrade because it prevents spills from reaching hard-to-clean areas.
Yes, but you need to choose the right type for your stove (gas, electric coil, or glass top).
Most backsplash films last between 2–4 years depending on usage and quality.
No, it’s designed to be removable and is generally safe for painted walls when installed correctly.
An organized space makes cleaning supplies accessible and prevents moisture buildup and mildew.
It creates vertical storage by allowing spray bottles to hang, freeing up cabinet space.
Yes, smooth and simple hardware reduces grime buildup and is much easier to wipe clean.
Porous materials like natural stone, butcher block, and grout lines benefit the most from sealing.
Typically every 6–12 months for stone and every 1–2 years for grout.
No, each upgrade costs under $50 and most can be completed in under 30 minutes.


