Hey friends! How’s your week going so far??

Did you catch that sneak peek of my coffee table on Instagram last week? It got a much-needed makeover and I’m loving it.
This table used to reside in a formal-ish living room in our last house. In this house nothing is formal and all the rooms get used – I love it! The kids sometimes hang out with friends in this room, and we use it for every day lounging as well as entertaining.
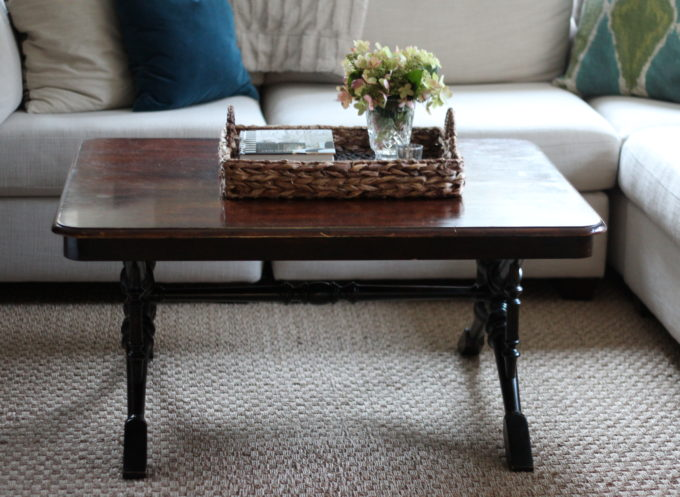
The table has seen a lot of action since we moved here, and the top of it was reflecting that.
There are only so many times can you touch up scratches and work on those white ring marks. OY. It’s amazing how just refinishing the top of the table – not even bothering with the base – has given this piece a new lease on life! Look at the difference –
BEFORE
& AFTER
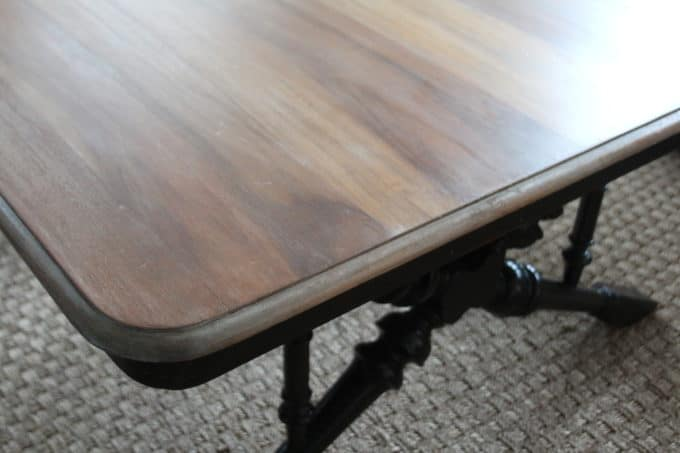

Do you have a coffee table that has seen better days? Consider refinishing the top of it!
If you haven’t refinished a piece of furniture before, don’t fear! It’s easy – you can do it. A table top is a great place to start because you’re working with mostly a flat surface, not a lot of detail to worry about. Here’s the process on how to give new life to your old coffee table top by stripping and refinishing it.
Affliliate links are included in this post for your convenience. Supplies are listed at the bottom of the post!

STRIP FINISH
I have mentioned many times before that Citristrip is my preferred furniture stripper – this isn’t a sponsored post; I genuinely like this product of various strippers I have used over the years. The gel is easy to apply and I find that it works the best.
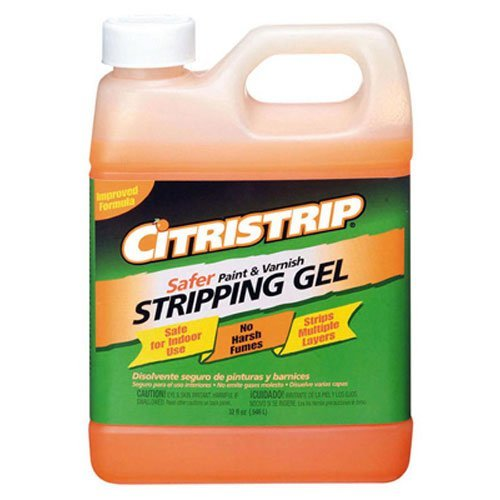
This stripper is supposedly a safer alternative to other ones on the market but let’s face it, it’s still a chemical and not healthy for you to touch or breath in it’s fumes, so be sure to wear gloves and a ventilation mask when using this. Use a cheap plastic drop cloth under it that you can throw away.
My method for stripping is to spread the gel on the piece of furniture with a cheap paint brush. I do a pretty substantial coat because if it starts to dry, the finish is harder to remove. A thick coat will likely take off most of the finish with one pass. Let it sit for about 20-30 minutes and then start scraping.

I scrape all the finish into a plastic grocery bag. This keeps the area around the furniture pretty clean so you are not walking in the scraped-off gook as you work. This process can be pretty messy!
I love this painter’s scraping tool for both scraping and getting into all the nooks and crannies of furniture. This was great for the edge of my table.

After the first pass of scraping, there are usually stubborn little bits of finish that you may have to hit again with the gel; let it do it’s work and then scrape again.
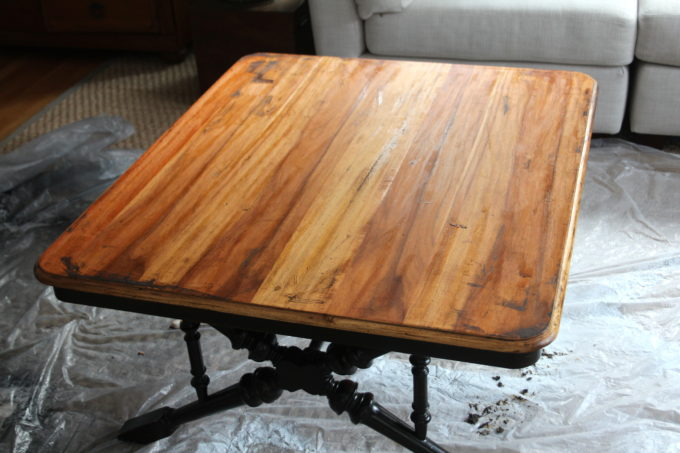

CLEAN WITH SOAPY WATER
After the finish is all scraped off, wash the wood with soapy water and a nylon scrubbing sponge (like you would use on pots and pans), dry well with rags or paper towels and let it air dry for a bit. You can buy a cleaner specifically for this purpose but I find a bit of dishsoap and water works just fine.
At this point I could tell the coffee table’s natural wood was quite red. This little table in front of it is a Homegoods find, and in the same family as my limed dining table – the general direction I was looking to take the coffee table.

SAND
Depending on the species of wood your piece is, it may have deeply absorbed previous stains and sealers. I always give any freshly stripped wood at least a light sanding – the coarser the sandpaper, the more your new finish will seep into the nooks and crannies. If you really want to start from scratch with your piece, use a palm sander to remove every last trace of the previous finish (I did this the first time I made over our dining table.) For this piece I hand sanded the table top.
Sometimes I use a wire brush on raw wood before staining, a trick I learned from a furniture refinisher. (This tool is also handy for getting the old finish off a piece that has a lot of detail, and it’s what I use to clean my paint brushes.)
Scrape the wood with the brush to remove any remaining sealer and open up the grain a bit more (going in the direction of the grain). I used this technique on my coffee table as well as the limed dining table I shared in the fall, and love how it allows a whitewash to seep into wood a little more.


CONDITION RAW WOOD IF STAINING
Wood conditioner helps stain to take evenly. Brush it on or use a rag to apply, let it absorb, and then you can stain in 15 minutes or so. Cardboard is great under a piece of furniture when conditioning and staining because it absorbs drips so you don’t track them all over the place as you work.

ADD YOUR DESIRED FINISH
Once your piece is stripped, cleaned, dried and conditioned, you can add a new stain, whitewash it with liming wax, diluted latex or acrylic paint, or seal the natural wood as is. There are so many options!
The final product finish will greatly depend on the species of your wood and what you use on it.
Since I was looking to lighten up this table and reduce the red of this wood, I tried using weathered oak stain to cool down the warm tones. While this stain was perfect for my oak dining table, the coffee table wood is extraordinarily hard and barely took the stain.
If the color doesn’t come out the way you imagined, don’t give up!! Sometimes trial and error results in a finish you love. Here is my table after being fully prepped, with a coat of weathered oak. I know! The color is so so pretty, right? But unfortunately, not the color I’m going for. Although this is gorgeous, it’s not right for my house right now. (Good to know I can achieve this later on if I want it back, though!)

Here’s how I achieved a limed finish on this table.
LIMED FINISH – WITH PAINT
You can achieve this look with liming wax, like I did on our dining table.
However, if you use your piece of furniture all the time and don’t want to have to worry about the finish getting marred, forego liming wax for a white wash and then seal the piece with polycrylic.
Remember that the species of your wood will play a huge part in your final finish. There’s a lot of trial and error to achieve the exact finish you have in mind. Don’t get discouraged! Try to enjoy the process and don’t get stressed if it’s looking awful. You can always throw on some more Citristrip and start over.
I like using regular old water-based paint for white washing because you can control it with water.
I diluted a tiny bit of white paint with water, then brushed it on. Next up I took a damp rag, and smoothed out the brush strokes, going with the grain of the wood. It’s a layering process. See how the right side is streaky and funky? The damp rag softens all that.
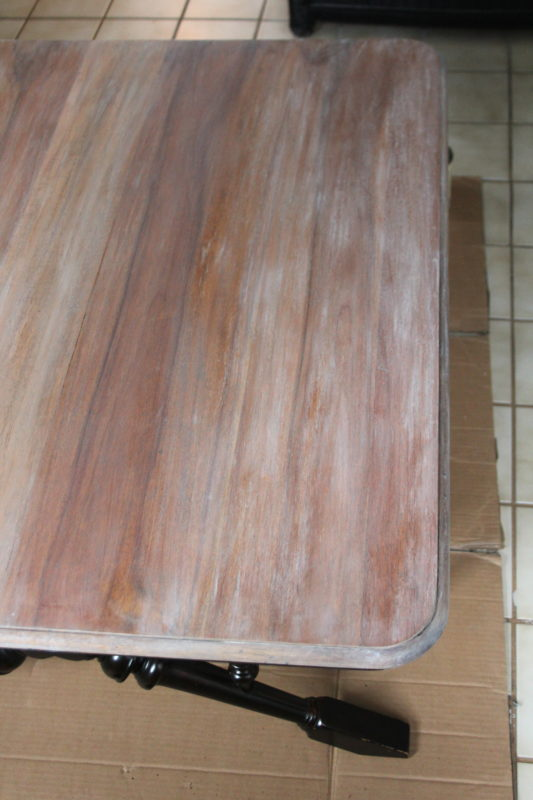
More brushing on and taking off. Get your Karate Kid game going. WAX ON WAX OFF. Layer it and then lift some of it off with the rag.
After I got the white wash into the nooks and crannies, it looked a little too uniform, so I distressed it with medium grit sandpaper to mess up the finish a bit.
The table still had a pink cast to it, so I threw on a coat of Provincial stain, and that is what brought it all together. Here it is whitewashed and coated with Provincial. The finish is looking a little funky because of the sand paper distressing.

SEAL
The final step: protect your table with a brushed-on coat of satin Polycrylic. This not only provides a resilient top to your piece, but also evens out all the distressing and gives it a beautiful finished look.
Do the edges first, then take the brush from one end of the table to the other without stopping for a smooth finish. You can add another coat or two if your table gets a lot of abuse – just let the Polycrylic fully dry between coats.
Allow the topcoat to cure for a day or two before putting anything on it. And you’re done!!
In this photo above you can see the edge of the dining room table at the bottom and how it relates to the coffee table. Similar tones makes the spaces feel a little more cohesive without being all matchy matchy.
SOURCES
Here are links to everything I mentioned in this post that you might need for refinishing a piece of furniture.
Citristrip | Paint Brush | Scraper | Gloves | Respirator | Plastic Drop Cloth | Scrubbing Sponge | Wire Brush | Palm Sander | Sandpaper | Wood Conditioner | Weathered Oak stain | Provincial stain | Polycrylic sealer
Pin this post for later!
Check out more before and afters and tutorials in the Furniture Projects Gallery!
Thanks for stopping by!
I’m sharing this tutorial with Inspire Me Tuesday at Thrifty & Chic On A Budget (A Stroll Thru Life) and at these creative parties, check them out for tons of inspiration!

