
Maps are more than just tools for navigation. They are stories, memories, and sometimes even dreams—etched on paper. That’s why learning how to frame a map isn’t just a DIY project. It’s a way to transform something functional into something deeply personal and decorative. Whether it’s a nautical chart, a vintage city map, or a custom print of your favorite destination, framed maps bring character and meaning into a space.
The best part? You don’t need to spend a fortune on professional framing. With the right materials and a little patience, you can frame a map yourself and make it look like a professional piece of art. Let’s walk through everything you need to know.
Why Frame a Map?
Framed maps have a special charm. They’re not just décor — they’re conversation starters. A map of your hometown, the city where you studied abroad, or the coastline where you spent summers can instantly make a wall feel more personal.
Unlike generic artwork, maps hold layers of meaning:
- Sentimental value: They represent places tied to memories.
- Educational element: Great for kids’ rooms or offices.
- Design versatility: Maps work well with almost any style — vintage, coastal, modern, or rustic.
- Affordable statement art: A single map can create the same impact as a large-scale canvas, often at a fraction of the cost.
Simply put, framing a map allows you to showcase both your style and your story.
Choosing the Right Map
Before you learn how to frame a map, you need to choose one that fits your home and your personality.
Here are some popular choices:
- Nautical charts: Perfect for coastal décor or lake houses.
- Vintage maps: Bring old-world charm with sepia tones.
- City maps: Great for urban lofts or as reminders of special trips.
- World maps: Ideal for travel enthusiasts who want a global feel.
- Custom prints: Highlight a neighborhood, hiking trail, or even a fictional world you love.
When selecting, think about:
- Scale: Large maps make a dramatic focal point. Smaller ones are better for gallery walls.
- Color palette: Match the tones to your room (soft neutrals, bold contrasts, or colorful themes).
- Room function: A study might suit a historic map, while a kids’ playroom could use something more playful.
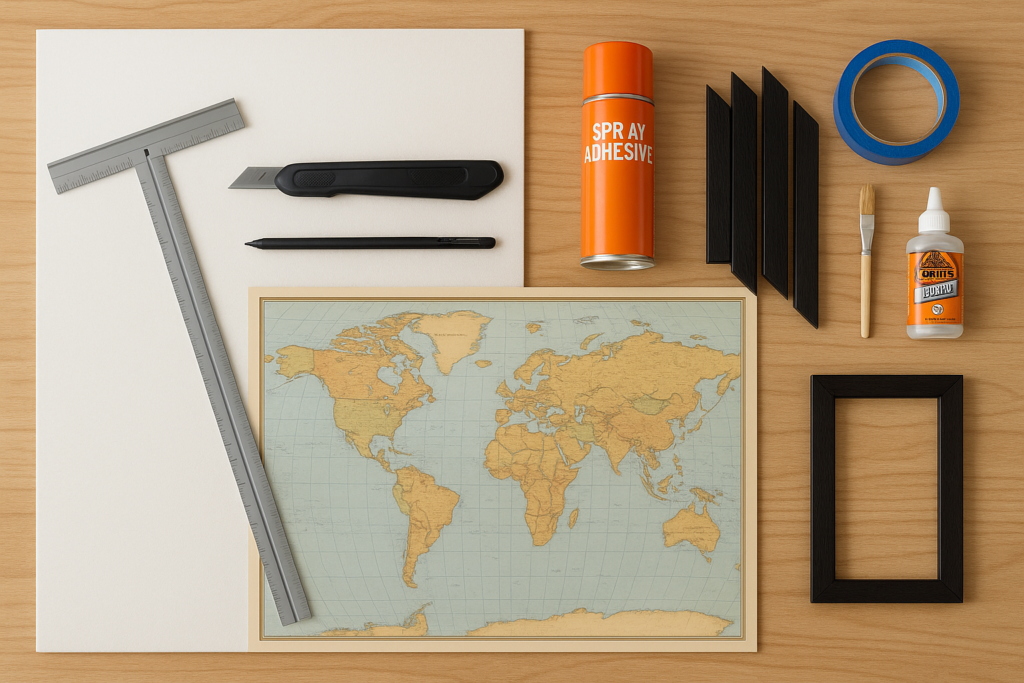
Materials You’ll Need
Before you dive into the steps, gather your tools. Here’s a checklist for DIY framing:
- Your chosen map
- Insulation board or sturdy foam backing
- Utility knife/X-Acto knife
- T-square or ruler
- Spray adhesive (use in a ventilated area)
- Wood corner molding for the frame
- Paint or stain for the molding
- Glue (Gorilla Glue or epoxy)
- Painter’s tape
- Hanging hardware (triangular hooks, picture wire, or even paper clips)
- Brayer or silicone spatula for smoothing bubbles
Optional extras: gold paint pens for detailing, poster putty to keep frames straight once hung.
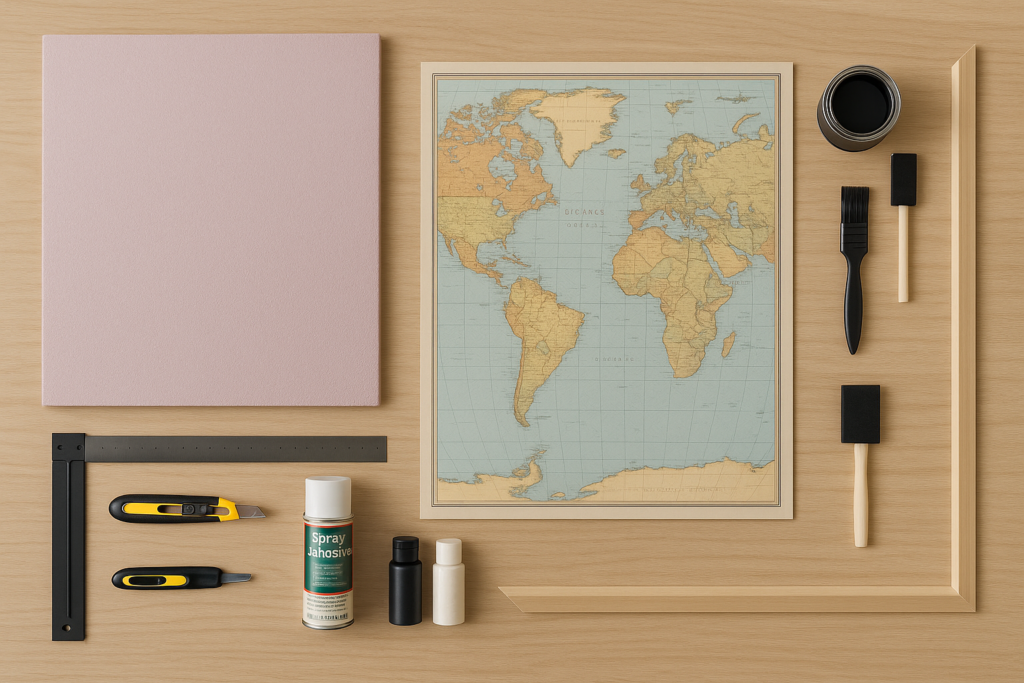
Step-by-Step Guide: How to Frame a Map
Step 1: Prepare the Backing
Start with your insulation board or foam backing. Measure your map and mark the board accordingly. Use a T-square for clean lines and score the surface with a utility knife before cutting through completely. This prevents jagged edges.
If you’re not planning to add a frame, paint the exposed edges of the board. Just avoid spray paint—it melts insulation. Instead, brush on acrylic craft paint or leftover wall paint.
Step 2: Flatten and Prep the Map
Most maps arrive rolled, which can make them curl stubbornly. To fix this, roll the map in the opposite direction a few times until it lies relatively flat. The flatter the map, the easier your mounting will be.
Step 3: Mount the Map
Lay your backing board flat in a well-ventilated area. Spray it evenly with adhesive (mask up—this stuff is strong!). With a helper, carefully lower the map onto the board, starting at one edge and smoothing as you go.
Use a brayer or spatula to push out air bubbles, working from the center toward the edges. Take your time — this step is what makes the difference between a professional look and a wrinkled mess.
Step 4: Build and Attach the Frame
Now for the fun part: the frame. Cut your wood corner molding at 45-degree angles so it fits neatly around the board. Paint or stain the molding in your desired color. Black adds a modern look, while natural wood feels rustic.
Glue the molding directly onto the board edges, securing with painter’s tape while it dries. For extra flair, you can detail the inner edges with metallic paint pens—gold or bronze work beautifully against darker trim.
Step 5: Add Hanging Hardware
Because insulation board is lightweight, you don’t need heavy-duty hardware. Hot glue a triangular picture hook to the back, or even use a paperclip as a makeshift hanger. Measure carefully so the map hangs straight.
Design Ideas for Framed Maps
Once you know how to frame a map, the styling possibilities open up:
- Gallery wall: Combine smaller framed maps of cities you’ve visited.
- Statement piece: Go bold with one oversized map above a sofa or fireplace.
- Kid’s room: Use colorful maps for a fun yet educational decoration.
- Travel wall: Pair maps with photos and souvenirs for a storytelling display.
- Rustic look: Use distressed wood frames for vintage maps.
Maps can adapt to any space—they can be modern and graphic, or classic and nostalgic.
Pro Tips for Success
- Always score before cutting insulation to avoid jagged edges.
- Avoid spray paint directly on foam—it eats away at the surface.
- Get help mounting the map. Doing it alone is frustrating and prone to wrinkles.
- Use poster putty behind frames to prevent them from shifting.
- Don’t obsess over perfection. A slightly off-center map still looks stunning once it’s on the wall.
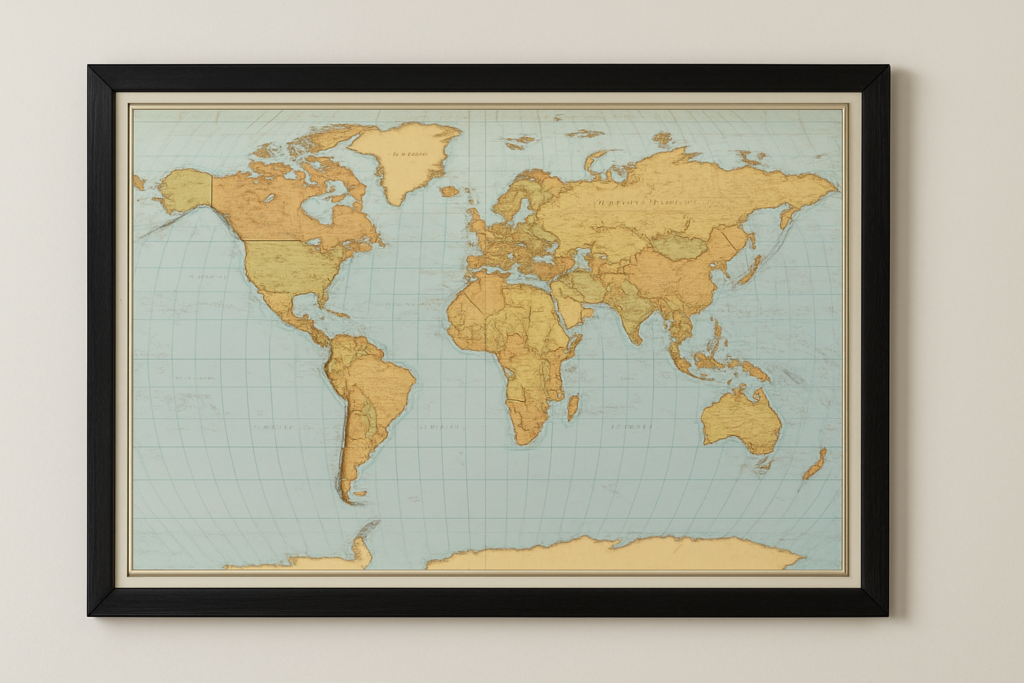
Final Thoughts on How to Frame a Map
Learning how to frame a map is less about technical perfection and more about storytelling through décor. Each map you frame adds personality, memory, and character to your home. With simple materials and a few hours, you can transform paper into art that sparks conversations and inspires adventures.
So go ahead — pull out that old atlas page, nautical chart, or world map poster. Frame it, hang it, and let your walls tell your story.


")


")
