A gallery wall lets memories live on the walls in a beautiful way, and this guide shares practical family wall decor ideas that make planning and hanging feel simple and fun. Whether it is a first apartment or a forever home, a clear plan turns a blank wall into a story worth sharing with friends and family. The tips below are based on tried-and-true design practices, so a family gallery wall looks balanced, cohesive, and easy on the eyes from day one.
Why Family Wall Decor Ideas Matter
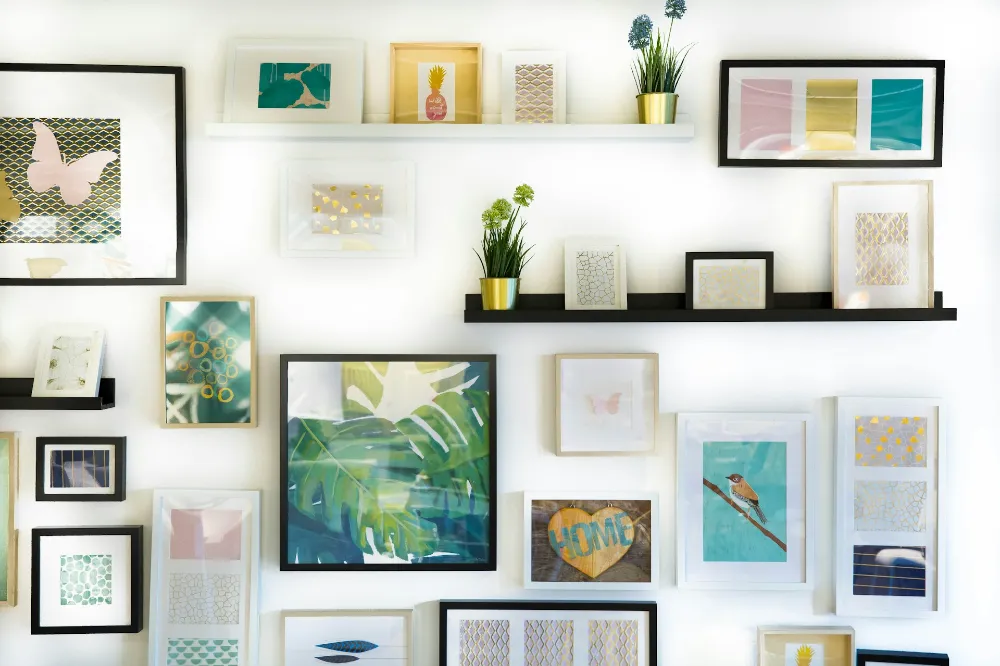
A gallery wall is timeless, and it gives a home a warm focal point that draws people in to look and talk about the moments that matter most. Thinking of the collection as one big picture helps the whole wall feel calm and connected, instead of busy or random.
Experts recommends choosing a clear story before choosing frames, and pairing those choices with Unique Home Décor Frames so every piece earns its place and the wall looks collected, not cluttered.
Start With Your Story
Pick a theme that fits family life, such as “first-day photos,” “annual trips,” or “four seasons in our city,” so choices get easier and the wall feels united. Choose one “hero” piece, like a large family portrait or a favourite travel shot, and build the rest around it for balance and flow. If mixing art and photos, keep colours in a similar tone family so the whole arrangement reads as one cohesive composition from across the room.
Plan On The Floor First
Lay frames on the floor inside painter’s tape that matches the wall’s width so spacing and layout can be tested without making holes. Snap a quick phone photo of the layout to use as a map when moving pieces to the wall, which cuts guesswork and saves time. Start transferring the largest pieces first, then fill the gaps with medium and small frames to create rhythm and calm movement.
Choose Frames That Fit Your Theme
Use 2–3 frame finishes to start, such as black, white, and a warm wood, to keep the look consistent and easy to expand over time. Add one special finish, like a slim brass frame, for subtle shine without stealing attention from the photos themselves. Float-mount small items like tickets or vows in shadowbox frames to add depth and meaning without crowding the layout.
The Rules That Make It Look Pro
The 57-inch rule is a simple anchor: aim to place the centre of the main piece at 57 inches from the floor so art sits at average eye height and feels balanced in most rooms. When hanging above furniture, keep the bottom row about 4–6 inches above a sofa or console to connect the art to the furniture below. Keep frame-to-frame spacing consistent at about 2–3 inches so the wall reads as one unit rather than a scatter of parts.
Above Furniture vs. Empty Wall
Above a sofa or console, map the bottom edge of the lowest frames 4–6 inches above the furniture, then stack the rest upward with consistent gaps. On an empty wall, centre the overall composition at 57 inches to create a clean, gallery-calibrated sightline that suits most people’s view. If ceilings are very high, a slight shift up from 57 inches can work, but build around a single anchor so the eye knows where to rest.
Three Layouts That Always Work
- Grid layout: Use identical frames in even rows and columns for a crisp, modern look that is quick to scale as the family grows.
- Organic cluster: Begin with the hero piece slightly off-centre, add medium frames around it, then tuck small pieces into the gaps for balance.
- Shelf mix: Combine a ledge shelf with a tight cluster above to swap prints seasonally without adding more holes to the wall.
Simple Math for Perfect Spacing
Choose your gap, then do small, repeatable math to map nails and keep things straight across the whole wall. For horizontal nails in a grid, measure half the frame width plus the gap from nail to nail so every piece lines up cleanly across the row. For vertical spacing, use frame height plus the gap so rows are evenly stacked and the total composition stays rectangular and tidy.
The No-Stress Hanging Method
Cut kraft paper or newsprint the size of each frame, tape the paper to the wall in the planned layout, and mark nail spots right on the paper. Hang one piece at a time and adjust as needed so small errors do not spread across the whole wall. Use a small level or laser level and step back often to check lines from different points in the room before committing to the next nail.
Add Personal Texture And Keepsakes
Mix in a textile, a small sculptural piece, or a round frame to break up too many straight lines and keep the wall lively. Float-mount a child’s first drawing, a wedding program, or a map with trip pins to layer memories without making the wall feel heavy. Treat the wall like a living album so updates feel natural when new milestones arrive, not like a complete redo each time.
Family Wall Decor Ideas For Small Spaces
In tight hallways, go for slim frames and a narrow grid with 2-inch gaps so passersby do not brush the edges. In a stairwell, track the rise of the stairs and keep the centerline of the grouping near 57 inches along the slope for clean sightlines on the way up or down. Tall, narrow walls love a vertical stack with one strong anchor in the centre and smaller pieces stepping above and below to balance height.
Colour, Mats, And Finishes That Glow
Keep prints in a similar colour intensity and let mats create breathing room around busy photos, which helps every image read crisp and clear from a few feet away. Standard white mats look classic, but a pale grey or natural linen mat can add warmth and soften contrast around black-and-white photos. Use non-glare acrylic when possible in sunny spots so reflections do not hide faces, especially on eye-level pieces.
A Quick Case Study From Experts
A young family had 12 years of photos across phones and old drives, but no clear way to display them without feeling cluttered or random. Experts sorted images by theme, chose one large “hero” portrait, and built an organic cluster around it with two wood frames, one black, and one slim brass accent for quiet shine. The team kept gaps at a consistent 3 inches, centred the arrangement at 57 inches, and float-mounted a ticket stub from the parents’ first concert to add story and depth.
Pro Tips That Make A Big Difference
- Keep gaps consistent at about 3 inches to avoid crowding, which makes the wall feel relaxed and deliberate.
- Place the biggest piece first so the eye has an anchor, then stagger sizes to move the gaze around the whole wall.
- Treat the whole as one frame: centre the composition at 57 inches, then balance sides and corners so nothing feels too heavy in one area.
Where Unique Home Decor Frames shine
High-quality frame build, true-square corners, and solid hanging hardware keep lines sharp and spacing clean over time, especially in a grid. Unique Home Décor Frames let families mix wood, black, and brass finishes while keeping sizes consistent, which makes upgrading or expanding the wall simple and stress-free. A few shadowbox options make it easy to float-mount keepsakes so the display feels personal without losing its clean layout.
Lighting That Flatters Faces
Soft, even light is the goal, so add a picture light or a nearby lamp that washes the wall rather than creating hot spots or glare. Non-glare glazing helps a lot in bright rooms or near windows, so faces and details stay visible from different angles. If using a picture light, centre it over the hero piece and keep the brightness gentle so the wall reads as a whole, not as a spotlight on one frame.
Troubleshooting Common Mistakes
If the wall feels busy, give pieces more breathing room by widening mats or removing one or two small frames near the edges to restore calm. If it feels too high, re-anchor the composition so the centre sits at the 57-inch mark, then rebuild around that line. And if edges look crooked, re-check nail math and use a level across top lines in rows or along centerlines in organic clusters before rehanging.
Family Wall Decor Ideas You Can Finish This Weekend
- Pick 12 photos and print them at 8×10 with white mats for a simple first grid that fills a 4×3 layout.
- Set gaps to 3 inches and centre the whole grouping at the 57-inch mark for a classic, museum-inspired height.
- Add one keepsake in a float frame to make the wall feel personal on day one, then build slowly over time.
Final Thoughts
With a clear story, consistent 2–3 inch gaps, and the 57-inch eye-level anchor, any family can create a polished gallery wall that looks intentional and easy to live with from the start. Follow simple floor planning, nail-by-nail steps, and small, repeatable math so the process stays calm and the result feels like a cohesive whole, not a patchwork. These expert approach makes these family wall decor ideas practical and repeatable, so the wall can grow with the family while staying balanced and beautiful year after year.


")


")

