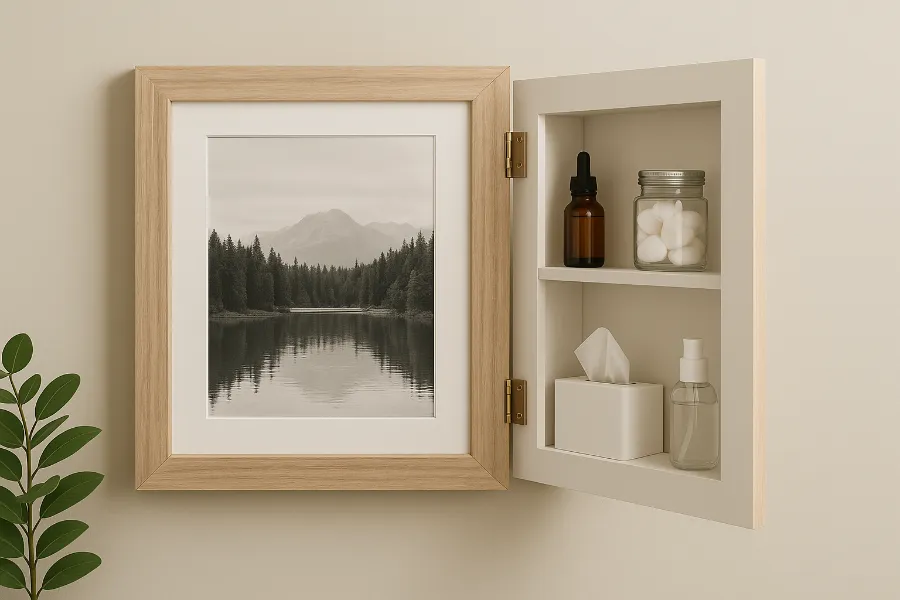
Home décor is all about making every inch of your space work harder without compromising style. That’s why the concept of a picture frame cabinet door has been creating such a buzz. Imagine a stunning frame on your wall—displaying art, a photo, or even a mirror—that also swings open to reveal hidden storage. It’s clever. It’s stylish. And it’s surprisingly doable on a modest budget. Whether you’re a DIY enthusiast, a home décor lover, or someone who simply wants to hide the clutter behind a gorgeous frame, this idea is worth your attention.
In this guide, we’ll explore how to transform ordinary cabinet doors or thrifted frames into functional hidden storage. We’ll cover everything from materials to step-by-step builds, clever variations, and real-life storage ideas. Let’s unlock the magic of the picture frame cabinet door!
Why Picture Frame Cabinet Doors Are Trending
Minimalism and multi-functionality are shaping today’s home design trends. Homeowners want solutions that blend practicality with beauty. Enter the picture frame cabinet door—a stylish hack that makes storage disappear behind what looks like ordinary wall art. It’s the kind of project that draws compliments while secretly solving everyday storage challenges.
Even better, it’s budget-friendly. Many DIYers report making one of these for as little as $30, using reclaimed wood or thrifted materials, compared to hundreds for store-bought hidden cabinets.
Choosing the Right Frame or Cabinet Door
The foundation of this project lies in choosing the right frame. You can take two routes:
- Repurpose an old cabinet door
Many raised-panel cabinet doors already have the look of a frame. A little sanding, paint, or stain and you’ve got the perfect base. - Use a thrifted or reclaimed frame
Flea markets and thrift stores are goldmines for oversized frames. Look for ones with sturdy wood, deep borders, and character details that suit your décor. - Build your own frame from scratch
For advanced DIYers, crafting a frame from reclaimed wood adds a rustic, farmhouse charm that’s hard to replicate with mass-produced options.
Pro Tip: Always consider depth. A frame with some thickness not only looks more convincing but also provides enough clearance for the storage box behind it.
Prepping the Frame
A beautiful finish starts with good prep. Here’s what to do:
- Strip or Sand – If you’re working with painted or varnished wood, sand it down to create a fresh surface.
- Fill Holes & Dents – Wood filler can smooth imperfections.
- Paint or Stain – Choose a finish that blends seamlessly with your interior. Crisp white for coastal, espresso for modern, distressed chalk paint for farmhouse charm.
- Seal or Wax – A layer of wax or polyurethane protects the wood and adds a professional touch.
Think of this step as setting the tone. The frame should look so good no one suspects it hides storage.
Building the Cabinet Box
Behind every picture frame cabinet door is a simple, shallow box. This is where your hidden treasures will live.
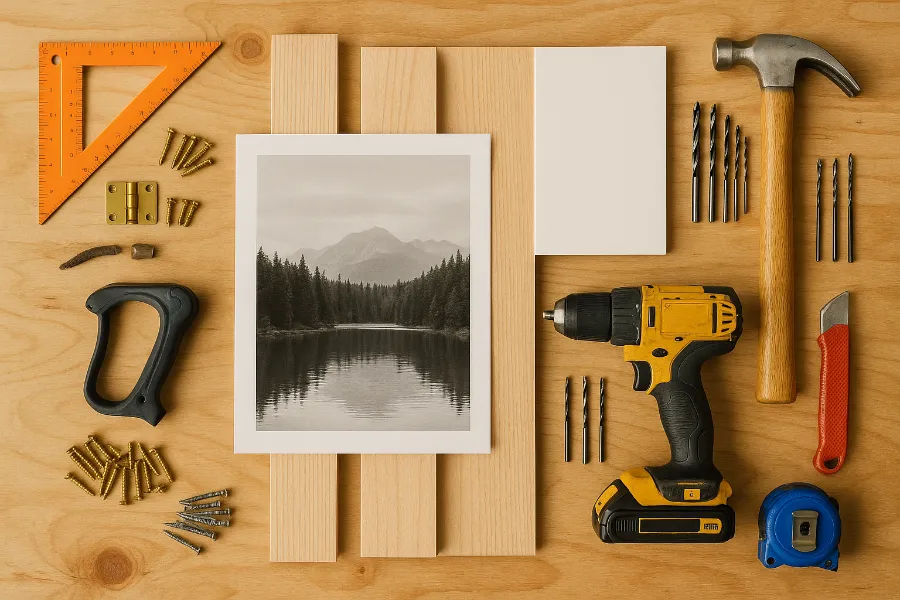
Materials:
- 1×4 or 1×6 pine boards (depending on desired depth)
- Plywood backing
- Wood glue & brad nails (or screws and a drill)
Steps:
- Cut boards to size, matching the dimensions of your chosen frame.
- Assemble the box by attaching boards together with glue and nails or screws.
- Add the plywood backing, ensuring it’s flush and secure.
- Optional shelves can be added for organization, perfect for spices or essential oils.
This box doesn’t need to be deep. Even a 3–4 inch depth is enough to store small items without bulging.
Attaching the Picture Frame Door
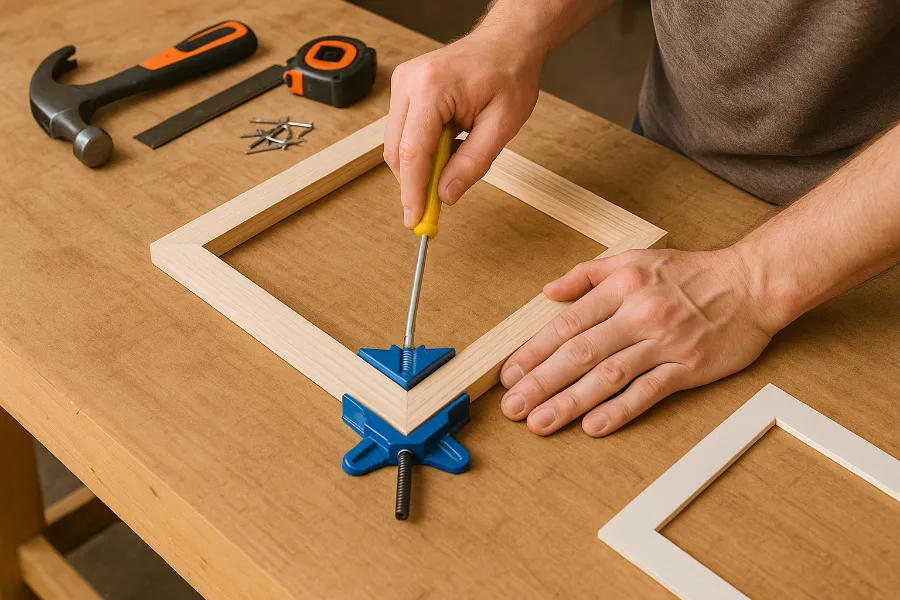
Now comes the fun part—turning that frame into a functional cabinet door.
- Choose hinges – Standard butt hinges work fine, but concealed hinges make the transformation even more seamless.
- Attach hinges – Secure them to one side of the frame and the box.
- Install magnetic catches – These keep the door snug when closed.
- Add hardware if desired – A small knob or pull can work, but many DIYers prefer to keep it handle-free for a stealthy look.
Paint the hinges and screws to match the frame, and you’ll have a door that blends perfectly into your wall décor.
Finishing Touches
A few final details can elevate your picture frame cabinet door from DIY to designer:
- Decorative Wax – Adds depth and a soft finish to painted frames.
- Coastal Accents – A dry-brush of white over wood stain creates a breezy beachy vibe.
- Mirrored Inserts – Instead of a picture, try a mirror for a dual-purpose vanity cabinet.
- Seasonal Art Swaps – Frame art that you can rotate with the seasons to keep your wall fresh.
These touches not only enhance aesthetics but also keep your project aligned with your overall décor theme.
Clever Storage Ideas
So what exactly can you hide behind a picture frame cabinet door? The possibilities are endless, but here are some favorites:
- Kitchen spices – Keep counters uncluttered while having quick access to jars.
- Bathroom medicine or makeup – Perfect for small essentials.
- Entryway keys and mail – Never lose your keys again!
- Essential oils or perfumes – A tidy, hidden display.
- Doorbell chimes – A genius hack is disguising unsightly doorbell boxes.
- Remote controls – Tuck them away while keeping them close at hand.
The beauty lies in the element of surprise. Nobody expects your artwork to open like a door.
Cost, Time, and Effort
One of the biggest draws of this project is how accessible it is.
- Cost: Most builds land around $30–$50, depending on materials and finishes.
- Time: A weekend project—expect 1–2 days, allowing for drying time between coats of paint or stain.
- Skill level: Beginner to intermediate. If you can use a drill and follow a paint tutorial, you can build one.
This affordability makes it a great entry point into DIY furniture building.
Creative Variations
Want to take it a step further? Try these variations:
- Gallery Wall Storage – Create multiple small picture frame cabinets as part of a gallery wall. Functional art at its best.
- Fairy Cabinet Doors – Paint whimsical designs or install mini-frames for kids’ rooms.
- Rustic Chalkboard Cabinet – Swap the picture insert for a chalkboard panel. Perfect for notes, menus, or doodles.
- Seasonal Décor Cabinet – Use themed prints—holiday art, botanical sketches, vintage posters—and change them with the seasons.
These spins turn a clever hack into a centerpiece of your home décor.
Why Picture Frame Cabinet Doors Are a Genius Hack
At the end of the day, the picture frame cabinet door is the perfect marriage of creativity and practicality. It’s proof that storage doesn’t have to look utilitarian. Instead, it can blend seamlessly into your walls, disguised as beautiful art. With just a little effort, you can create a custom piece that looks high-end but costs less than dinner for two.
Whether you’re hiding spices, keeping your bathroom tidy, or simply wowing guests with your ingenuity, this project is a guaranteed win. And the best part? Every time you open that frame and reveal its secret, you’ll smile knowing you built something both beautiful and brilliant.


")


")
