When you picture a workspace that feels truly personal, a custom inlaid wood desktop comes to mind. It’s more than a surface to work on. It’s a piece of art. A statement that fuses craftsmanship with everyday functionality. The way the natural grains of wood meet geometric or freeform inlays, and then get sealed under a smooth finish, turns a simple desk into a design centerpiece.
In this article, we’re going to break down how an inlaid wood desktop can transform your workspace, the detailed steps in making one, and why it might just be the DIY project you’ve been waiting for.
Designing Your Inlaid Wood Desktop
Every strong project begins with a design plan. Before you even touch a tool, ask yourself:
- What size desktop do you need?
- Is the desk meant for heavy-duty office use, light crafting, or as a decorative statement piece?
- What type of wood appeals to you most — maple, walnut, oak, or something exotic?
The design should balance style and functionality. For instance, a minimalist workspace may call for subtle linear inlays, while a creative studio might shine with bold geometric resin-filled patterns.
Why the Inlaid Wood Desktop Stands Out
Unlike standard solid wood desktops, an inlaid wood desktop brings unique texture and depth. The inlay process allows you to combine different wood tones, patterns, or even materials like resin and metal strips. The result is a desk that catches light differently from every angle.
And there’s more:
- It’s highly customizable.
- The process makes even affordable base wood look high-end.
- It’s durable when sealed correctly with epoxy or resin.
Step-by-Step: Building Your Own Inlaid Wood Desktop
Step 1: Create the Base
Your desktop begins with a strong foundation. Most DIYers use a solid wood board or plywood as the base layer. The base needs to be flat, sturdy, and cut to the exact size you want for your desk frame. Reinforce the underside with supports if you expect heavy loads like monitors or equipment.
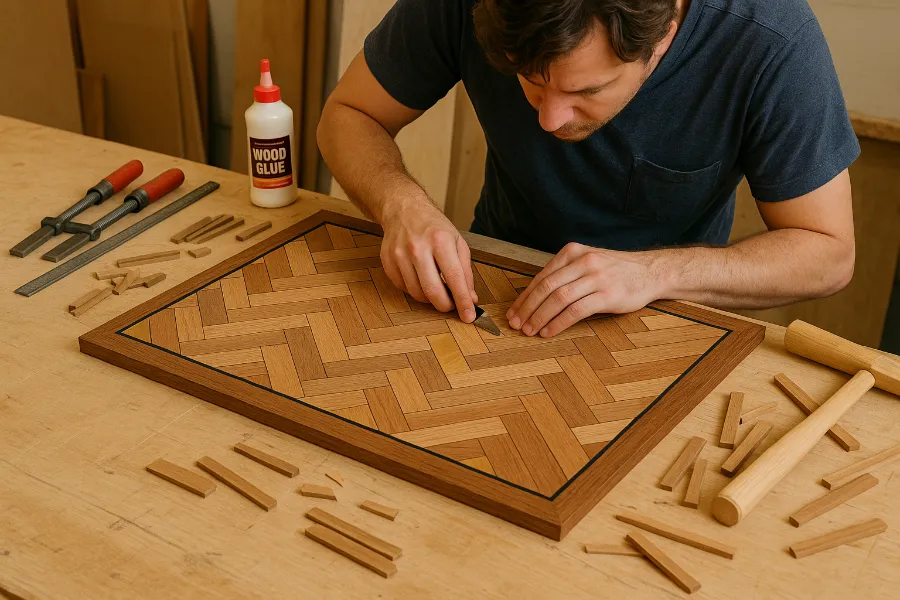
Step 2: Craft the Inlay Design
This is where creativity kicks in. Sketch your design on paper first. Then, transfer the outlines onto your desktop base. Use a router or chisel to carve shallow grooves where the inlays will sit.
Options for inlays include:
- Strips of contrasting hardwood (light maple against dark walnut looks stunning).
- Veneer cutouts in repeating geometric shapes.
- Colored epoxy resin for a modern twist.
Pro tip: Keep the design balanced. Too much complexity can overwhelm the surface.
Step 3: Sand and Stain
Once the inlays are set, it’s time to bring harmony to the surface. Sand the desktop smooth, blending the base and inlay materials. After sanding, apply your chosen stain. Stain deepens the grain patterns and ensures consistency across the varied materials.
Popular choices:
- Natural light stains to highlight inlay contrast.
- Dark walnut for a rich, elegant finish.
- Gray-wash for modern interiors.
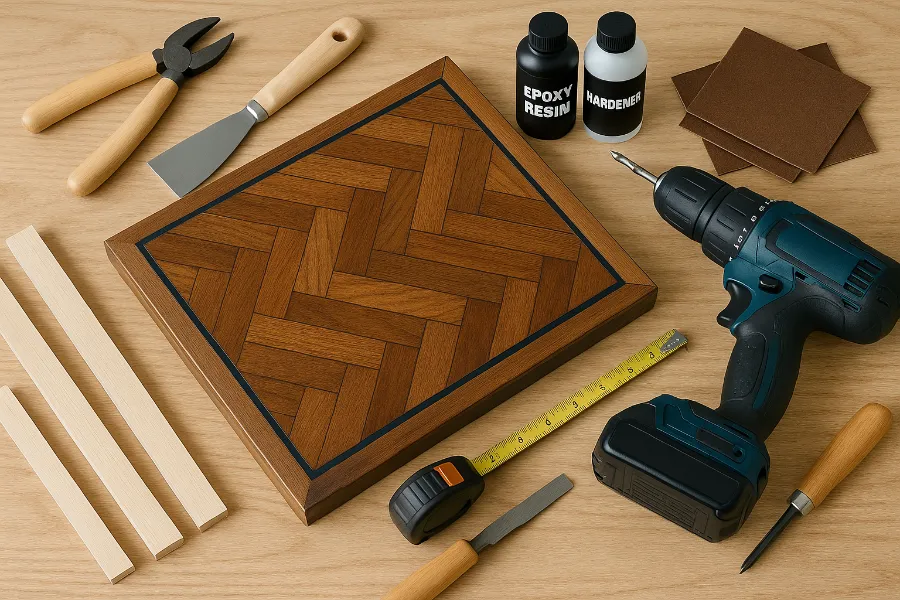
Step 4: Pour Epoxy Resin
This is the step that elevates an inlaid wood desktop from handmade to professional. Epoxy resin seals the wood, smooths out imperfections, and gives the surface a durable glass-like finish.
Steps for pouring resin:
- Seal the wood with a thin layer to prevent bubbles.
- Mix resin and hardener thoroughly.
- Pour slowly across the desktop, letting the resin self-level.
Step 5: Eliminate Air Bubbles and Cure
Air bubbles are the enemy of a flawless surface. Use a heat gun or torch to sweep lightly across the resin, popping any bubbles that rise. Let the surface cure for 24–48 hours, depending on product instructions. Patience here pays off with a desk that looks professionally made.
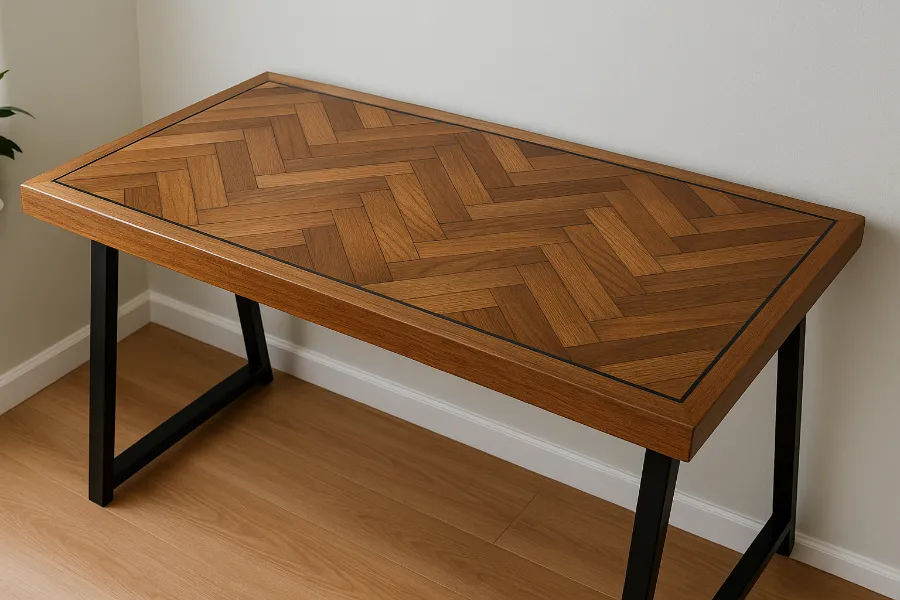
Final Setup and Integration
Once cured, the inlaid wood desktop can be mounted on your choice of desk legs or frame. Sleek black metal legs create a modern look. Traditional wooden legs keep the piece warm and classic.
Consider styling it with:
- A minimalist lamp that allows the desktop to shine.
- Cable management trays to keep the surface clutter-free.
- A few decor pieces — plants, coasters, or books — that echo the design colors of your inlay.
The Value of Crafting an Inlaid Wood Desktop
Building an inlaid wood desktop isn’t just about having a surface to work on. It’s about creating something that merges artistry with utility. The process teaches patience, attention to detail, and rewards you with a one-of-a-kind piece that no mass-produced desk could replicate.
Whether you’re tackling this as a weekend project or commissioning a custom build, the final result is a workspace centerpiece that makes sitting down to work feel inspiring every single day.
Final Thoughts
A desk is where big ideas take shape. By crafting an inlaid wood desktop, you’re giving yourself more than just furniture — you’re creating an environment that encourages focus and creativity. The inlays tell a story. The smooth resin finish whispers of hours spent in careful crafting. And the final product? It speaks loudly of who you are and how you work.
If you’ve been searching for a project that bridges craft and function, this is it. The inlaid wood desktop is not only a conversation starter but also a surface you’ll use daily, and proudly so.
")


")
")
")
")

")


")


