Yesterday, I shared how I revamped Ikea wall lights for our master bedroom, and today, I’m excited to bring you another simple yet impactful DIY project. If you’re looking for a unique and visually striking way to display your favorite memories, wood mounted photo art is the perfect solution! Not only does it elevate the look of your photographs, but it also adds a rustic, artistic touch to your decor.
The best part? Once you have your materials, you can complete this project in under an hour!
Why Wood Mounted Photo Art?
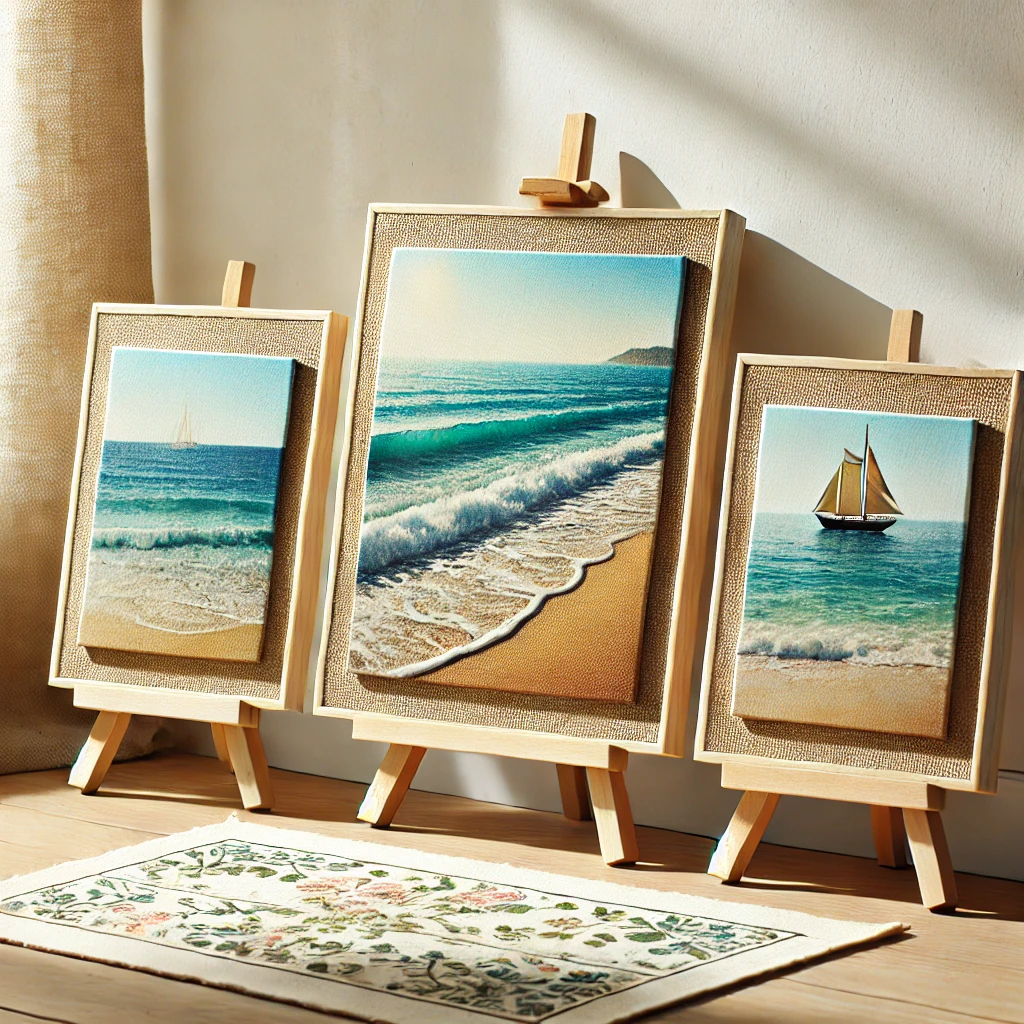
Framed photos and canvas prints are beautiful, but sometimes you want something that feels a bit more like a true piece of art. I recently framed some of my favorite snapshots from our trip to Hawaii for our travel gallery wall in the basement. While I love having those memories on display, I don’t spend much time in the basement since it’s mostly the kids’ space. That’s when inspiration struck—I wanted to see those beautiful Hawaiian landscapes every single day!
If you follow me on Instagram (and if not, let’s connect!), you may have seen a stunning wood-mounted display I stumbled upon while Christmas shopping at the mall. Instantly, I knew I had to create my own version. This project is not only affordable but also a fun way to personalize your home decor. The results were so incredible that I already have another one in the works!
How to Make Your Own Wood Mounted Photo Art
Materials Needed:
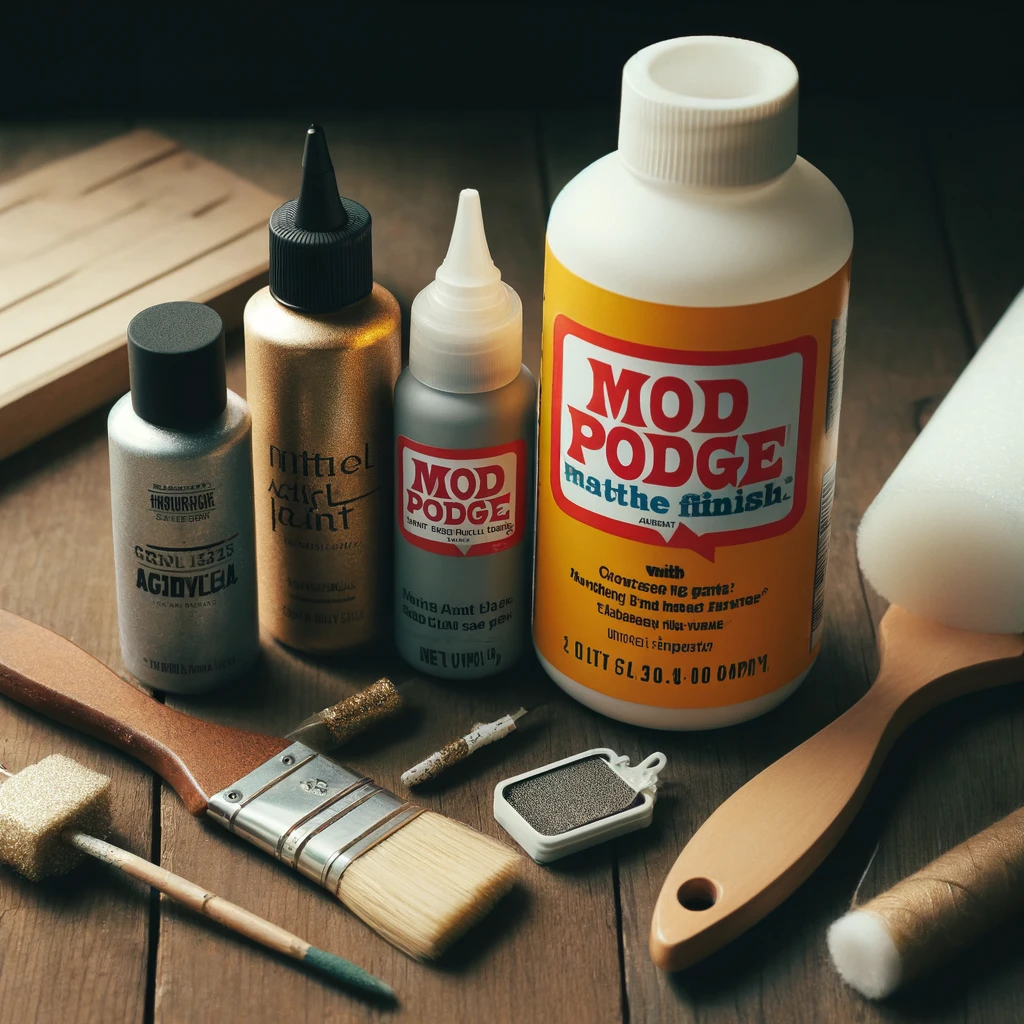
- Photo poster (details below)
- Wood board (details below)
- Acrylic paint (for the edges)
- Mod Podge, matte finish
- Foam brush OR brayer
- Nylon bristle brush
- Sandpaper
- D-ring and screws (for hanging)
Step 1: Selecting and Printing Your Photo
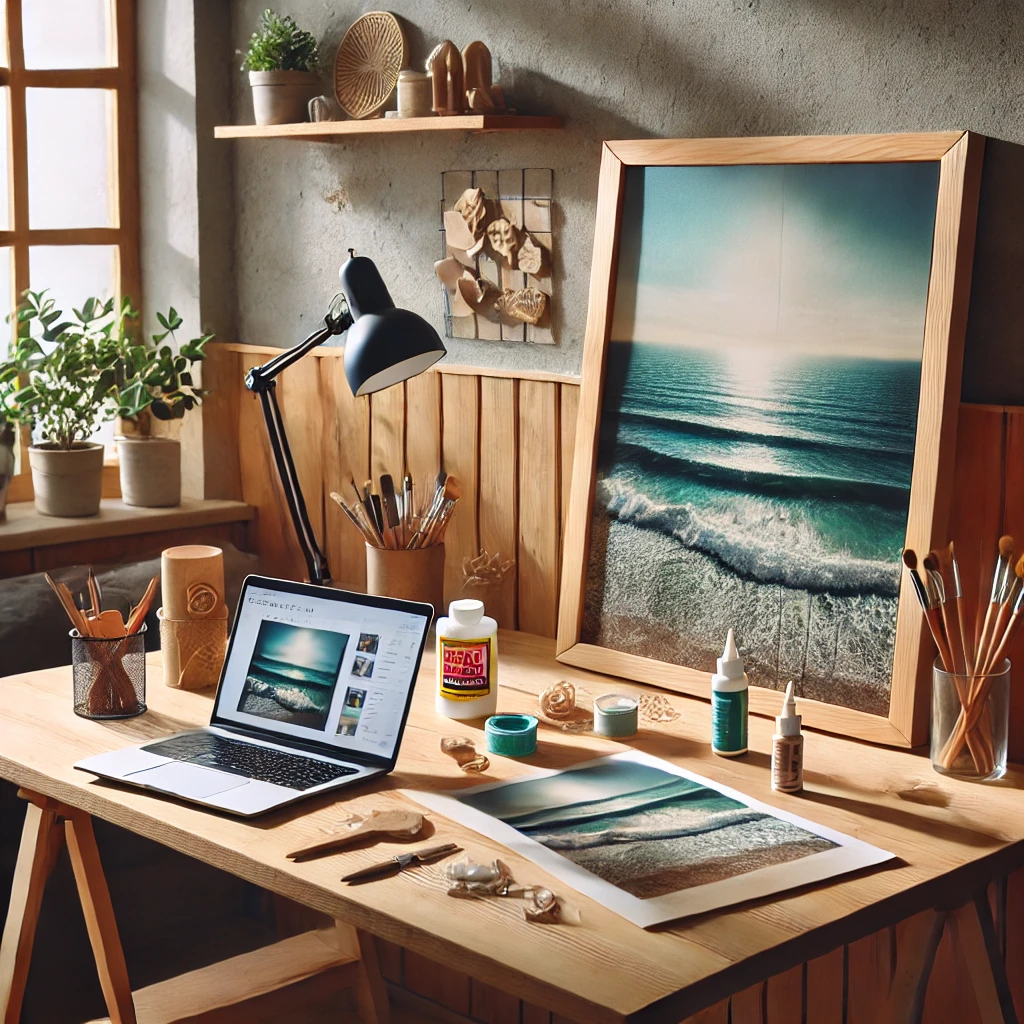
The first step in creating wood mounted photo art is choosing the right image. It could be a breathtaking landscape, a cherished family photo, or even abstract art. Once you’ve selected your image, you’ll need to have it printed as a poster.
I uploaded my photo to the Staples website and selected same-day pickup at my local store. I went with an 18″x24″ poster for $20.99, though since then, Staples has had 50% off sales! If you’re not in a rush, you can find great deals online.
Other excellent printing options include:
- AdoramaPix: 16″x20″ for $9.60, up to 20″x30″ for $18.00 (plus shipping)
- Snapfish & Shutterfly: Reliable quality and frequent promotions
Pro Tip: Be cautious with same-day printing at places like Walmart and Walgreens, as the quality can sometimes be subpar.
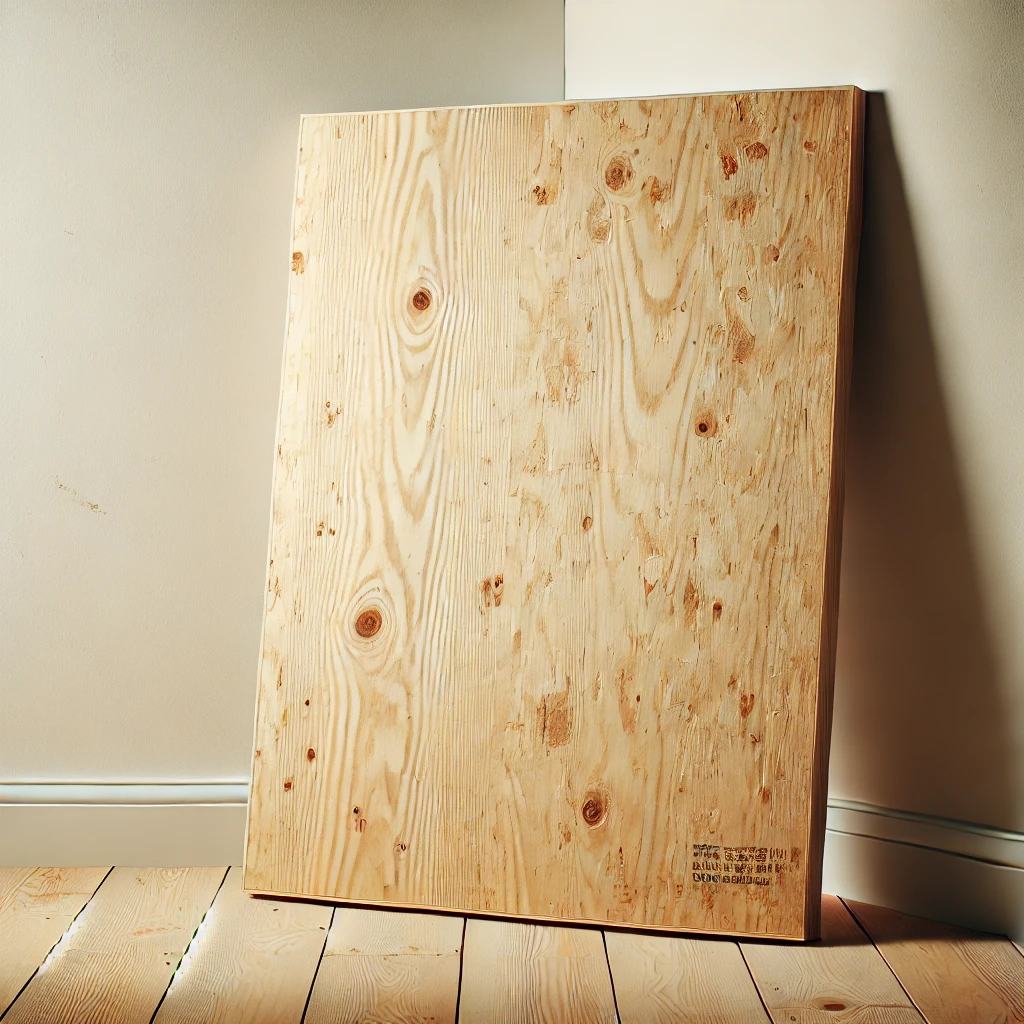
Step 2: Choosing Your Wood Board
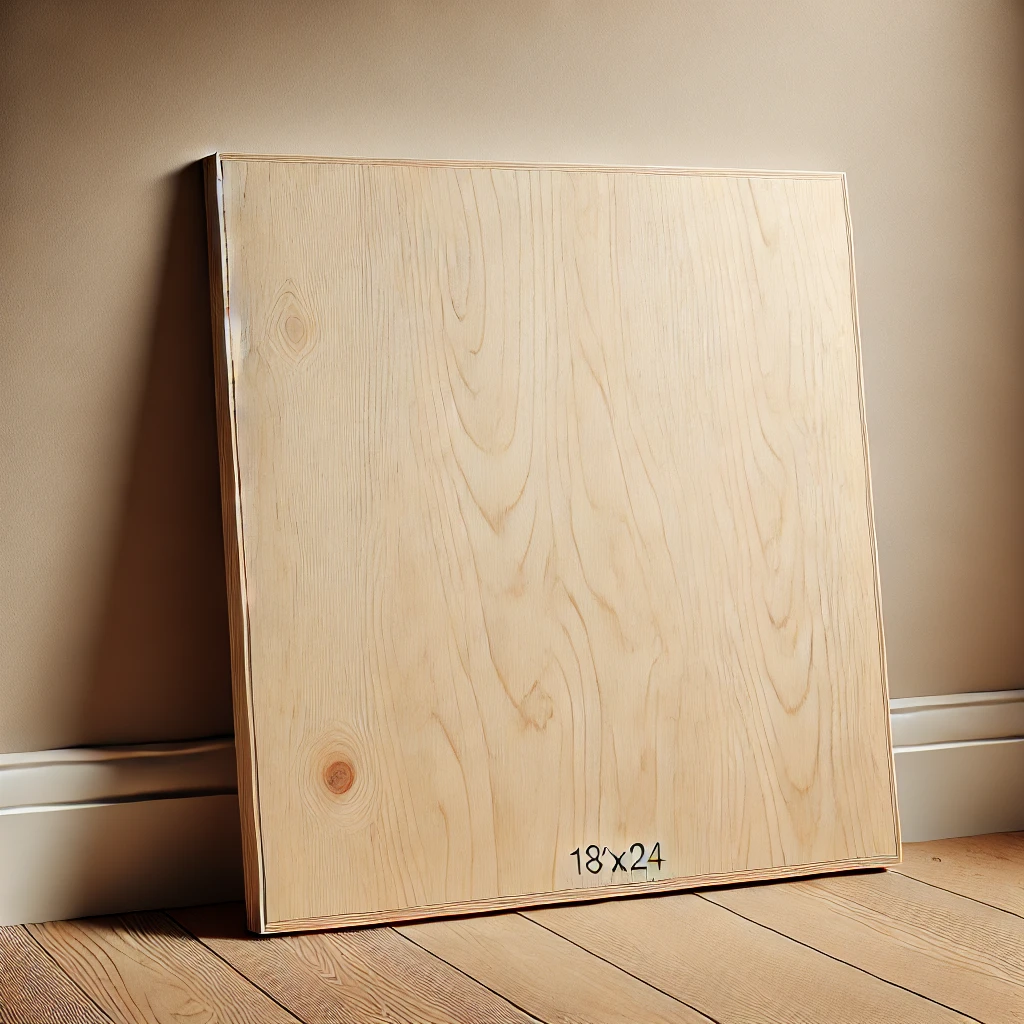
Your wood mounted photo art needs a solid base. I chose an 18″x24″ birch plywood board, which I had cut from a 24″x24″ sheet at Lowe’s for under $8. Birch is ideal because it has a smooth surface and clean edges, making it perfect for mounting.
Step 3: Preparing the Woodpodge
- Sand the board – Smooth out the surface and edges to remove any roughness.
- Wipe clean – Use a dry cloth to remove dust.
- Paint the edges and perimeter – Apply 3-4 coats of acrylic paint. The drying time is quick, so this step won’t take long!
Pro Tip: Sometimes, posters may not be an exact match to their advertised size. My 18″x24″ print was slightly smaller (17.75″x23.75″), which I initially found frustrating. However, after painting the edges, I loved how it framed the photo beautifully!
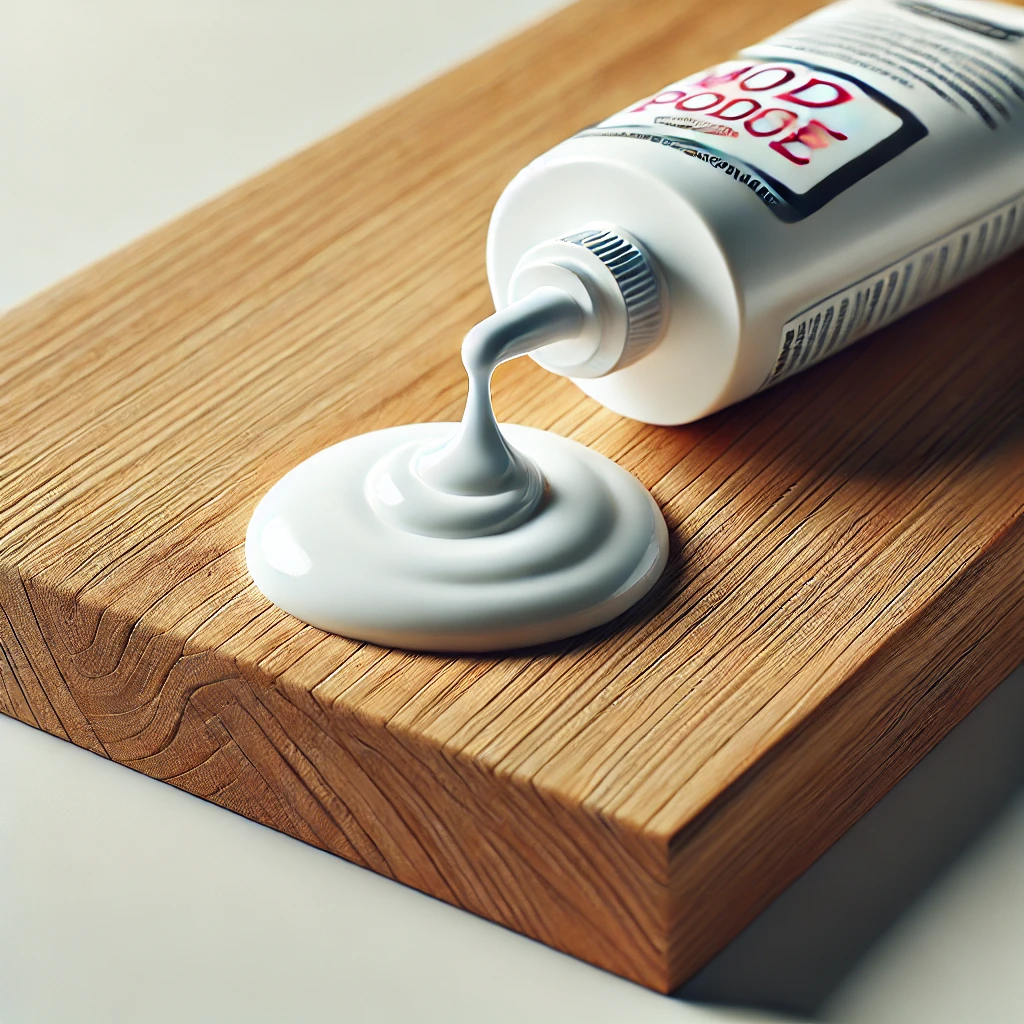
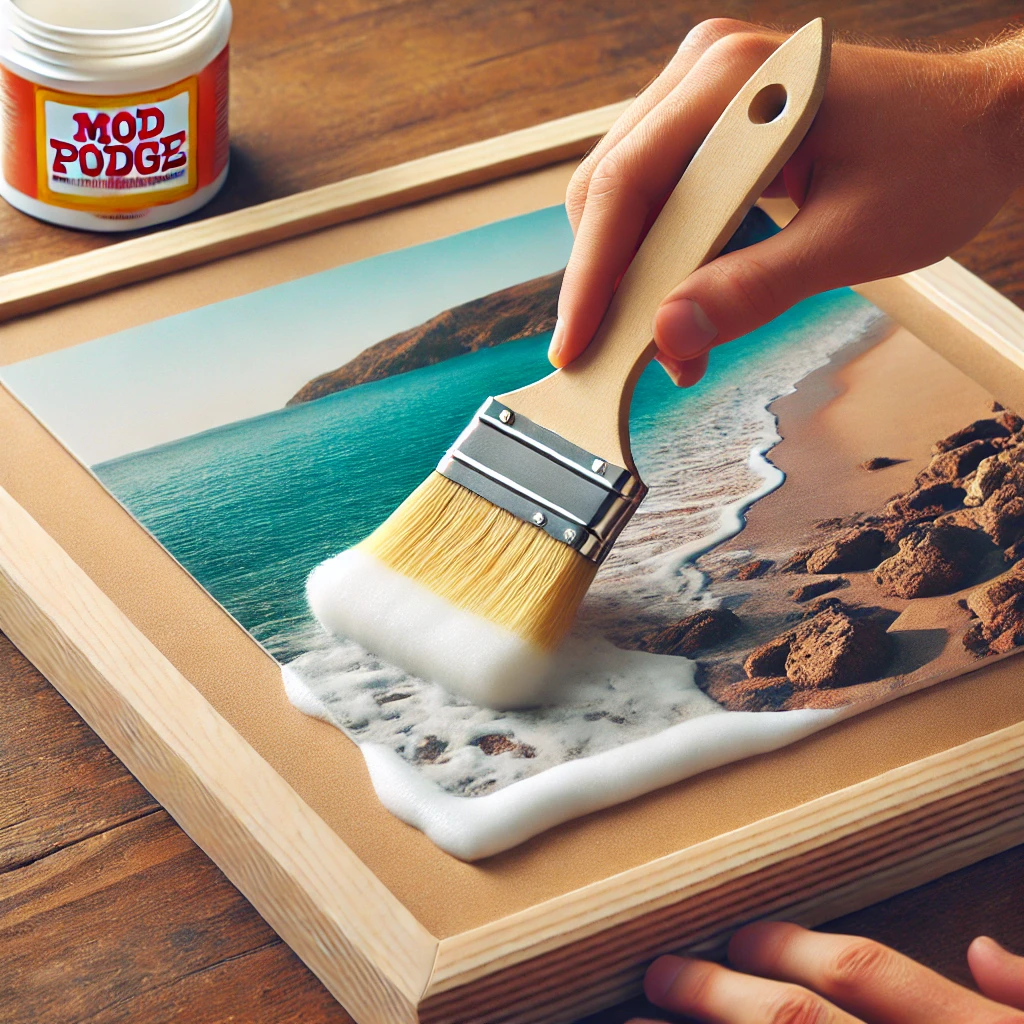
Step 4: Mounting Your Photo

- Apply Mod Podge to the board – Pour a generous amount onto the surface and spread it evenly using a foam brush or brayer. Be sure to wipe any excess back into the bottle.
- Carefully place your photo – Align the edges as precisely as possible. You can adjust it slightly, but be mindful that Mod Podge sets quickly!
- Seal the edges – Add a little extra Mod Podge around the perimeter to ensure a secure hold.
- Smooth out air bubbles – Use a clean foam brush or a brayer to press the image firmly onto the wood.
Step 5: Sealing the Photo
- Pour another layer of Mod Podge on top of the photo – This will create a protective seal and add a subtle texture to the surface.
- Use a nylon bristle brush to spread it evenly – Avoid foam brushes at this stage, as they tend to break down and leave tiny black particles in your finish (ask me how I know!).
- Tip for smooth application – Keep a bowl of water and paper towels nearby. If the Mod Podge starts drying too quickly, dampen your brush slightly to extend your working time.
Pro Tip: Don’t stress over small imperfections! A little texture adds depth and enhances the way light interacts with the image, giving it a true artistic quality.
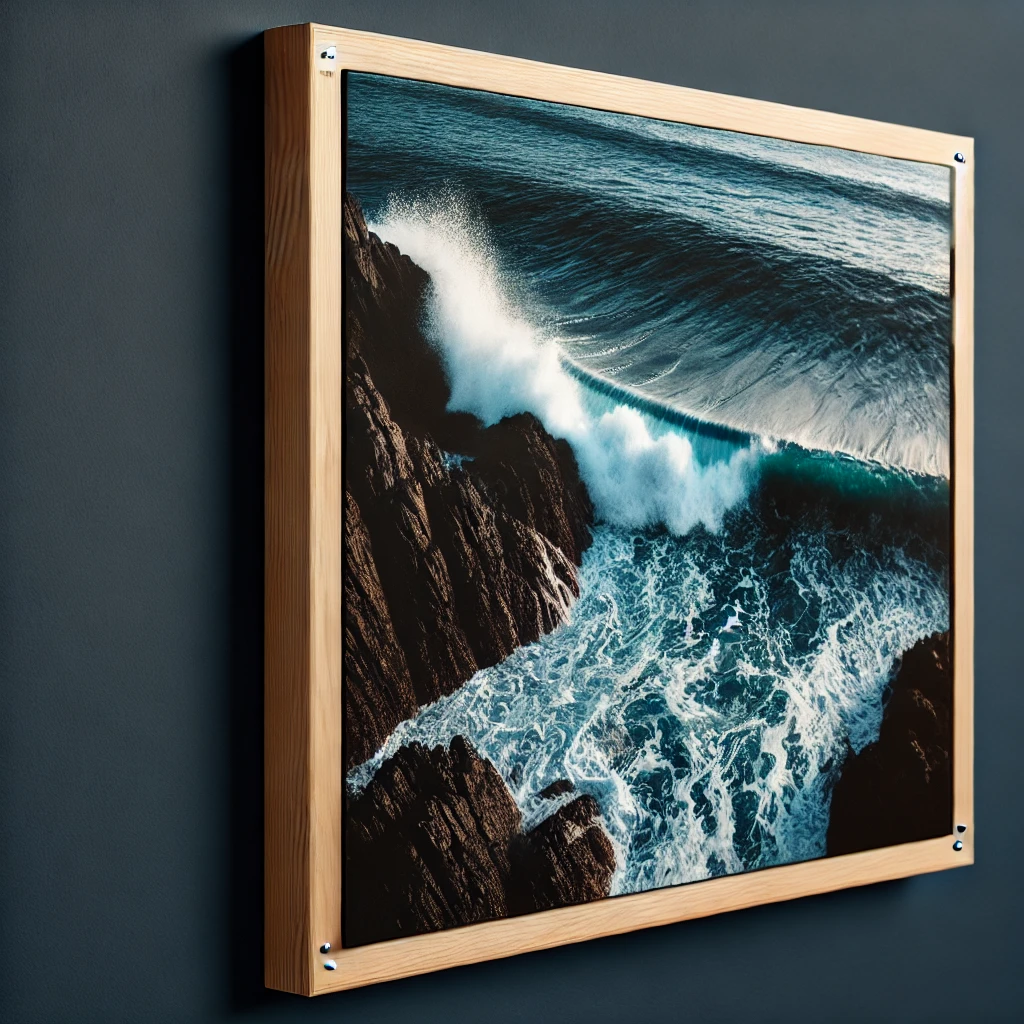
Step 6: Let It Dry and Hang Your Art!

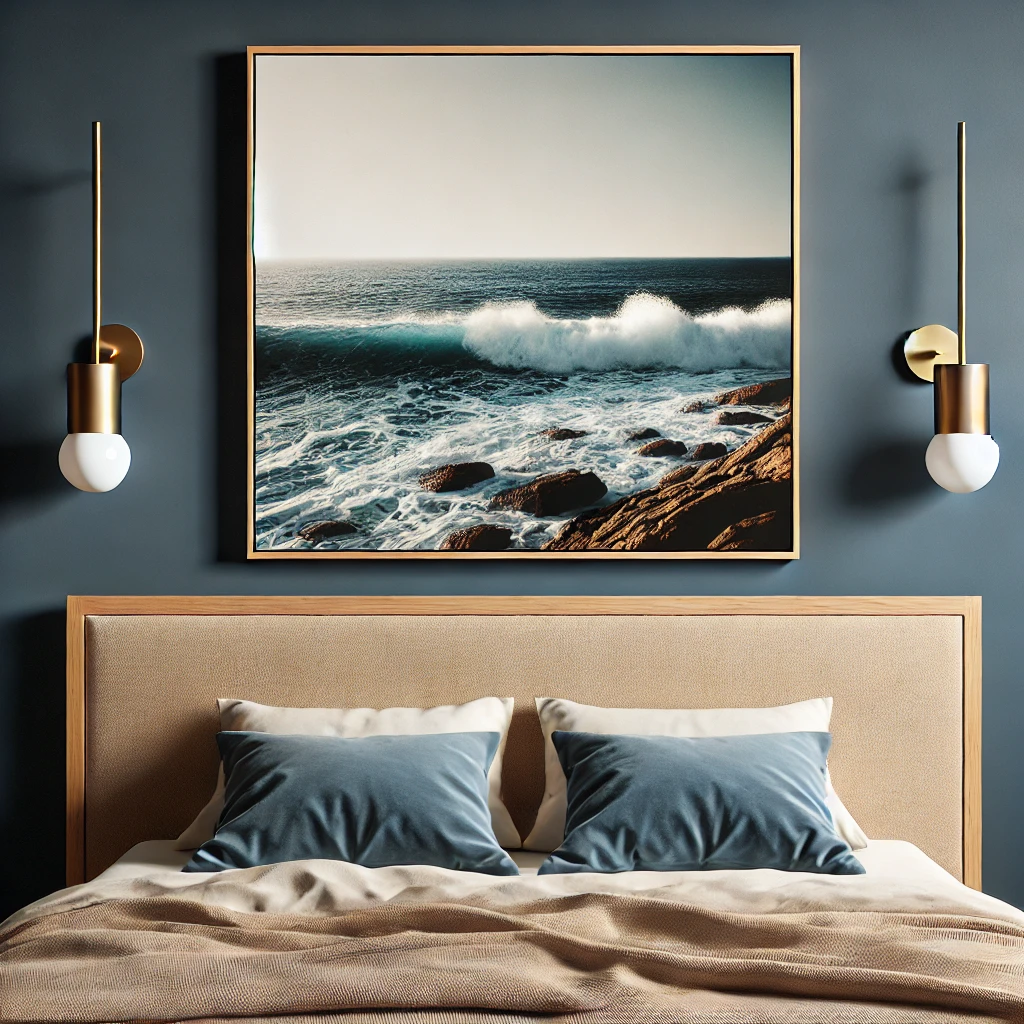
Once fully dry, attach a D-ring to the back for easy hanging. And just like that, your wood mounted photo art is complete! From start to finish, this entire project took me less than an hour, and the results are absolutely stunning.
Admiring the Beauty of Nature Through Art

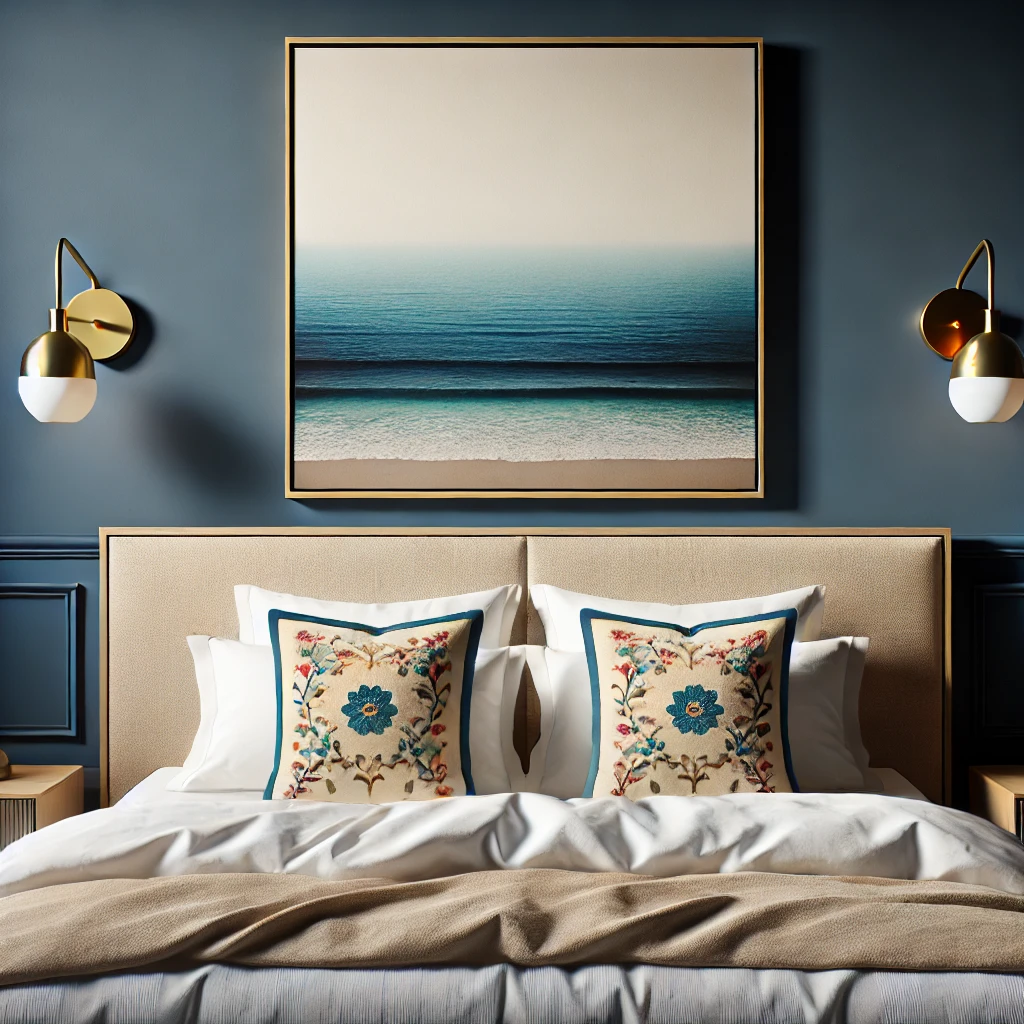
Every time I look at this piece, I am reminded of how breathtaking Hawaii is. The glistening black lava rocks, the shimmering turquoise waters—it’s like a little window into paradise. Honestly, I believe nature is God’s most incredible masterpiece, and I feel blessed to have experienced it firsthand.
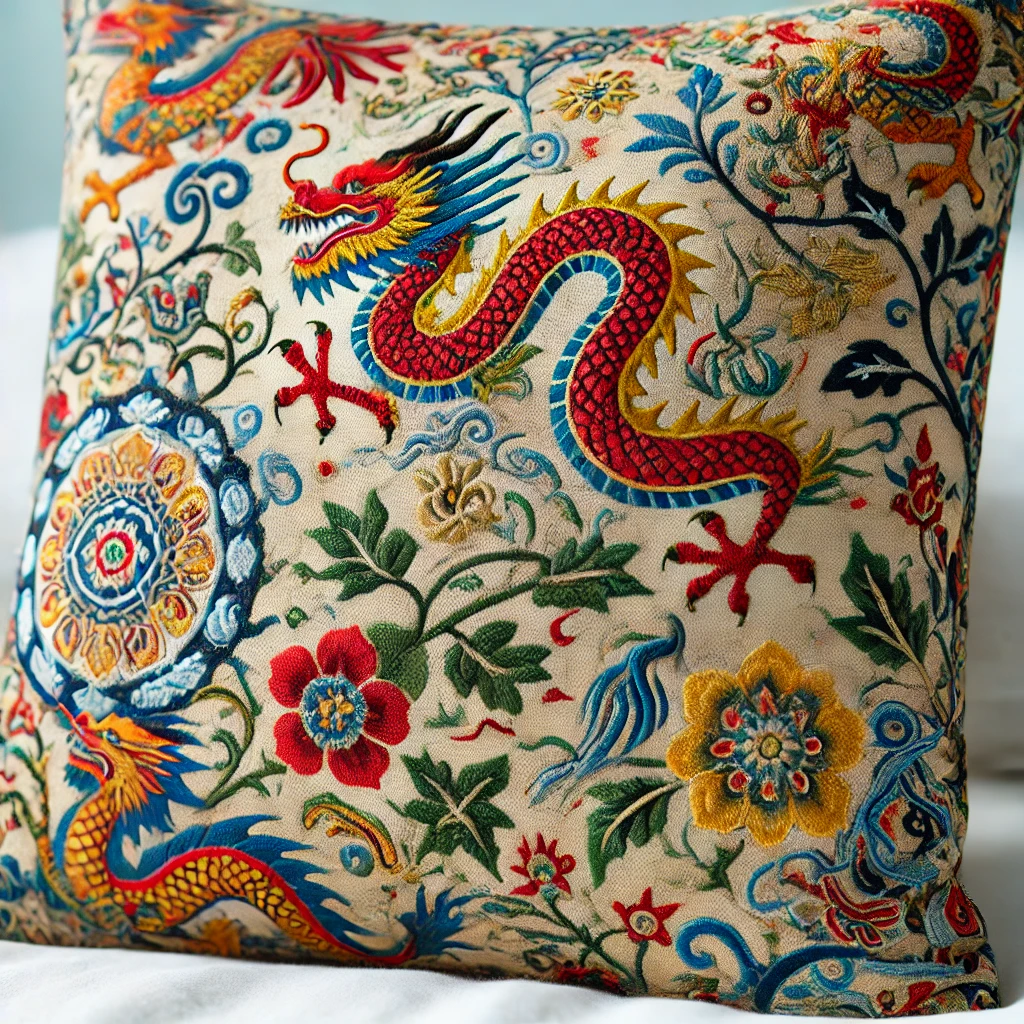
Interestingly, the ocean tones in my print mirror the shades of my Aquamarine Chiang Mai Dragon pillow, which I previously used in my living room decor. While I’m still deciding whether to keep the pillow in the bedroom, I do love the vibrant pop of color it brings to the space during winter.
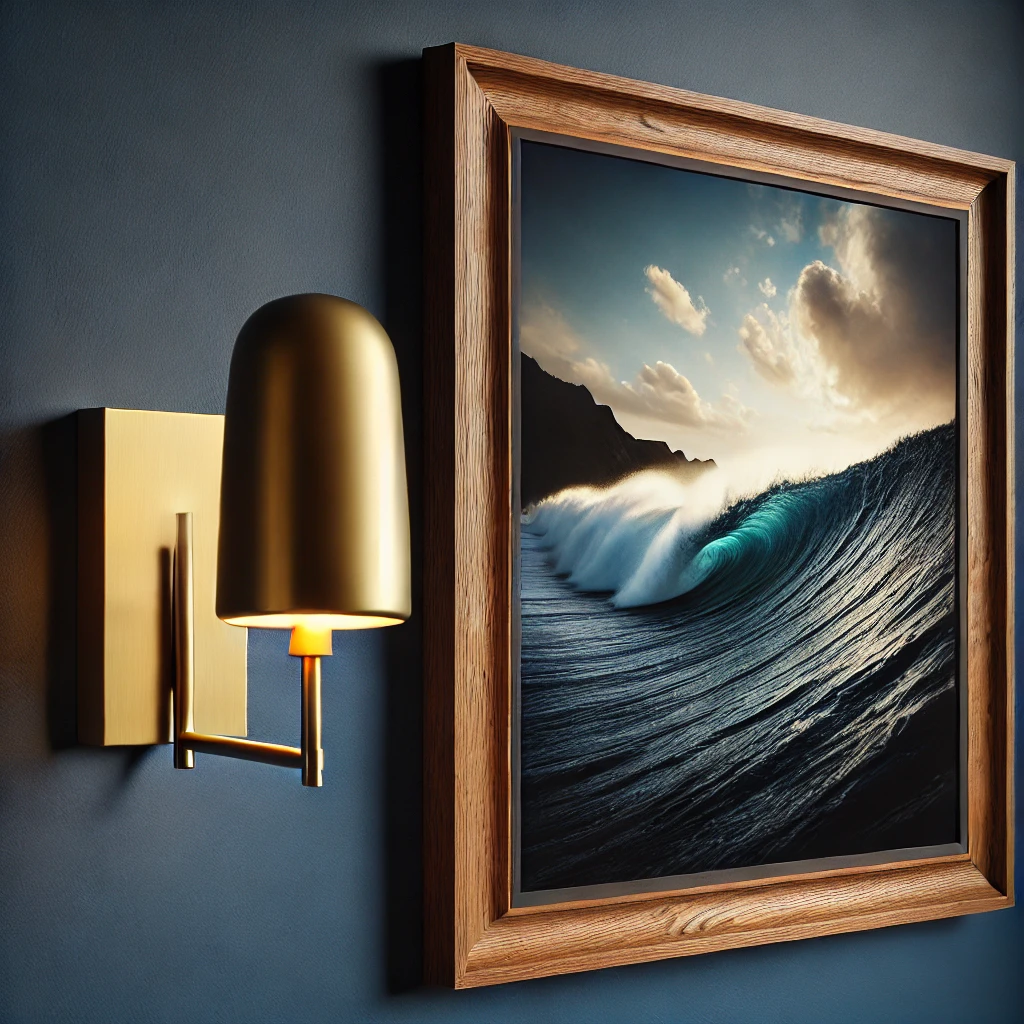
And can we talk about the mix of metals in my decor? I love how the different finishes brass, gold, and silver add even more character to the room.
Final Thoughts & Another Fun Project
After years of saving and planning, our trip to Hawaii was a dream come true. Seeing this photo every day reminds me of that sense of adventure, gratitude, and joy, even on days when life feels overwhelming.
The best DIY projects are those that are affordable, simple, and meaningful and wood mounted photo art is exactly that! If you’re looking for another creative way to display photos, check out my tutorial on tracing paper and tissue paper canvas art.
By the way, Staples is still running their 50% off poster sale so I’m off to create another masterpiece! If you try this project, send me a picture—I’d love to see your creations!
Have a wonderful day, my friends!
My Uncommon Slice of Suburbia


