There are certain moments in DIY life that send a tiny shock straight to your soul. For me, one of those moments is when I’m standing there, paint can in hand, fully convinced I’m about to create a smooth finish only to watch the surface wrinkle, bubble, or crinkle like it suddenly aged 40 years in 40 seconds. If you’ve ever experienced spray paint crinkling, you know exactly what I mean. It’s the kind of thing that makes you wonder why you didn’t just spend your day reading about beginner mistakes in garage DIY projects instead of learning them the hard way.
The first time this happened to me, I stared at the paint like it personally betrayed me. The finish looked like a dried-up riverbed cracked, wrinkled, ugly. I assumed the can was bad or expired. Turns out, spray paint is just more dramatic and sensitive than I expected. Once I understood the reasons behind spray paint crinkling, everything started to make sense. A lot of it even ties back to how coatings behave on a chemical level, something I later found.
When the Bottom Layer Isn’t Dry
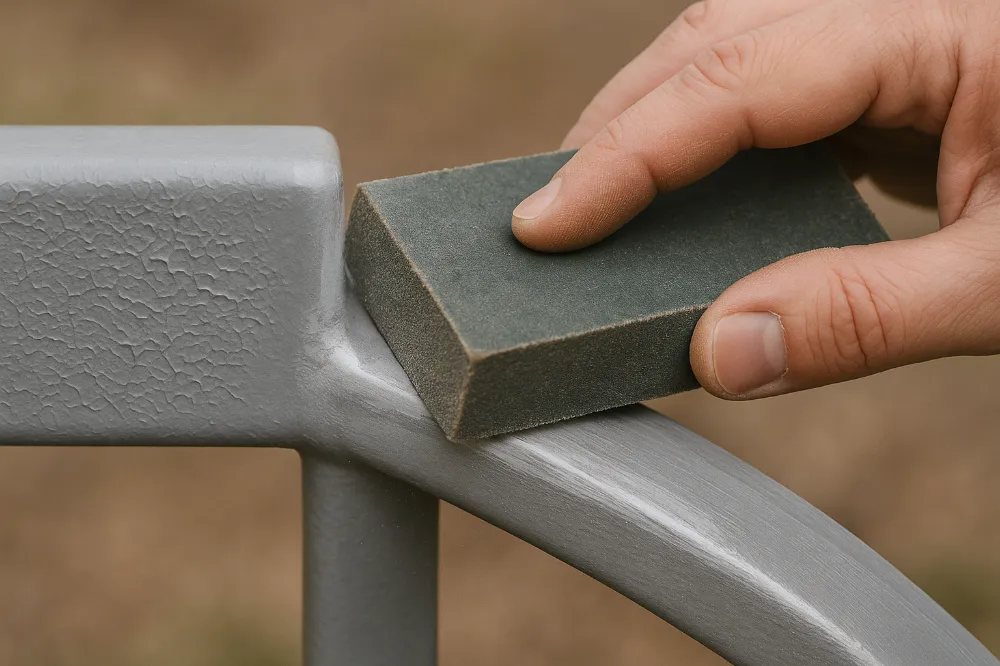
If there were a rulebook for how to prep surfaces for painting projects at home, this would be rule #1: let the bottom layer dry completely. Spray paint dries from the outside in, meaning the surface feels dry even when the bottom is still soft. Add a second layer too soon, and the solvents from the new coat attack the soft layer below, causing swelling and crinkling. It’s like putting on a second coat of nail polish too early it will smudge, buckle, and look uneven.
Thick Coats Are Trouble
Back when I was convinced that “more paint = better coverage,” I would blast one heavy coat instead of applying multiple thin ones. This is how I learned that thick paint traps solvents, which dry unevenly and cause wrinkles. It’s the same outcome as ignoring step-by-step sanding techniques for smoother finishes you think you’re saving time, but you’re actually guaranteeing more work later. Thin coats always win.
Temperature and Heat Ruin Paint Jobs
One summer I painted in a hot garage and instantly ruined an entire project. I assumed heat would help it dry faster. Nope. It dried too fast, sealing the top layer while the bottom remained soft. As the trapped solvents tried to escape, the surface wrinkled. Cold weather does the opposite paint dries slowly, creating a rubbery surface that doesn’t bond properly. Spray paint really does want the best temperature range for outdoor DIY projects, usually between 50°F and 90°F. Anything outside that range is risky. The U.S. National Weather Service even directly emphasizes how humidity and temperature affect surface drying rates, and that alone changed how I plan painting days.
Humidity: The Silent Saboteur
Humidity is a sneaky enemy. High humidity traps moisture in the air and slows solvent evaporation. Even when a surface looks dry, there may be microscopic moisture on it. When spray paint tries to bond over that moisture, wrinkles appear. It connects perfectly with what I learned about how humidity impacts home improvement projects moisture interferes with adhesion more than most people realize.
When Old and New Paint Fight
Mixing different types of paints can cause lifting a dramatic form of crinkling. The solvents in the new paint soften the old layer, making it buckle. This is where knowing how to fix damaged surfaces before repainting really becomes valuable. When in doubt, I always use a primer barrier coat before applying new paint.
Dirty or Oily Surfaces Cause Chaos
I once repainted a kitchen handle and only half of it wrinkled. That half happened to be the area I had touched with my fingers before painting. The oils caused instant adhesion failure. This reminded me how important best cleaning methods before starting DIY crafts really are. Even invisible residue can ruin paint. Now I clean everything with alcohol or degreaser and degreasing tips for household DIY repairs.
Old Spray Paint Behaves Badly
Spray paint ages. Solvents separate. Nozzles clog. The paint thickens. Old paint dries unevenly and causes wrinkling, the same way why old tools affect project results shows you that not all older equipment performs the way it used to. Now if a can sputters, sprays unevenly, or feels thick, I replace it.
When You Skip Primer
Some surfaces plastic, metal, gloss finishes absolutely require primer. Otherwise, the paint doesn’t grip, and the finish wrinkles. Skipping primer feels a lot like ignoring common problems when restoring vintage items the surface will betray you if it’s not prepared.
Poor Shaking Technique
Spray paint needs at least a full minute of shaking. If you don’t shake long enough, the solvents and pigments remain uneven. That imbalance causes uneven drying, which leads to wrinkling. It’s a small detail that plays a bigger role in how to prep surfaces for painting projects at home than most people think.
Wrong Surface Type
Certain surfaces expand, contract, or repel paint, such as glossy tiles, unsealed wood, or flexible plastics. These conditions cause the paint film to dry unevenly. Learning how to choose the right primer for difficult surfaces helped me avoid a lot of these issues.
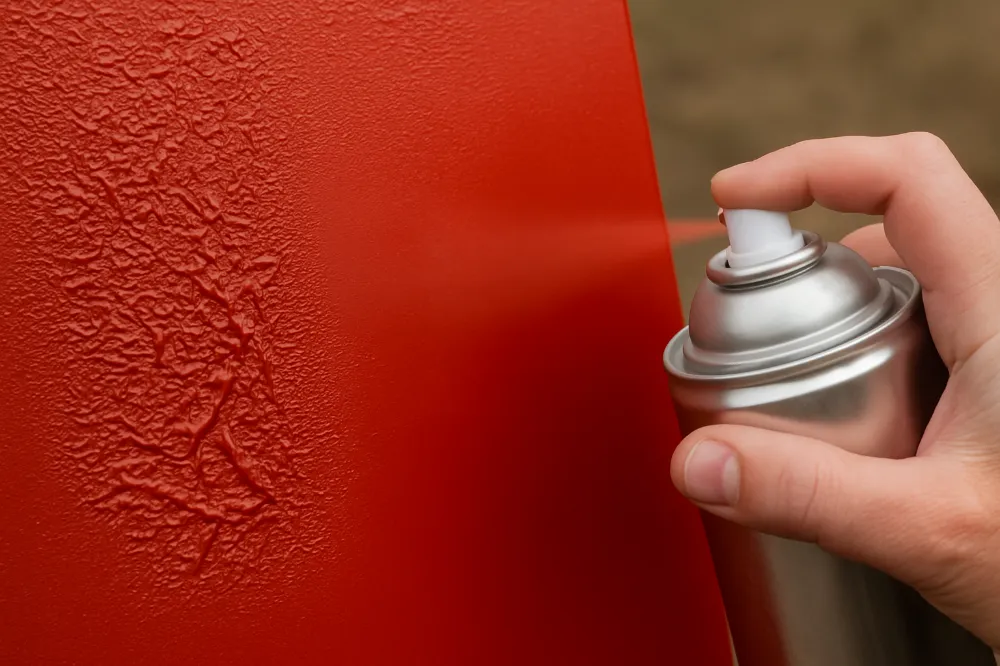
Spraying Too Close
Distance matters. Too close and the paint pools. Too far and it partially dries mid-air. Pooling leads to uneven drying and wrinkling. I stick to the recommended 8–12 inches now.
The Science Behind Wrinkles
Spray paint cures through solvent evaporation. If the top layer dries before the bottom, pressure builds beneath the surface. That pressure distorts the paint film, creating wrinkles. Understanding this made me more patient and precise, especially with tips for repainting old metal furniture safely and even why patience matters in home renovation tasks.
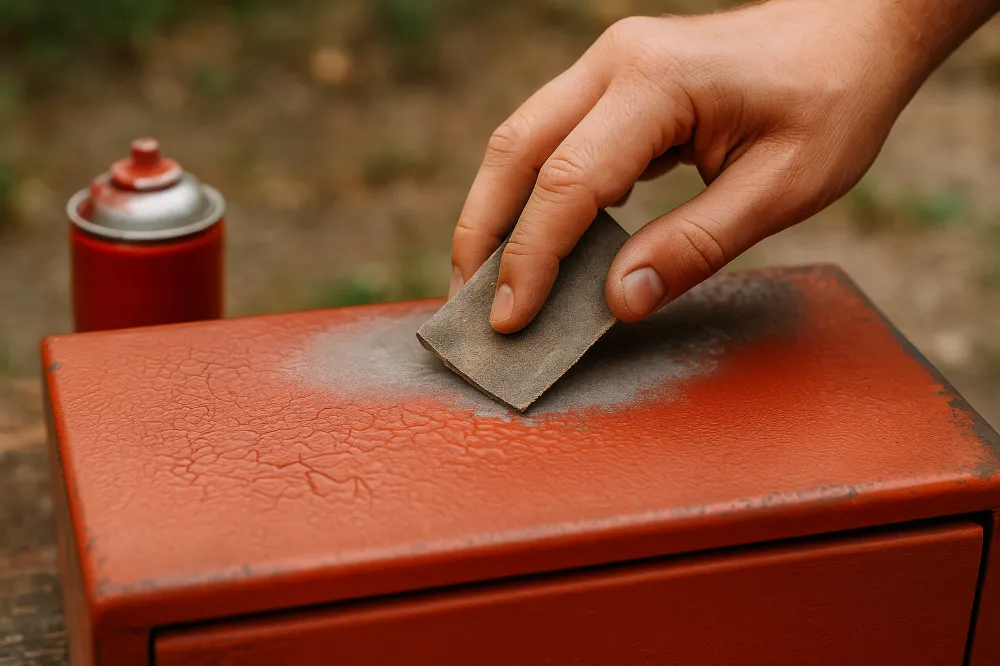
Fixing a Crinkled Paint Job
Once paint wrinkles, you can’t smooth it out. The only solution is sanding everything back down, cleaning it, priming if necessary, and repainting. This process mirrors how to fix damaged surfaces before repainting, which I’ve had to do more times than I’d like to admit.
Final Thoughts
Spray paint crinkling isn’t random it’s a reaction to something in the environment, the surface, the paint layers, or the application method. But once you understand these causes, you can avoid most mistakes entirely. Improving my process helped me get smoother results and even feel confident explaining how to work with unpredictable weather when painting or guiding someone through how to repaint kitchen hardware for a fresh look without repeating the same errors. Spray paint isn’t difficult it just demands proper prep, the right timing, and a little respect for the conditions around you.
FAQs
It usually happens because the previous layer wasn’t fully dry or the coat was applied too thick.
Yes. High humidity slows drying and traps moisture, which leads to wrinkling and uneven curing.
Absolutely. Cold temperatures prevent proper solvent evaporation, causing the surface to wrinkle.
Old or partially separated paint can spray unevenly, leading to inconsistent drying and crinkling.
Plastic needs a primer designed for adhesion. Without it, the paint can’t bond properly and wrinkles.
Yes. Applying a new paint formula over an old, incompatible one often causes lifting and wrinkling.
You need to sand the area smooth, clean it, prime if necessary, and reapply thin coats.
Generally 8–12 inches away is ideal to prevent heavy, wet coats that wrinkle while drying.
Yes. Oils interfere with adhesion, creating uneven drying and texture issues.
Follow the can instructions, but most spray paints need either a recoat within 1 hour or after 24–48 hours.


