I am a museum-trained leather conservator and practicing leather technologist. I routinely work with handbags for private collectors, resellers, and institutional archives. I also collaborate with Leather Repair Gallery on complex treatments where lab-grade tools and extended bench time are required.
I have no affiliation with Chanel; all trademarks belong to their respective owners. What follows is not a sales pitch. It is a conservation-grade case study: minimum-intervention, as reversible as possible, documented step by step.
The Bag & Its Context
Model and era
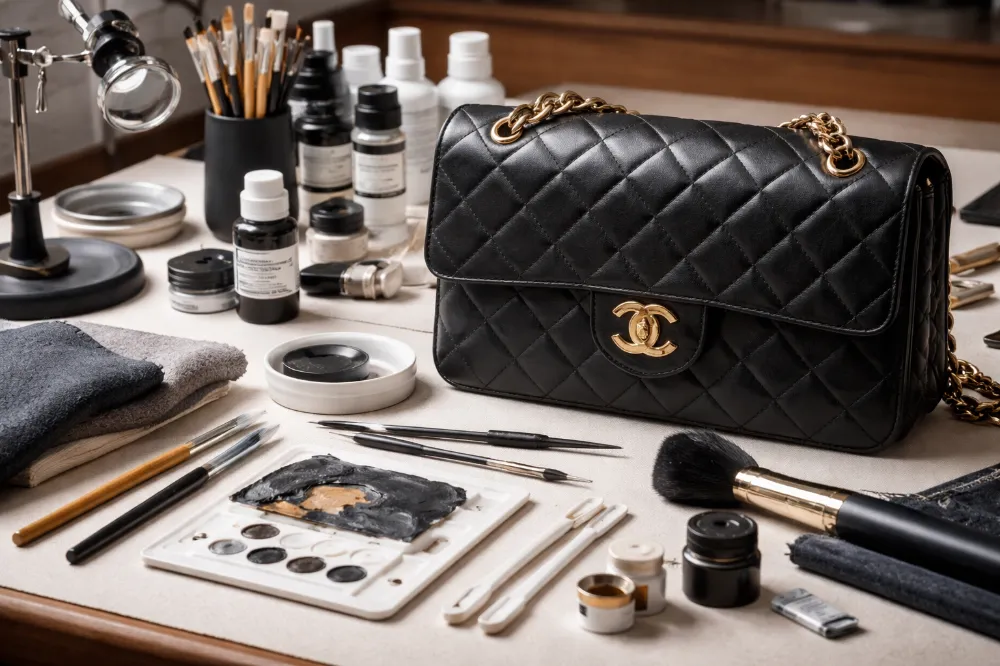
The case: a Chanel Classic Double Flap, Medium size, black lambskin, gold-tone hardware, vintage, estimated around late 1980s–early 1990s based on serial range and construction details. This is the archetypal black diamond-quilted flap with leather-woven chain.
The bag arrived with a very familiar cluster of issues for vintage Chanel lambskin:
- corner abrasion with pale “halo” showing through;
- generalized rub and dullness on the back pocket and base;
- scattered nail scratches on the front panel;
- fatigued edge coat on flap edges;
- deflated quilting on the front and base;
- softened shape from years of storage without stuffing;
- mild tarnish and micro-scratches on the CC turn-lock and chain.
The owner bought the bag pre-loved about a decade ago and stored it in a soft dust bag, but without stuffing and near a window, which led to slight UV-related tone shift on the front and flap.
Lambskin vs caviar — why it matters
Chanel lambskin:
- Very soft hand with a fine, tight grain.
- Shallow protective film (thin polyurethane/acrylate topcoat).
- High sensitivity to:
- friction (especially corners, back pocket, flap edge);
- dye transfer from dark denim or jackets;
- moisture and rapid humidity swings.
Chanel caviar (grained calfskin):
- thicker, more structured hide;
- heavier, more resilient finish layer;
- more tolerant of gentle household-level cleaning.
This means that methods that are “safe enough” on caviar (more vigorous cleaning, mildly abrasive cloths, heavier coatings) can be destructive on lambskin leading to stiffness, cracking, or the “plastic repainted” look.
What makes lambskin different from caviar
- Lambskin has less “spare” coating. Every cleaning or recolor eats into a limited margin.
- It stretches and creases more readily, so poor re-humidification and pressing leave permanent distortions.
- Ethically, lambskin Classic Flap restoration should favour spot stabilization and in-painting, not blanket repainting.
Intake and previous DIY
On intake I always ask about:
- storage (stuffed or collapsed, in box or open shelf, near heat or light);
- DIY care (creams, wipes, conditioners, “magic erasers”);
- usage pattern (occasional, daily, humid climate, heavy crossbody use, etc.).
In this case, the owner had:
- applied a general clear shoe cream over the front and corners;
- occasionally wiped the back with household “gentle” wipes;
- stored the bag unstuffed in a cloth bag.
The good news: no silicone dressings, no saddle soap, no alcohol-based stain removers. The damage was mostly mechanical wear plus time, not chemical burns.
Diagnostics & Treatment Planning
How I examine a vintage Chanel Classic Flap
Before I touch any cleaner or pigment, I go through a non-negotiable diagnostic workflow:
- Magnification (3–10×)
To locate micro-cracks in the finish, feathering edges on old recolours, loose edge coat, and hidden cuts. - Raking light and multiple angles
Side light reveals texture: broken grain, depressed quilting channels, shiny friction spots, and previous over-polishing. - Colour mapping
I map out base tone and undertone. Many vintage black lambskins read as a slightly warm, smoky black, not a cold “printer black”. This matters when we in-paint. - Behaviour under minimal moisture
In an inconspicuous area (under the flap) I test a pH-appropriate, neutral cleaner to see whether pigment lifts, the surface blushes, or the topcoat softens. - Fiber strength cues
On corners and the flap crease I assess how the leather flexes: crisp (healthy), papery (dehydrated), mushy (over-oiled).
Everything is documented with before notes and test notes. Only after this do I propose options.
Decision matrix: stabilize, stabilize + tone, or go cosmetic
I always present a clear decision matrix to the client:
- Stabilize only
- Priority: slow or stop further deterioration, keep full historical patina.
- Actions: meticulous dry and low-moisture cleaning, fiber consolidation where needed, minimal hardware refresh.
- Aesthetic change: subtle; defects remain visible but better managed.
- Stabilize + selective toning (in-painting)
- Priority: preserve character while removing the visual “shout” of exposed corners and bare patches.
- Actions: as above + spot lambskin color touch-up / in-painting on corners, edges, and high-rub zones.
- Aesthetic change: smoother, more uniform read at arm’s length, patina still visible up close.
- Full cosmetic emphasis
- Priority: maximum visual homogeneity, often for display or strong resale positioning.
- Actions: broad colour work, extended edge-coat reconstruction, possible Chanel hardware replating on removable elements, more aggressive geometry reshaping.
- Aesthetic change: “prettier” on screen, but closer to resto-mod than conservation.
For this bag, the owner chose Option 2: stabilization + selective toning, plus limited edge work and shape correction.
Contraindications and red flags
For lambskin in particular I flag the following as no-go:
- saddle soap, glycerine soaps, and anything with lanolin or heavy fats;
- household wipes, alcohol-based cleaners, stain pens;
- “magic eraser” sponges or any medium-to-hard abrasives;
- petrol- or acetone-based solvents;
- heavy oiling or “feeding the leather” with neatsfoot or mink oil;
- blanket spray recolours.
These are either chemically incompatible with the original Chanel finish or impossible to reverse without further loss of material.
The Protocol: Step-by-Step Chanel Lambskin Restoration
1. Dry soil removal & controlled cleaning
Goal: Remove loose dirt and film without swelling the leather or pulling colour.
Method:
- Dry cleaning
- Very soft goat-hair or synthetic brush to lift dust from seams and quilting channels.
- Non-linting microfiber to lift surface particulates with minimal pressure.
- Low-moisture cleaning
- A pH-appropriate, non-ionic leather cleaner in water, used at low concentration. No added oils or waxes.
- Applied to the cloth, never directly on the leather.
- Short, linear movements along the grain; immediate follow-up with a dry cloth.
Every new area starts with a test swab under the flap. If I see pigment on the cloth beyond a safe threshold, I adjust or halt.
What I do not use:
- household wipes (even “baby” or “sensitive”);
- all-purpose cleaners and degreasers;
- leather “balsams” and oily dressings at this stage.
Ventilation and basic PPE (gloves, eye protection for decanting, good air flow) are standard lab practice.
2. Colour stabilization & selective toning (in-painting)
Here the brief is “correct the loudest problems, not rewrite the bag’s history”.
Material classes:
- fine-particle leather pigments and dyes in an acrylic or PU-acrylic binder;
- flexible, low-build consolidants for worn corners;
- matting and gloss agents to match original sheen.
Process:
- Colour matching
- Build the main tone: warm or cool black.
- Adjust undertone: does the lambskin lean slightly olive, brown, or blue under daylight?
- Calibrate transparency: lambskin looks best when the original micro-texture still reads through.
- In-painting vs recolouring
- Work only where there is material loss or visually disruptive rub.
- Apply ultra-thin layers with a fine brush, feathering into the surrounding original finish.
- Allow full drying/curing between passes.
- Sheen control
- Chanel lambskin is typically soft satin, not matte rubber or high gloss.
- I adjust the final finish so the repaired zones neither flash nor look “dead” in raking light.
Why in-painting beats full recolor for this lambskin
For thin Chanel lambskin, a full recolor means laying a continuous new film over an already delicate surface. This often fills the natural micro-grain, dampens the supple “break” of the leather, and can create a plastic, uniform sheen that reads wrong in person. In-painting keeps interventions local and layered, so much more of the original finish, patina, and internal flexibility remain intact. You gain visual harmony from normal viewing distance without turning a vintage object into a freshly sprayed fashion prop.
3. Scratch & corner wear mitigation
Corners are structurally vulnerable; improper repair can create stiff, blocky tips that fail early.
Techniques:
- Fiber consolidation
Where abrasion has lifted fibres, I apply a very dilute consolidant that wicks in and binds frayed collagen without creating a hard shell. - Micro-fills
Only on areas where leather thickness is clearly reduced and threatens structural integrity. Fills are kept as low-build as possible and always followed by in-painting. - Controlled micro-abrasion
If there are raised “lips” of old coating around a loss, I level them with extra-fine micro-abrasives under magnification, staying strictly inside the damaged micro-zone.
The touch test is crucial: after treatment the corner should still feel like supple leather, not like a rigid edge guard.
4. Edge work (edge coat / edge paint)
Vintage Chanel edge finishes are thin and relatively flexible. The goal is localized restoration, not re-engineering.
Steps:
- Remove what is truly friable
I do not strip every mm of edge coat. Only flaking, powdering segments are carefully reduced. - Prime
A thin, compatible adhesion layer is applied to the exposed edge before colour. - Rebuild with multiple thin coats
Edge coat is applied in very thin passes, with full drying in between. No “one thick coat to do it all”. - Feather and adjust sheen
Interface zones (old/new) are lightly smoothed and, if required, gently de-glossed to avoid a hard shine line.
Common pitfalls (and how we avoid them):
- thick, ridge-like edges that crack on the first flex;
- gloss mismatch that outlines the repair;
- unnecessary full-edge strip that erases original craft.
5. Hardware refresh: polish vs replating
Vintage Chanel hardware finish varies by year, but many classic 1980s–1990s Medium flaps have a rich yellow gold-tone plating that has softened slightly with time. Continued retail price increases have made these details even more scrutinised by buyers.
My hardware decision tree is:
- Clean only
If patina is beautiful and plating is intact, I may restrict myself to gentle cleaning with a mild, non-abrasive agent. - Light polish
- Very soft cloth, minimal metal polish, working with the direction of existing micro-scratches.
- Focus on removing superficial haze, not chasing every deeper mark.
- Replating (removable parts only)
I consider Chanel hardware replating only where:- plating is visibly missing in patches;
- the part is removable (e.g., chain, detachable plate);
- the owner fully understands the trade-off between historical authenticity and cosmetic refresh.
For this bag, I chose light polishing only: the CC turn-lock regained gentle glow, but still reads as vintage, not freshly cast.
6. Geometry & quilting reconditioning
This is essentially Chanel quilting reshape under conservation constraints.
Approach:
- Environmental conditioning
The bag rests in a controlled environment (approx. 45–55% RH, stable temperature) so the leather regains a bit of internal flexibility without becoming visibly damp. - Stuffing and forms
I fill the bag with inert, acid-free tissue and shaped inserts that mimic the intended profile:- base kept straight, not bowed;
- front panel gently supported from behind;
- side gussets encouraged back into plane.
- Time, not force
No hot irons, no steamers pressed against the leather, no aggressive clamping. Shape is restored gradually over hours and days.
Limits:
- If the original batting has broken down or migrated, full loft cannot be restored.
- Hard creases from past crushing may be softened but not erased.
7. Lining care & odor management
Lambskin and leather linings are prone to shiny wear and cosmetic stains.
What I do:
- dry vacuum (with protective mesh) to remove dust and loose debris;
- targeted spot work with pH-balanced, low-moisture methods;
- drying in a ventilated space with stable humidity.
What I never do:
- add fragrance (perfume, “bag sprays”, essential oil mixes);
- use oily “freshening” products that soak into leather and cloth.
Odour management is about removing the source and moisture, not masking the smell.
8. Documentation & quality control
Every conservation treatment is documented:
- before/after observations, including macro and raking-light notes;
- a defect map noting exactly where intervention occurred;
- materials log with notes on expected reversibility;
- an aftercare sheet tailored to the bag’s condition.
For resellers I often add a short note summarizing the treatment in neutral language suitable for listing descriptions.
Outcomes, Limitations & Honest Boundaries
What improved
After this Chanel Classic Flap restoration:
- overall colour read is more cohesive, especially at the corners and back pocket;
- obvious pale “bites” on the corners no longer pull the eye;
- micro-scratches on the front are visible only at close range under raking light;
- edge coat no longer snags fabric;
- quilting appears visually fuller, and the silhouette is more aligned with original proportions;
- hardware presents with a soft, even glow.
The bag now presents cleanly for inspection or resale without crossing into “suspiciously perfect for its age”.
What we deliberately left alone
- historical patina on the most handled zones – that soft, diffused shine is a key part of vintage character;
- slight tone variation between front panel and flap, visible in certain lights;
- a couple of minor scratches under the flap crease that serve as age markers, not defects.
Risks and mitigation
- Dye/pigment migration: managed via test areas and conservative cleaner strength.
- Sheen mismatch: addressed through controlled finishing layers, always tested under multiple light sources.
- Edge cracking after repair: minimized with thin coats and proper curing time.
- Over-reshaping quilting: avoided by refusing steam pressing and heat tools.
When I say no
I decline projects where the explicit request is “Make it look brand new, I don’t care how” if that implies heavy resurfacing, thick repainting, or indiscriminate replating. That is cosmetic refurbishment, not conservation, and often harms long-term value and structural health.
Practical Buying/Selling Impact
For owners
Post-treatment, the owner gains:
- day-to-day confidence — the bag no longer feels “too fragile to wear”;
- improved presentation — important for in-person inspection and any future listing;
- clear boundaries on what the bag still is: a restored vintage lambskin, not a modern boutique replacement.
For resellers
Retail prices for new Classic Flap bags have climbed steeply, with the Classic Medium Flap around $10,800 in the U.S. after the March 2024 price increase. This makes well-preserved vintage examples particularly interesting.
On the resale side, major platforms show Vintage Classic Medium Double Flap Bag in lambskin regularly trading in a broad band depending on condition, completeness, and year. A correctly executed Chanel Classic Flap restoration with transparent documentation can:
- legitimately move a grading from “fair” to “good/very good”;
- shorten time-to-sell by improving first impression;
- justify pricing at the upper end of the band for that condition category.
Transparency is critical: the listing should state that professional conservation was performed, ideally with a non-marketing, technical note.
How to Get a Conservation Assessment
If you own or resell a Chanel lambskin bag and want a neutral, conservation-led opinion, the simplest entry point is a photo-based assessment.
At Leather Repair Gallery, a typical remote assessment looks like this:
What you send (core photos):
- front view;
- back view;
- base;
- each corner in close macro;
- flap edge crease (inside) in macro;
- turn-lock and surrounding panel in macro;
- chain entry points;
- a clear shot of the main interior.
What you receive:
- a defect map with plain-English notes;
- 2–3 treatment scenarios: for example, stabilize-only; stabilize + tone; plus their pros/cons;
- clearly explained risks, limits, and reversibility for each option;
- indicative time window and budget bands rather than a single absolute quote;
- a tailored care plan whether or not you proceed with treatment.
If you want a conservator’s eyes on your bag, you can send this basic photo set to Leather Repair Gallery for a neutral, no-obligation assessment. You will get an honest view of what not to do at home – and when a light toning is safer than a full recolor.
FAQs
Lambskin has a much thinner protective finish and softer fiber structure, so it tolerates far less cleaning, abrasion, and recoloring than caviar.
When done conservatively with documentation, professional stabilization and selective toning can preserve or even improve resale appeal without harming value.
It is localized color correction applied only where material loss exists, rather than coating the entire bag.
Full recoloring adds a continuous new film that can stiffen the leather, obscure grain, and create an unnatural “plastic” appearance.
Structurally weakened corners can be stabilized and visually improved, but they cannot be returned to factory thickness without compromising flexibility.
No, only areas with flaking or failing edge coat should be treated; intact original edges are best left alone.
Through controlled humidity, proper internal support, and time never with irons, steamers, or aggressive pressing.
Not usually; light cleaning or polishing often preserves authentic patina better than replating.
No, most household products contain solvents or oils that permanently damage lambskin finishes.
If the goal is preservation, longevity, and honest age character, conservation is appropriate; cosmetic refurbishment prioritizes appearance over material integrity.


