Hey, friends! With the next One Room Challenge just around the corner, I thought it was about time I wrapped up sharing my previous projects! (I’m sitting this one out, but I can’t wait to follow along with all the amazing bloggers participating this season!) Today, I’m excited to share a super simple DIY project: rustic industrial picture ledges.
I always imagined incorporating picture ledges into my 17-year-old son’s room to display sports memorabilia, awards, and personal items. We decided to keep his chalkboard wall, so I installed ledges around the other three walls. The result? A minimalist, industrial-meets-rustic look that complements the desk and Ikea hack bookcase perfectly.
How to Build and Install Rustic Industrial Picture Ledges

This project is beginner-friendly and incredibly rewarding. Let’s get started!
This post contains affiliate links for your convenience. Read my full disclosure policy here.

The Wood Selection
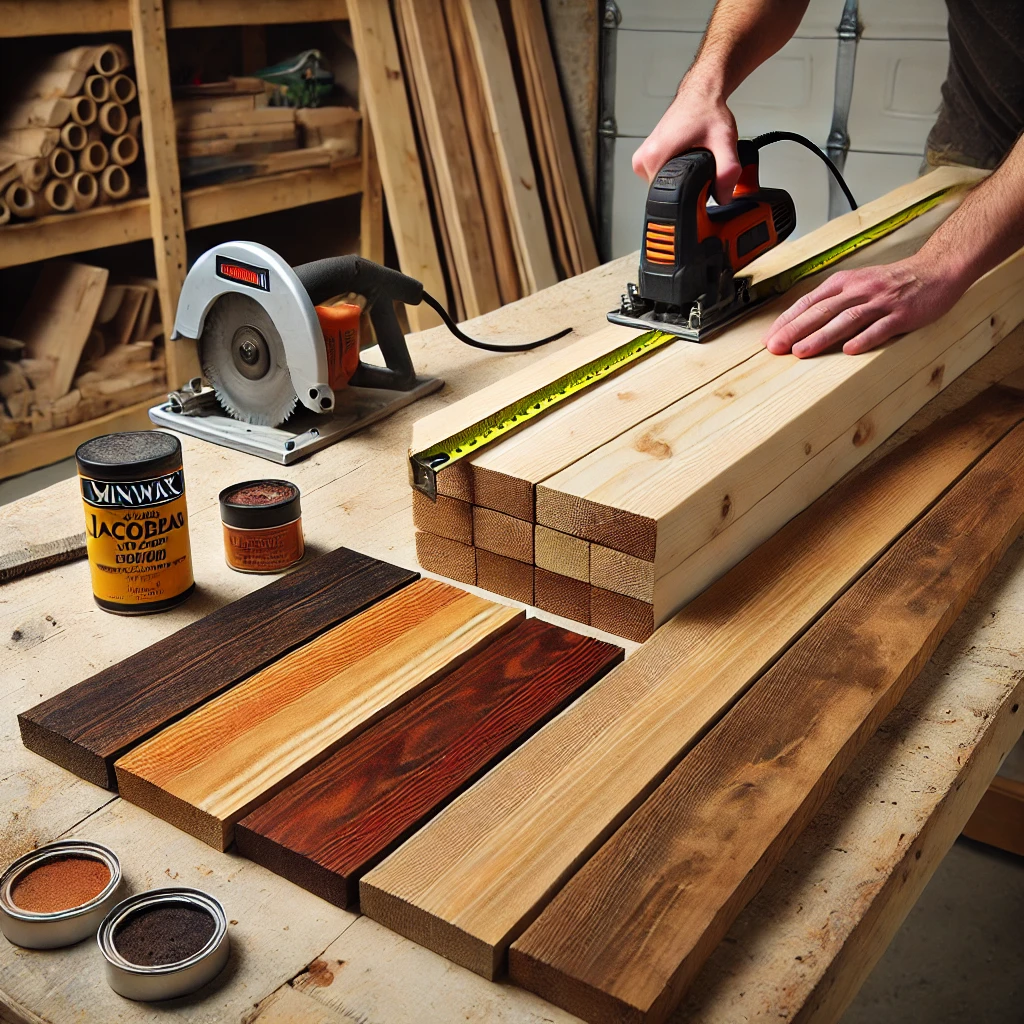
The first step in creating these simple picture ledges is to measure the walls and purchase wood. I used 1″x4″ select pine boards—making sure each board was straight and free of warping. You can cut the boards at home using a saw, or most lumber yards and hardware stores offer cutting services if you prefer.
For finishing, I stained the wood with Minwax Jacobean mixed with a touch of Red Mahogany to achieve a warm, vintage look. I wasn’t aiming for an exact wood match with the rest of the room—just a complementary finish. After applying a couple of coats, I distressed the edges with a palm sander to give them a worn-in feel, reminiscent of a well-loved baseball glove.
Minwax Jacobean Stain Minwax Red Mahogany Stain
Choosing the Brackets

For a sleek, industrial touch, I opted for L-brackets (corner braces) that I spray-painted black. These brackets keep the design minimal while tying in with the black elements already present in the room.
Pro tip: Spray-paint the screws as well by pushing them into a cardboard box to hold them steady while painting.

Installation Steps

1. Measure and Mark
Start by determining the height where you want the ledges. Use a level to draw a straight line along the wall to ensure proper alignment.
2. Position the Brackets
If you’re installing ledges across long walls, decide where to place the brackets for optimal support. I spaced mine about 18 inches apart, ensuring additional support at the seams where the boards met.
3. Secure the Brackets to the Wall
Using a drill, install wall anchors to hold the brackets securely. Since these shelves aren’t meant to hold heavy objects, I used one anchor per bracket.
4. Attach the Boards
Once the brackets are secured, place the boards on top and fasten them with short screws (shorter than the board’s width) to avoid protruding through the wood.
Corner Braces (L-brackets) Drill and Wall Anchors

Maximizing Functionality

Adding Hooks for Baseball Hats
One of my favorite aspects of this project was adding hooks underneath the ledges to hang my son’s baseball hats.
- I used utility hooks, spray-painted black for a cohesive look.
- If you’re planning to paint them, opt for stainless steel or brass hooks instead of vinyl-coated ones, as paint doesn’t adhere well to vinyl.
- To install, pre-drill holes slightly smaller than the hook screws, then twist the hooks into place.
Installing Bedside Lighting
For the area above my son’s bed, I installed Ikea Hektar Wall/Clamp Spotlights under the ledge. These lights:
- Have a black powder-coated metal finish (perfect for an industrial aesthetic).
- Swivel for adjustable lighting.
- Feature a cord that blends with the dark walls. If desired, you can use a cord cover to conceal it.
- Have an on/off switch conveniently positioned near the headboard.
Displaying Art on the Picture Ledges
For a neat display of framed pictures and artwork, I used two methods:
- 3M double-sided mounting tape for smaller frames.
- Wall hooks placed slightly lower than the frames, creating the illusion of leaning art while ensuring stability.
This prevents pictures from tumbling down in case of an impromptu football game in the room! 😉
Final Thoughts
This DIY project was simple yet transformative! Adding rustic industrial picture ledges not only enhances the room’s aesthetic but also creates a practical space for organizing memorabilia, hats, and lighting. It’s an ideal beginner-friendly DIY project with a big impact!
For more details on my son’s room makeover, check out these related projects:
- Rustic Industrial DIY Desk –DIY Rustic-Industrial Desk
- Ikea Hack Bookcase – Ikea Hack Rustic-Industrial Bookcase
- Block Poster Large Scale Art – Block Art
- How To Hang a Snowboard – Hang A Snowboard On The Wall
Sources & Materials
- Wood
- Stains – Minwax Jacobean Stain & Minwax Red Mahogany Stain
- Brackets – L-brackets
- Spray Paint – Black spray paint and spray paint handle
- Hooks for Hats – Hooks for hats
- Lighting – Ikea Hektar Lights
- Wall Color – Sherwin Williams Tricorn Black #6258
- Letter Art Over the Bed – check out this post for the tutorial.
- Headboard – DIY, covered with a flat flannel sheet
If you have any questions about this project, feel free to ask!
Have a wonderful day, lovelies! 😊


