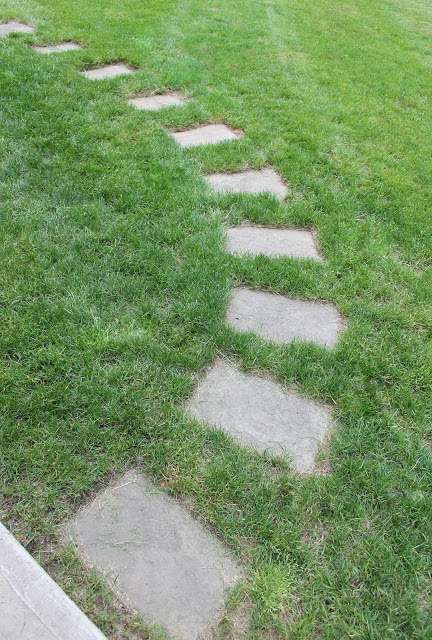
The stepping stone path I recently set in my backyard is the third path I have laid over the years. With a little time and elbow grease now, the set stones will require little maintenance over the years.
Here’s a tutorial in case you are looking to set your own stepping stone path into existing grass.
1 | Choose your material. In my last house I set stepping stone paths with irregular stones that I bought at a stone yard. I was able to pick through and choose what stones I wanted, and was careful to choose ones that were somewhat flat on one side, and fairly large (yet small enough that I could lift them myself). You can purchase natural stone by the pallet or by the pound at many stone yards.
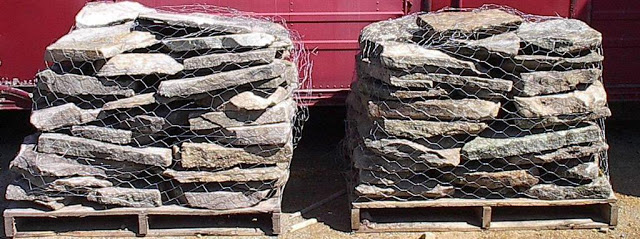

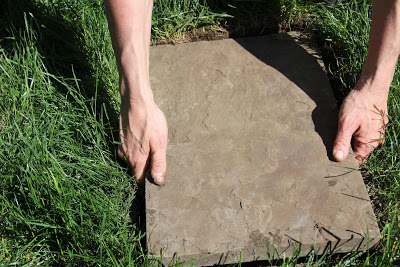
For this project I repurposed rectangular-cut bluestones form our yard. Our front path (that badly needs to be reset – but that’s a project for another day) had a little side path off of it leading to a door in our garage. We never used this path or the door, so I decided to repurpose the stones.
The bluestones are mostly smooth on one side, but quite unevenly textured on the other, so setting them is much like setting an naturally shaped stepping stone.

The uneven side wouldn’t make a very good surface for stepping, so this side was placed down. When laying the foundation for the stones I took into consideration that the bottom of the stone would would need to be leveled.
PS – Those pavers weigh a ton! Holy upper body workout!!
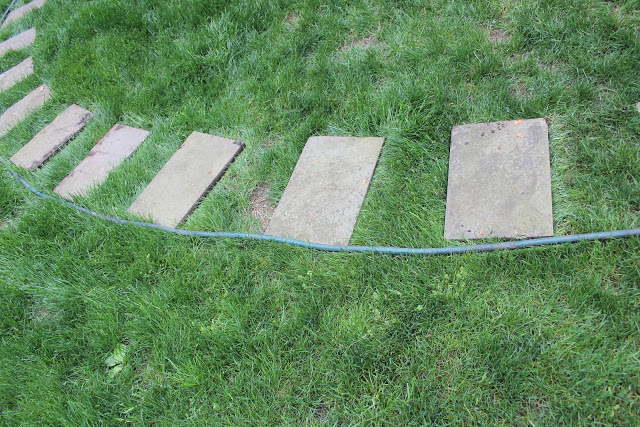
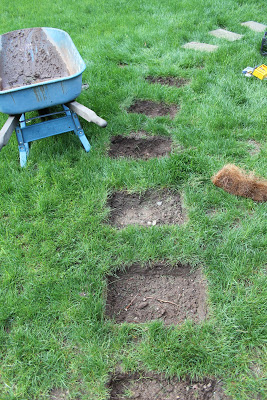
2 | Determine where the path will go and how far apart the stones will be set. A hose is a great way to mark a curved path. Set the stones about where you think they should be set and then walk on them several times, adjusting the stones based on where your natural step lands comfortably. My steps ended up about 6″ apart.
3 | Use an old putty knife or other flat utensil to cut into the grass around each stone to create an outline, then move the stone to the side and use an edger to cut out the grass.
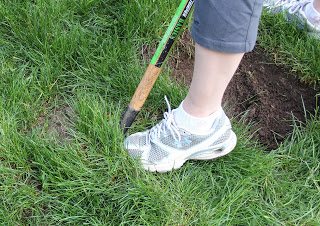
{Side note: I found that after cutting around the rectangle, I could then use the edger like a pizza “peel” and take out the whole rectangle of grass at once.

I put these pieces aside and then later on filled in an area of the yard where the grass hadn’t come in well. Fingers crossed my “sod” takes over there!}
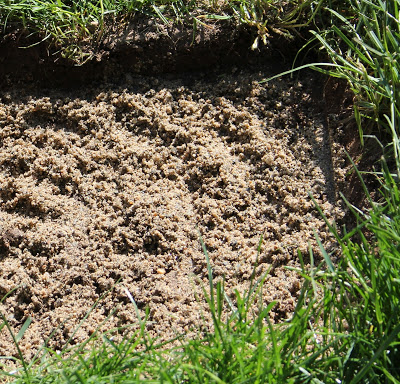
4 | After removing the grass, prepare each hole for the stone by squaring the edges and digging out the dirt, allowing about 2″ for sand along with the height of your stone. For these stones, which are about 2″ high, I dug down about 4 inches.
5 | Place a layer of all-purpose sand. I raked my fingers through the sand so the textured stone would sink into the loose sand.
With textured pavers or stones, take care to add more sand as needed to make each stone sit level with each other and just beneath the grass. You want to embed these stones within the grass, not have them protruding out of the lawn.
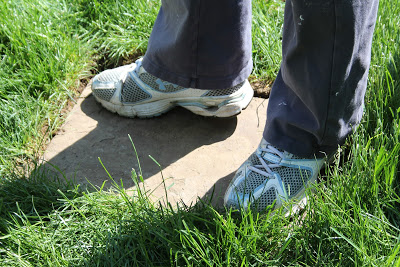
6 | Movement equals shifting which equals cracked stones later on, so make sure each stone is level and has no movement when weight bearing. After pressing on each stone and adjusting with more sand, stand up and rock on the corners to feel if the stone is set and not moving.
From previous experience, if you take the time to set the stones properly they will look great for a long time to come!
7 | Fill in any gaps with bits of the removed grass and dirt, packing it in tightly.

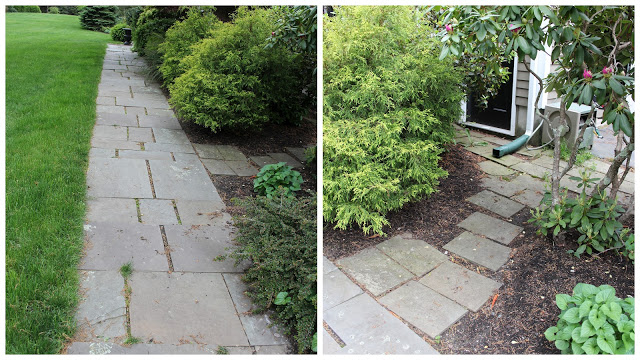
Then step back and admire your work!
I added a garden with ornament grasses to this area…..
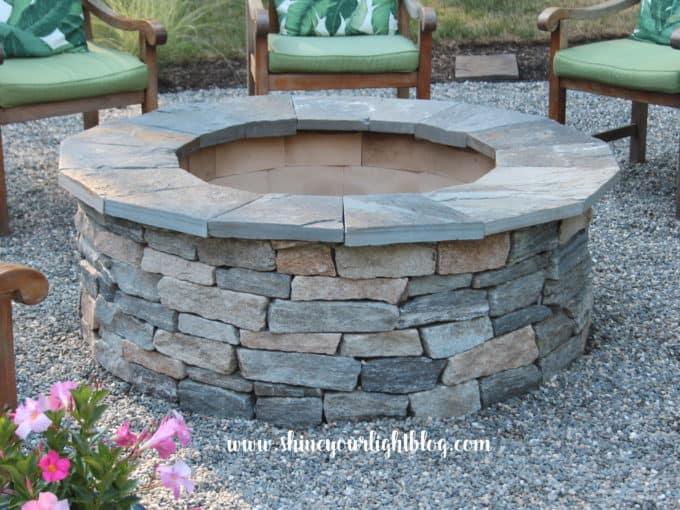
and eventually, a pea stone patio and fire pit!
With a little sweat equity you can definitely transform your yard with your own two hands!
Have a wonderful day friends!
Pin for later!