If you’re someone who keeps their jewelry tangled in a box on the dresser, this DIY project is for you. It’s the perfect solution for organizing your accessories while creating an attractive, functional display for your wall. Plus, it’s so simple that even those who aren’t particularly crafty can tackle it with ease.
I first created a jewelry board several years ago, and it completely transformed how I use my jewelry. Before, it was difficult to sort through the tangled mess in my jewelry box, but now, I can see my favorite pieces at a glance. It’s a stylish way to stay organized and encourages me to wear my fun jewelry more often.
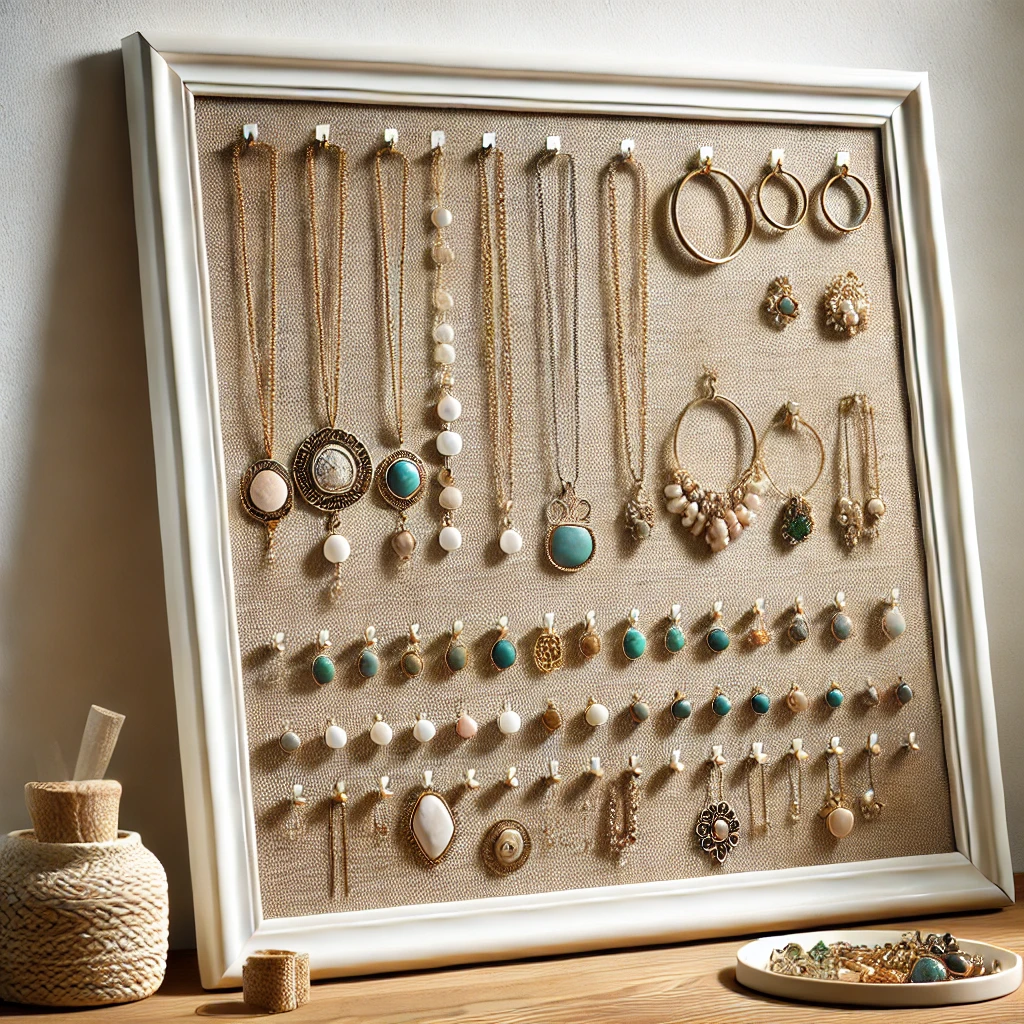
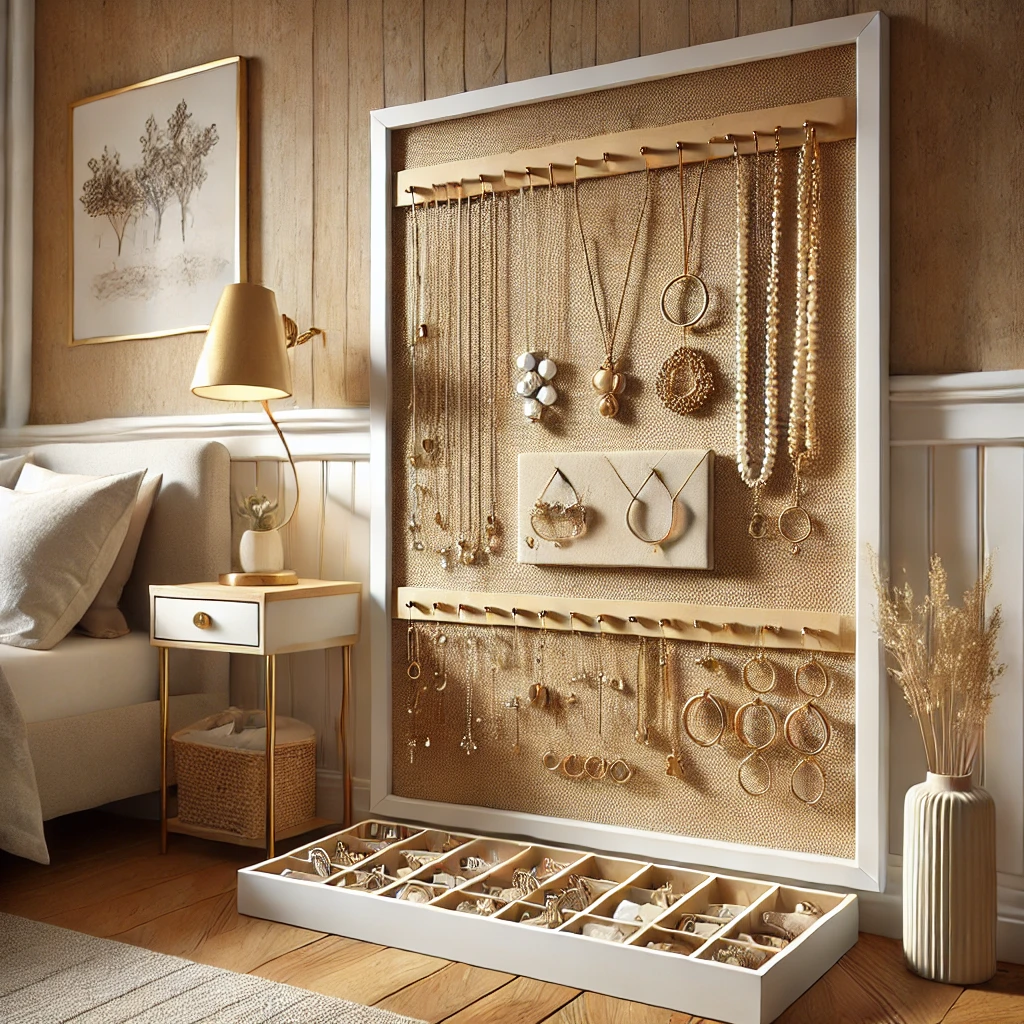
My original jewelry board featured a robin’s egg blue and chocolate brown color scheme, which perfectly matched my old master bedroom. However, I realized that the busy background distracted from the jewelry. In my new home, the board has been updated with a simple, natural burlap backdrop that highlights the necklaces and bracelets while maintaining a minimalist aesthetic.
This updated jewelry board now resides in my bathroom, as the closet in my new master bedroom is on the smaller side. I adore how functional yet decorative it is. Some of the jewelry on display holds sentimental value, reminding me of special moments or loved ones. By creating a board like this, you can enjoy your beautiful accessories every day, even if you’re not wearing them.
Why Upcycle a Picture Frame?
Repurposing a picture frame into a jewelry board is not only cost-effective but also allows you to customize the design to suit your personal style. It’s an easy way to keep your jewelry organized, prevent tangles, and add visual interest to your walls. Plus, it’s a wonderful opportunity to breathe new life into an unused frame. Here’s how to create your own jewelry board:
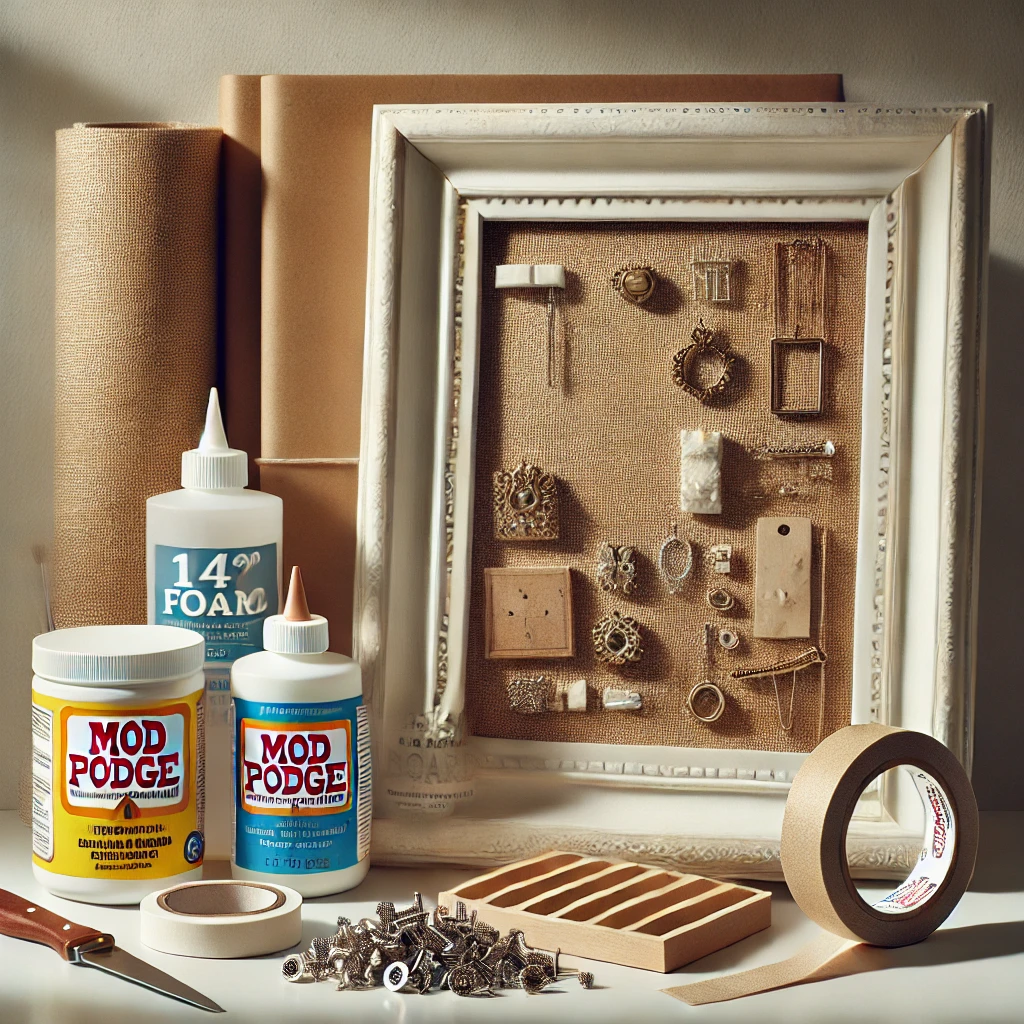
Supplies You’ll Need
- An empty picture frame
- 1/4″ foam board
- Fabric (I recommend inexpensive burlap for a neutral look)
- Mod Podge
- Decorative upholstery tacks
- Strong-hold, clear-drying craft glue
- Brayer (optional but helpful)
- Packing tape (optional)
Step-by-Step Instructions
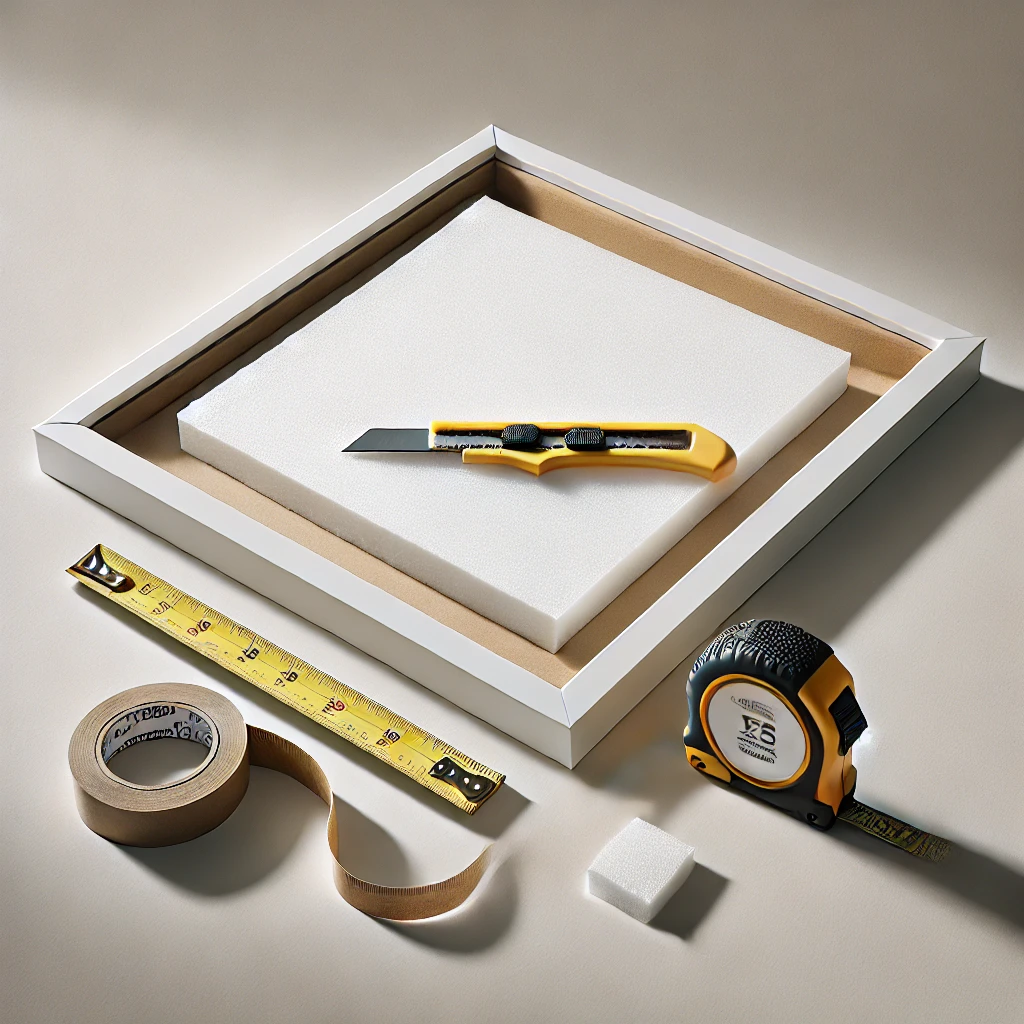
- Prepare the Foam Board
Cut the foam board to fit snugly inside your empty picture frame. If your frame is larger than the foam board you have, you can tape multiple pieces together using packing tape. Foam board is lightweight yet sturdy enough to hold the jewelry without the tacks falling out, especially when reinforced with glue.
- Attach the Fabric
Cut a piece of fabric that is a couple of inches wider and longer than the foam board. Apply a generous layer of Mod Podge to the front of the foam board, then quickly wrap the fabric around it before the adhesive dries. Use a brayer to smooth out any wrinkles and ensure the fabric adheres fully. Wrap the excess fabric around to the back of the foam board and secure it with strong adhesive or packing tape.

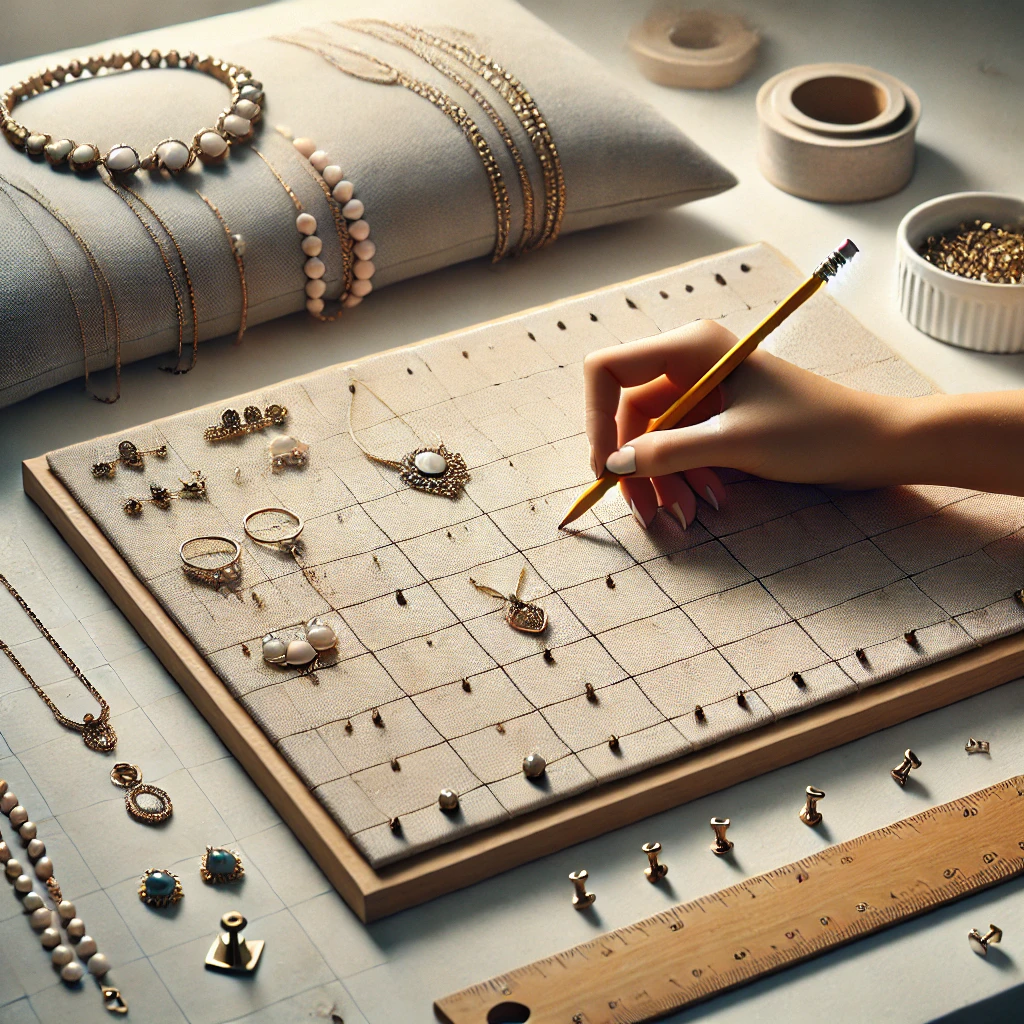
- Plan the Layout
Using a pencil, mark where you want to place the decorative tacks or pins. Lay out your jewelry to determine the spacing. I recommend dedicating a short row at the bottom for bracelets and spacing the rest for necklaces. Don’t worry if the jewelry overlaps slightly; this can create a charming, layered effect.
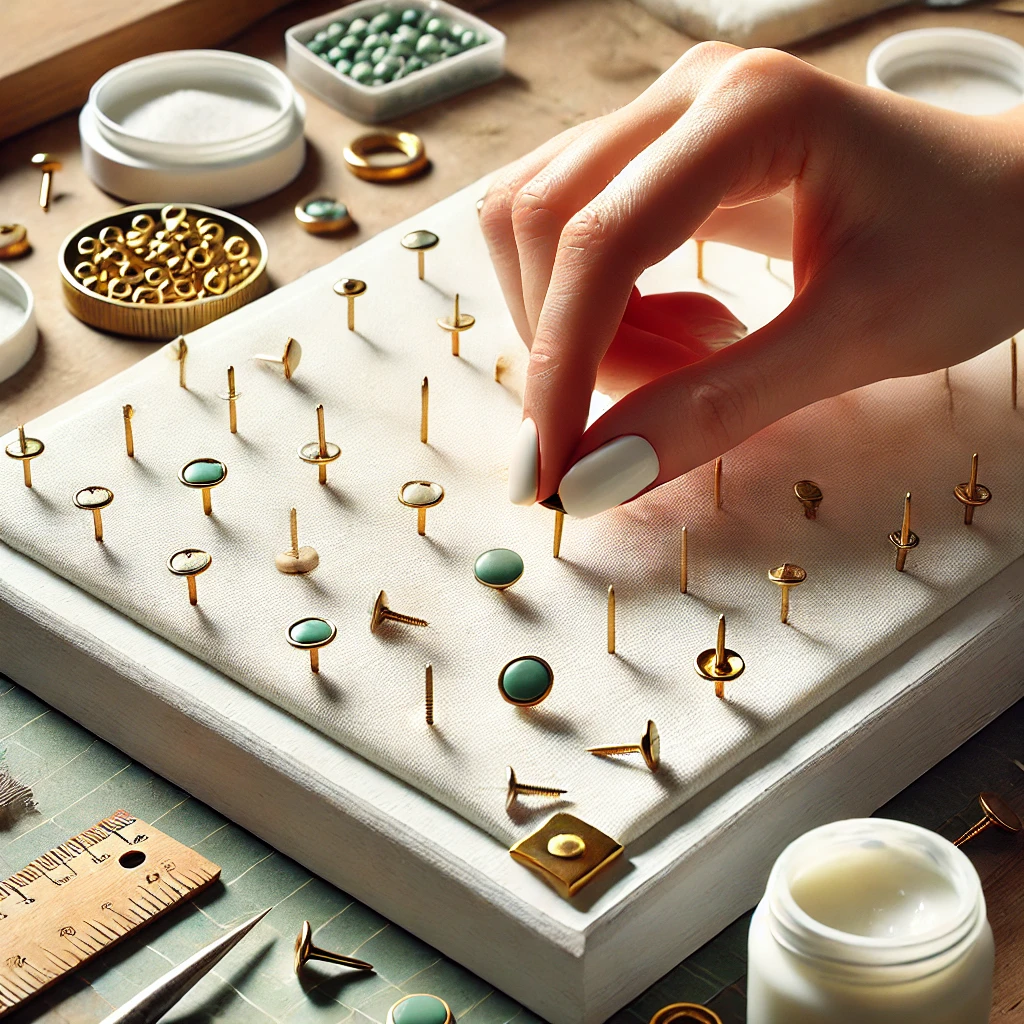
- Add the Tacks
Before inserting the upholstery tacks or pins, dip each one in strong craft glue to ensure they stay securely in place once the jewelry is hung. Press the tacks firmly into the foam board at your marked spots and let the glue dry completely.
- Assemble the Board
Place the finished foam board into the picture frame. If the frame still has brads from its previous use, you can bend them to hold the foam board in place. Otherwise, use packing tape to secure the board from the back.

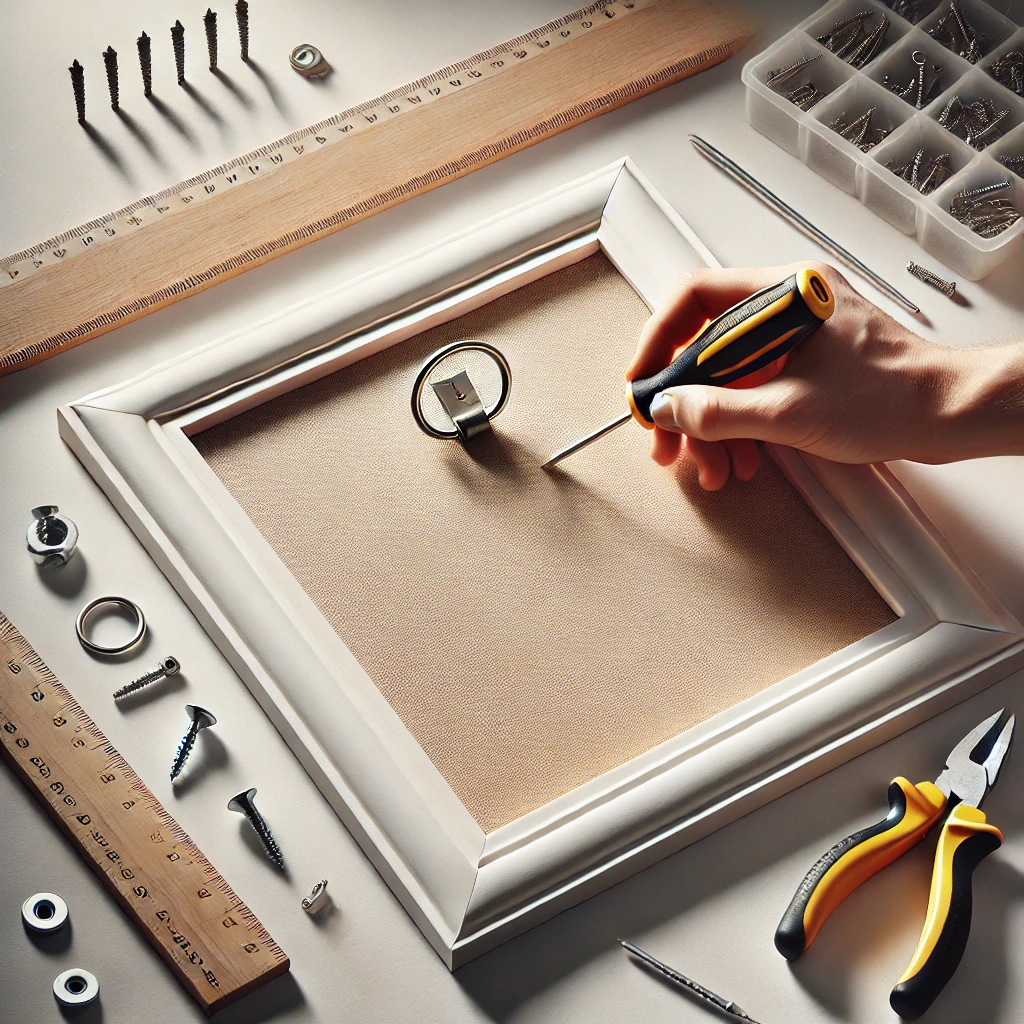
- Prepare for Hanging
Attach a D-ring or saw-tooth hanger to the back of the frame so it can be easily mounted on your wall.
Enjoy Your Jewelry Display

Once your jewelry board is complete, hang it in a convenient location and start adding your accessories. It’s a joy to see your necklaces, bracelets, and earrings beautifully displayed and easily accessible. Even the pieces you don’t wear often can serve as meaningful decor, reminding you of cherished memories or special people.
Tips for a Stunning Jewelry Board
- Use fabric that complements your room’s decor. Neutral textures like burlap work well, but you can experiment with patterned or colorful fabrics if you want a bolder look.
- Arrange your jewelry by type or color for an extra touch of organization.
- If you have small earrings or rings, consider adding a small section of corkboard or hooks to the design to accommodate these pieces.
Why This Project Works
This DIY jewelry board is not only practical but also decorative. It adds personality to your space and transforms your accessories into wall art. You’ll find it much easier to grab the perfect necklace or bracelet when you’re in a rush, and you’ll likely wear your jewelry more often simply because you can see it.
Sentimental Value
Some pieces of jewelry hold memories that are too precious to stay hidden in a box. My board includes a necklace that reminds me of my grandmother, and every time I see it, I smile. Whether your jewelry is high-end or costume, displaying it is a wonderful way to cherish its value sentimental or otherwise.
Other Jewelry Organization Ideas
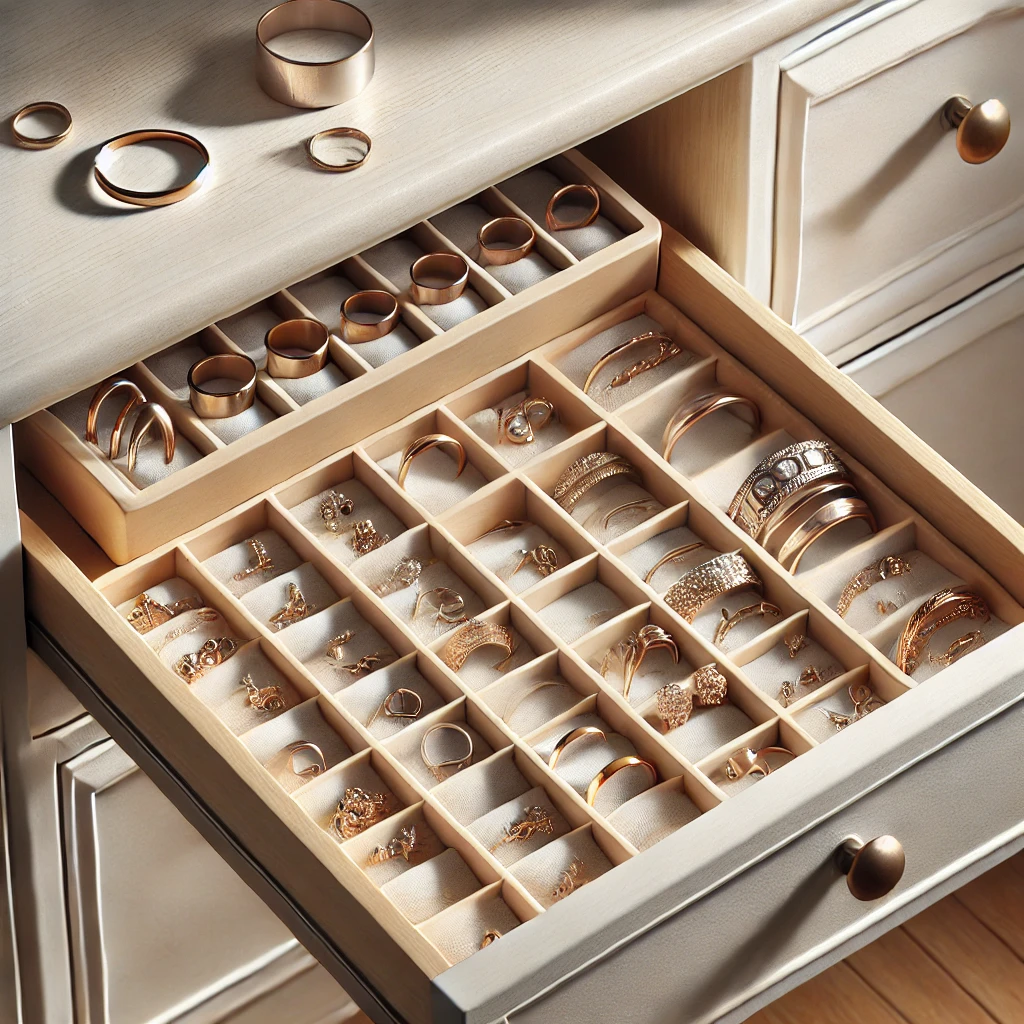
For smaller pieces like rings or earrings, try using a kitchen organizer inside a bureau drawer. This is an easy and inexpensive way to sort small items using odds and ends you might already have around the house. See how I organized small jewelry in a bureau drawer, using odds and ends from around the house!
Conclusion
Upcycling a picture frame into a jewelry board is a fun, simple project that anyone can do. Not only will it keep your jewelry organized and tangle-free, but it will also add a touch of charm to your space. So gather your supplies, get creative, and start enjoying your lovely things every day!

")


