If you’re searching for a statement piece that blends coastal charm with handmade character, look no further than the oyster shell mirror. This one-of-a-kind decor item not only brings texture and natural beauty into your space but also lets you express your creativity through DIY design. Whether you’re aiming for an elegant focal point in the entryway, a serene coastal touch in the bedroom, or a vibrant accent for your patio, an oyster shell mirror checks all the boxes. The best part? You don’t have to spend hundreds—or even thousands—of dollars to own one. You can craft your own with a little time, patience, and a bucket of shells.
Why Choose an Oyster Shell Mirror?
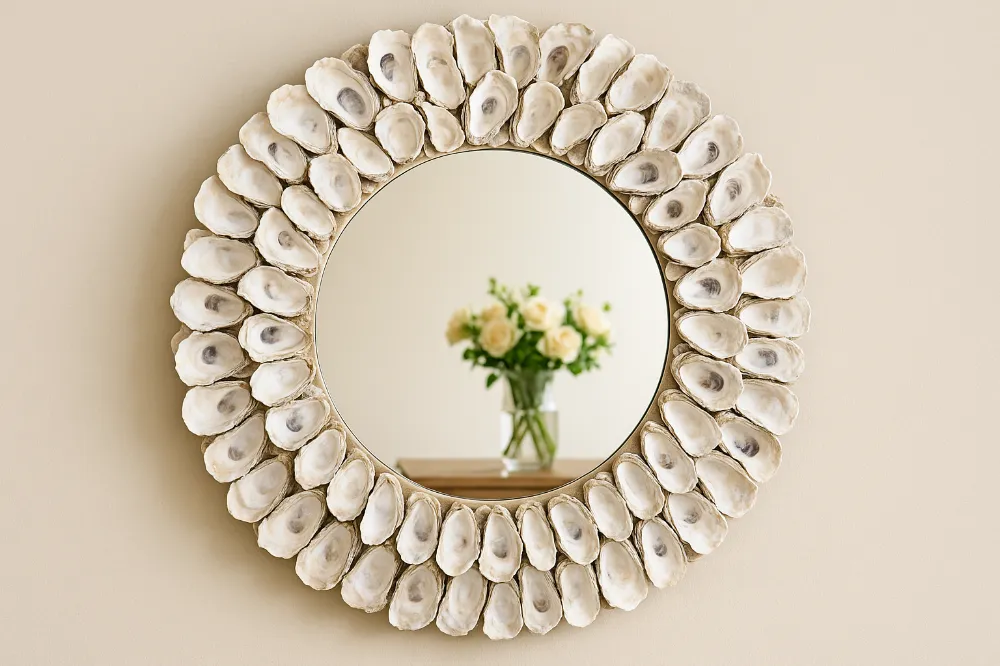
There’s something undeniably striking about the blend of rough oyster textures and a sleek mirror surface. Oyster shells bring a tactile, organic quality to interiors. They work especially well in coastal or nautical-inspired homes, but they can also add an earthy, artisan feel to modern spaces.
Here’s why oyster shell mirrors stand out:
- They introduce a natural, sculptural frame to an otherwise ordinary mirror.
- Each piece is unique—no two shells (and therefore no two mirrors) are alike.
- They can be designed on a budget, often costing less than $50 to make, compared to store-bought versions that sell for $500–$1,000+.
- They’re sustainable when shells are repurposed from seafood restaurants, fish markets, or beach finds.
An oyster shell mirror is more than decor—it’s a conversation piece.
Materials You’ll Need
Before you dive into creating your oyster shell mirror, gather the essentials:
- 300–500 cleaned oyster shells (varied sizes for layering)
- A mirror (round, oval, or rectangular depending on preference)
- Plywood or a sturdy baseboard cut to size
- Strong adhesive (options: hot glue gun, TEC Stick n Stay, or Liquid Nails)
- Sandpaper (to roughen slick surfaces so glue adheres better)
- Small putty knife or trowel
- Picture hangers or D-rings with wire for mounting
- Optional: craft paint, spray paint, or metallic finishes for styling
Having more shells than you need is smart—it gives you flexibility to choose the right size and shape for each section.
Step-by-Step Guide to Making an Oyster Shell Mirror
Step 0: Plan your size, weight, and shell count
- Pick a shape: round feels classic (sunburst effect), rectangles read modern, ovals feel vintage.
- Estimate weight: plywood + mirror + shells adds up. If you’re going larger than ~30–36″, plan sturdy hangers (D‑rings + wire or a french cleat).
- Shell count estimator (rule of thumb):
- For a 30–36″ round with a 3–5″ shell band, have 300–500 shells on hand so you can cherry‑pick sizes and shapes. One source used ~400–500 cleaned shells for a 36″ build, but only about half were ultimately used (the rest gives you options).
| Mirror Ø | Visible shell band | Have on hand | Likely to use |
|---|---|---|---|
| 20–24″ | 2.5–3″ | 200–300 | 120–180 |
| 30″ | 3–4″ | 300–400 | 180–250 |
| 36″ | 4–5″ | 400–500 | 220–300 |
(You’ll use fewer if shells are large or if your band is narrow.)
Step 1: Prep the oyster shells
- Clean & deodorize: Soak in a mild bleach solution (about 1:10 bleach to water) for an hour or two, then scrub off residue and grit. Let dry fully—sun helps brighten the shells. A 36″ project gathered shells this way and sun‑dried them for a couple of days.
- Sort by size: Make piles—extra‑big, big, medium, small. This saves time when you start layering. One tutorial emphasized having both small and larger shells at hand.
- Optional color: For a playful look, edge‑paint shells in a palette (blues/greens/metallics); let dry. A colorful version painted edges first, then assembled.
Step 2: Prepare the mirror base
- Cut and seal the substrate: Use ½” plywood for stiffness. Cut to your final shape. Prime or paint the face and edge a light color so any micro‑gaps visually disappear (off‑white/ivory is forgiving).
- De‑gloss slick areas: Adhesives need “tooth.” If your surface is shiny or metallic‑painted, scuff‑sand. One maker had shells pop where metallic paint was too slick and solved it by sanding.
- Attach the mirror to the board: Center it and bond (construction adhesive or strong craft glue). We’ll hide the seam later with a final ring of small shells.
Step 3: Choose the right adhesive (decision guide)
- TEC Stick N Stay (flooring adhesive): Trowel‑able, tacky, and stays put while you position shells; strong after 24–48 hours. This solved sliding issues where other glues struggled. Make sure the surface isn’t slick.
- Liquid Nails (construction adhesive): Great for batching an 8–12″ section at a time; then press shells into the bed. Slower set gives wiggle room.
- Hot glue: Fast and clean, ideal for lighter shells and speed builds; some makers preferred it to Liquid Nails for a quick two‑hour project (expect occasional touch‑ups if bumped).
- What to avoid: E6000 worked for many crafts but proved slow and fussy here; one build burned through two tubes with poor hold before switching.
Tip: For heavy shells on vertical frames, use hot glue to “tack,” then backfill key contact points with construction adhesive for a belt‑and‑suspenders bond.
Step 4: Dry‑fit your layout (the “puzzle” pass)
- Lay a test ring of larger shells around the board edge to understand spacing and overlap. Builders consistently describe the process as a jigsaw puzzle—rotate shells to hide seams.
- Sort a small tray of “next up” shells (big, then medium) so you’re not hunting mid‑glue.
Step 5: Glue in rings—from big to small
- Outer ring: Start with the largest shells. Let them overhang the plywood edge slightly for drama, keeping 1–1.5″ of shell on the board for solid contact.
- Second ring: Step inward with “less big” shells, staggering joints to cover seams from the previous ring.
- Work in batches: Spread adhesive over an 8–12″ section; then place shells while it’s workable. Rotate shells to lock into natural pockets.
- Inner rings: Continue with medium, then small shells, tightening spacing as you approach the mirror edge. Think shingle‑over‑shingle for a natural flow.
- Application method: For trowel adhesives, butter the shell’s contact points plus a thin bed on the substrate. For Liquid Nails, lay a bead and “smoosh.” For hot glue, press firmly for 5–10 seconds.
Pro tip: If a shell rocks, grind the underside on coarse sandpaper to create a flat contact pad.
Step 6: Finish the mirror edge (the pro move)
- Add a final micro‑ring of tiny shells right onto the glass to hide the mirror seam and give a bespoke finish. Makers love this trick for a clean edge.
Step 7: Hanging hardware (do this early or with care later)
- It’s easier to attach hardware before shelling the front. If you forget, prop the finished face on a padded surface and attach D‑rings to a backer strip, then run picture wire.
- For heavy or oversized pieces, consider a french cleat for even load distribution.
Step 8: Cure time & cleanup
- Cure: Allow 24–48 hours for full grab when using paste/gel adhesives; resist the urge to hang early. One builder reported solid hold after this window.
- Stringy glue hairs: If you used hot glue, sweep a hair dryer or heat gun lightly over the surface to make whispy strands vanish.
- Touch‑ups: Keep a handful of small shells ready to spot‑fill micro‑gaps after curing.
Step 9: Troubleshooting (quick fixes)
- Shells won’t stick: De‑gloss the area with sandpaper; reapply a tackier adhesive (e.g., Stick N Stay). This solved adhesion on metallic paint.
- Gaps showing base color: That’s why we paint the base light—tiny gaps blend in.
- A shell pops off after hanging: Re‑glue with hot glue (fast) or a dab of construction adhesive (strong). One quick‑build project needed a few re‑glues after handling—totally normal.
Safety & surface tips
- Work on a padded, level surface; shells are sharp—gloves help.
- Ventilate when using construction adhesives.
- Keep adhesive off the mirror—painter’s tape around the glass edge makes cleanup easy (remove before final micro‑ring).
Creative Variations of Oyster Shell Mirrors
The beauty of this project lies in customization. Here are three creative directions you can take:
Neutral Coastal Look
Stick with natural oyster shells for a raw, organic frame. Perfect for bedrooms, bathrooms, or entryways where you want subtle coastal charm.
Colorful Accents
Paint the edges of shells with craft paint in blues, greens, or even metallics for a vibrant pop. This is especially striking in eclectic or boho-style spaces.
Budget-Friendly DIY
Use a thrifted mirror as your base and repurposed shells from restaurants or local fish markets. With some creativity, you can make a stunning piece for under $10.
Styling Tips: Where to Place an Oyster Shell Mirror
Your oyster shell mirror deserves a spotlight. Here are great places to hang it:
- Entryway: Make a bold first impression for guests.
- Living Room: Place it above a sofa or sideboard as a statement piece.
- Bathroom: A coastal-inspired vanity mirror creates spa-like charm.
- Bedroom: Use above a dresser or as part of a gallery wall for a unique focal point.
- Outdoor Covered Porch: Adds character and blends beautifully with natural surroundings (just ensure it’s in a dry, protected spot).
Care and Maintenance
Oyster shell mirrors are relatively low maintenance, but a little care will keep them looking pristine:
- Dust gently with a microfiber cloth or use compressed air to remove buildup between shells.
- Avoid soaking or cleaning with harsh chemicals—moisture can loosen adhesive.
- If a shell loosens over time, reattach with a dab of adhesive.
Conclusion: A Coastal Classic You Can Make Yourself
The oyster shell mirror is more than just a DIY project—it’s an heirloom-worthy piece that celebrates nature and creativity. Whether you keep it simple with natural shells or get bold with colors and metallics, your mirror will be one-of-a-kind. And that’s the true magic of crafting it yourself.
So, grab those shells, find a mirror, and start building your coastal masterpiece today. You might just surprise yourself with how striking and professional it turns out. After all, a little patience and a bucket of oysters can transform your wall into a showcase of seaside beauty.


")
