This past week has been absolutely chaotic, but so much progress has been made! Here’s a breakdown of everything that’s happened.

Affiliate links are included in this post for your convenience. Read more about affiliate links here.
Kitchen & (More) Floor Demolition

From the beginning, Mark and I committed to tackling the demolition of both our floors and the kitchen ourselves. We were incredibly fortunate to have two of our friends, experienced renovators, available to help out on their day off—an absolute blessing! If not for them, we might still be in the demolition phase.
Initially, I planned to pack up the kitchen on Friday for a Saturday demolition, but shifting the timeline meant frantically moving everything upstairs to the kids’ rooms without even having packing boxes! Instead, I resorted to stuffing everything into laundry baskets. Chaos ensued!
Despite the Massachusetts winter slush and rain, we managed to haul all the appliances into the garage, remove cabinets and countertops, knock down the wall between the pantry closets, and strip away two layers of vinyl flooring, along with their plywood underlayments.
Demolition of a Kitchen
Even with our prior remodeling experience, we brought in our electricians to ensure that everything was safe post-demolition. These guys are fantastic and will be returning next week for the new wiring. After disposing of all the debris and pulling out an absurd number of popped nails from the subfloor, the kitchen was finally cleared out and prepped for the next phase!
We had already removed the foyer tile, but its plywood underlayment still needed to be pried up. This task turned out to be even more tedious than the kitchen demo, but we persevered. To make the process easier, we set our circular saw just deep enough to cut everything into manageable 2-foot sections. Safety tip: Always be cautious when cutting underlayment—it’s easy to accidentally cut into the subfloor!
As my daredevil brother always says: “Have fun, but use CAUTION!“
Safety First

Despite my usual obsession with safety gear, I ironically wasn’t wearing my protective gear in one of the photos (I probably grabbed them a second later!). I cannot stress enough the importance of eye protection, hearing protection, and dust masks during DIY projects. Demo work kicks up an insane amount of dust—even from just pulling up plywood.
Here are some budget-friendly safety options, or you can do what we do and “borrow” the kids’ noise-canceling headphones! 😉
Post-Demo Exhaustion
By the end of day two, we were exhausted but still had to clear out the remaining furniture from the dining, living, and family rooms so the flooring company could start on Monday. Huge respect to those who do physical labor daily—this is hard work!
A foam roller to stretch our backs would have been a lifesaver, but we made do with the rug! The half-finished dining molding project will have to wait until the kitchen is done—stay tuned for that!

Hardwood Floor Refinishing & Installation
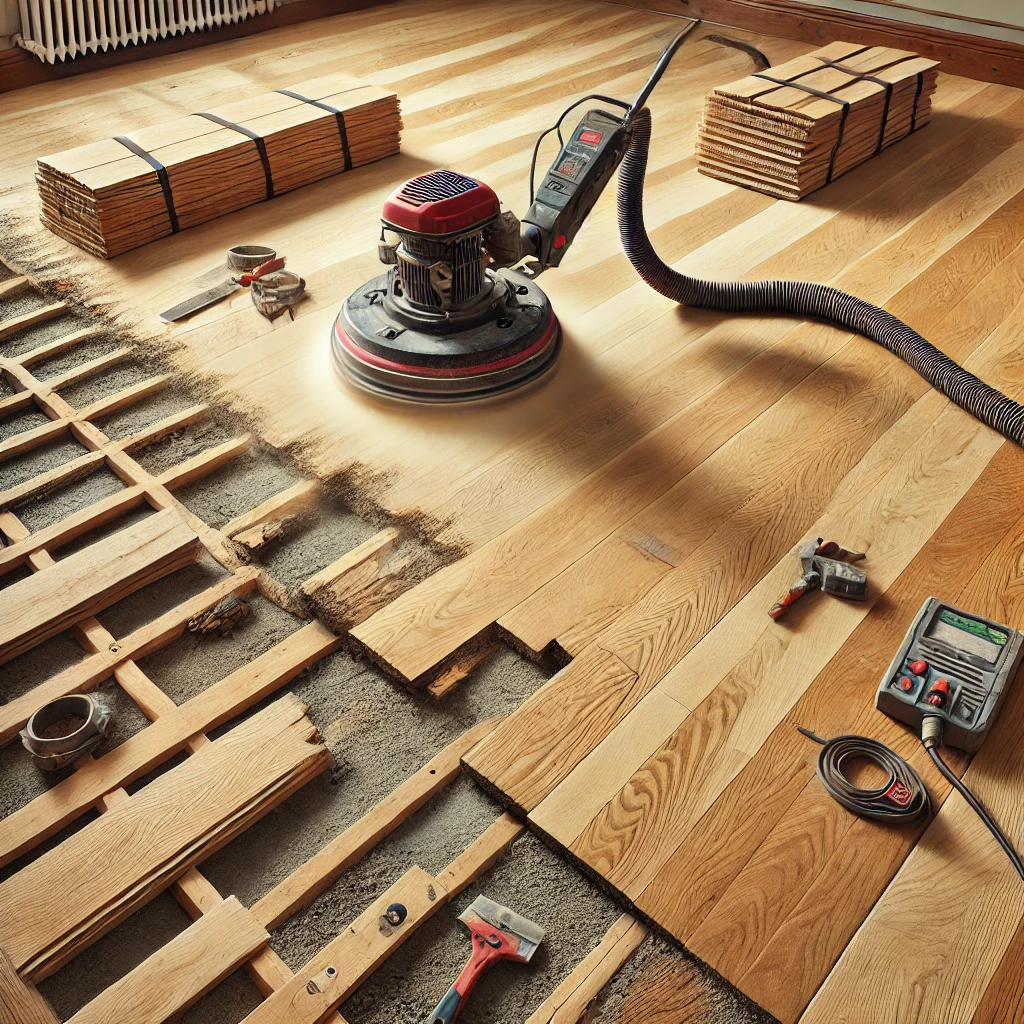
Here’s why refinishing the floors was necessary our home is 33 years old, and the hardwood was severely worn down in high-traffic areas.
On Monday, the flooring company got started. It’s a one-man operation, and Mike, the expert, took on sanding, installation, and old floor removal. He spent the entire week filling holes, fixing gaps, and prepping the subfloor for the new hardwood. It’s been an immense amount of work!
It never ceases to amaze me how old hardwood can be sanded down to look brand new again! Our floors are 3/4″ white oak, original to the house, and seeing them transform has been incredible.
We seriously debated replacing everything with pre-finished wide plank oak which would have been stunning and more convenient since it wouldn’t require sanding, staining, or sealing on-site. But ultimately, we’re glad we chose to restore the original floors. I can’t wait to see them stained and sealed!
The Stairs

At the start of the year, I mentioned my plan to revamp the staircase to match the new flooring. I had already removed the runner and stripped the ebony stain from the treads. Since the stairs were in rough shape, we decided to have Mike sand and stain the treads. And because we clearly love adding more to our plate, we also opted to replace the balusters and newel posts at the same time.
Since the newel post is anchored into the foyer floor, this was the ideal time to tackle this project though it does add to the renovation expenses. At this point, we’re embracing a SpaghettiOs-for-the-rest-of-the-year lifestyle! 😂
After scouring through thousands of inspiration photos and visiting multiple millwork stores, we settled on a substantial but simple newel post and square balusters to complement our board-and-batten wall moldings. The newel post looks massive now, but it’ll be trimmed down to size!
Here’s a glimpse of how my beautiful stairs currently look post-stripping not pretty. If you’re new here, check out how they looked after the first makeover!
Initially, I wasn’t sure about the newel cap design, but after extensive research and countless texts to Mark, I came around. Here’s how it looks painted, straight from the Lowes website.
For durability, we went with a solid oak version rather than the primed poplar alternative it’s heavier, sturdier, and far more resistant to wear and tear over the years.
This weekend, I’ll be busy filling nail holes and repainting the risers, trim, newel posts, and balusters I cannot wait to see how it all comes together!
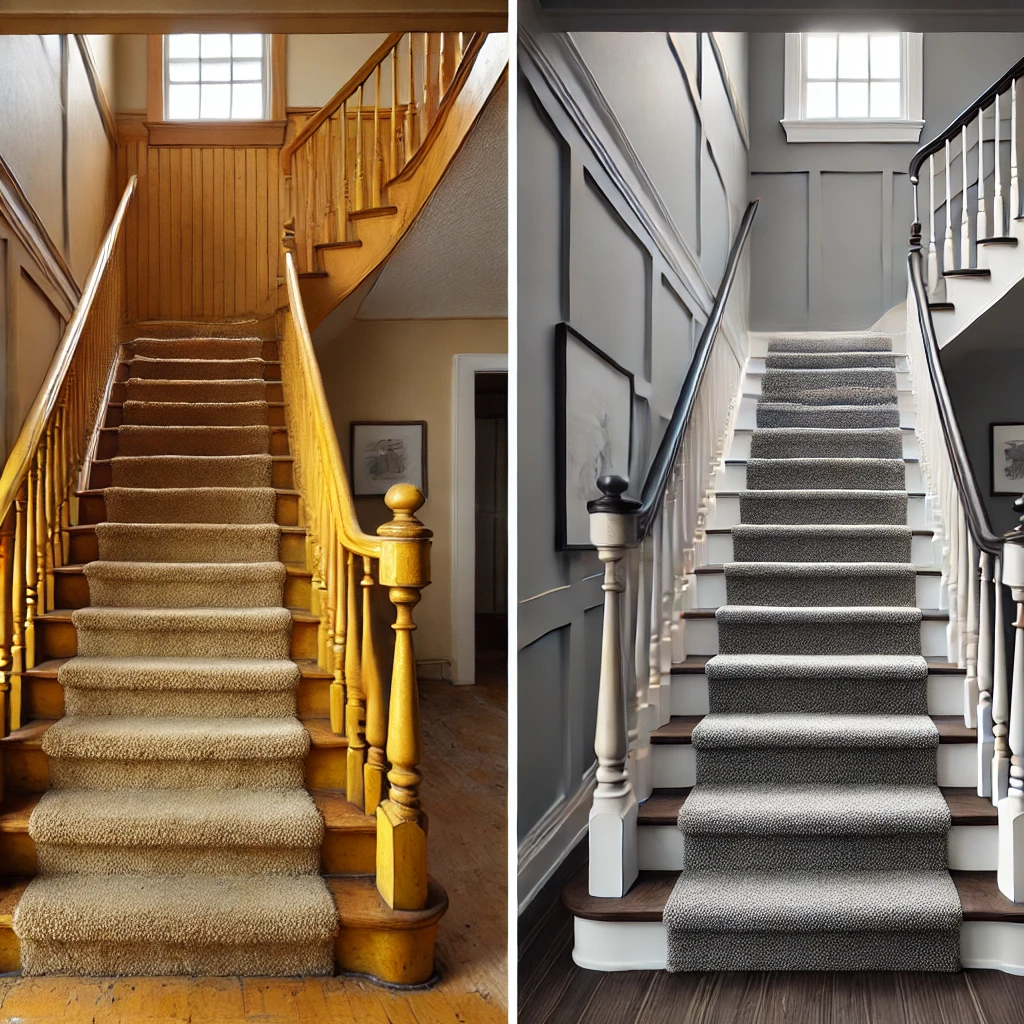
Can you believe how horrible my pretty stairs look now after stripping them??
If you’re new here see what they looked like after my first makeover.
The Realities of Renovation
Renovation is messy, invasive, and disruptive which is one of the reasons we put it off for so long. With our two eldest in college and our youngest away this week, we finally had the perfect opportunity to dive in.
Living through a renovation is tough it’s loud, time-consuming, and every inch of our first floor is in disarray. Tools, materials, and supplies are everywhere.
However, despite the temporary chaos, we are beyond excited and grateful to be at this stage! After 8.5 years, we finally saved enough, paid off debt, and tackled DIY projects to make this possible. It’s taken us far longer than anticipated, but the journey has been rewarding. Every moment of dreaming, planning, and hard work has made this transformation even sweeter.
If you’re stuck in the waiting phase, take heart! Your day will come when your home renovation dreams become reality, too.
Coming Up Next Week!
This week, the electrical pre-work will be completed, and cabinet installation begins! I cannot wait to see this space come together and share the progress with you all.
Thanks for following along on this epic journey stay tuned for more updates, and have a beautiful weekend!


")


")
")
")