Humidity is one of those invisible forces you rarely think about until it causes problems. Your hair frizzes, your windows fog, your towels never truly dry and eventually, your wall paint begins to suffer too. It usually starts subtly: a strange shine, a soft tackiness, a few tiny bubbles. But then the symptoms escalate until you’re staring at peeling sections, warped paint texture, or sagging streaks that weren’t there yesterday.
Most people blame the paint itself or the application technique when in reality, the real culprit is often humidity. Humidity affects how paint dries, cures, bonds, and ages, and it has the power to ruin even the most carefully executed paint job. What’s tricky is that humidity creates different problems at different stages: before you paint, while you paint, and long after the job is finished. Below is a deeper, expanded breakdown keeping your headers intact showing how this silent enemy works, why it matters, and how you can beat it before it wrecks your walls.
Why Humidity Matters More Than Most People Think
Humidity is more than just uncomfortable air it’s a disruptor of chemistry. Paint must dry in a controlled environment so water (in latex paint) or solvents (in oil-based paint) can evaporate at a predictable pace. When humidity is high, evaporation slows down dramatically. The paint stays soft for longer, which throws off the entire curing process. This isn’t random guesswork. Even the U.S. Environmental Protection Agency warns that excess humidity can alter how building materials behave because moisture naturally diffuses into porous surfaces over time (https://www.epa.gov/mold). And paint is essentially a film sitting on those porous surfaces, depending on them for stability.
When humidity interferes, the paint:
• loses adhesion
• forms weaker bonds
• shows uneven sheen
• becomes vulnerable to physical damage
• stays tacky or soft for days
• traps moisture beneath the surface
The result is a paint job that never quite looks right and rarely lasts long.
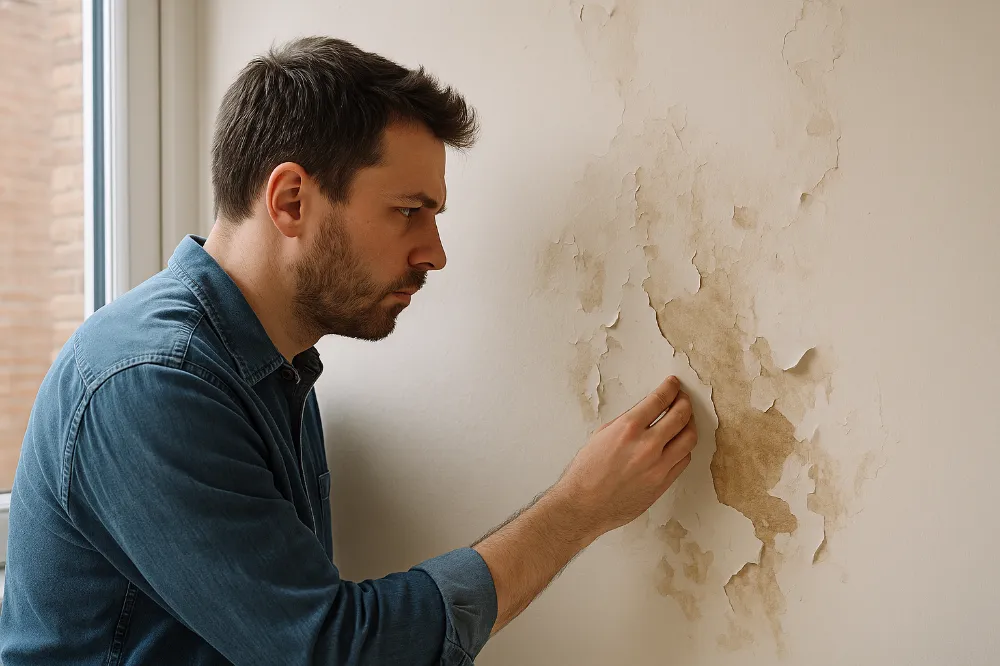
What Humidity-Damaged Paint Actually Looks Like

Humidity affects paint in recognizable ways, and each symptom tells a story about what’s happening behind your walls.
Bubbling or Blistering
Bubbles occur when moisture tries to escape from the wall but gets trapped under the paint film. The pressure pushes the paint outward. This happens when you paint over damp surfaces or moisture tries to migrate outward after painting. In bathrooms or laundry rooms, bubbling is practically a guarantee if the surface wasn’t fully dry.
Peeling or Flaking
Peeling is the next stage the moment the paint layer gives up. When adhesion fails completely, the paint separates in curls, strips, or brittle flakes. This usually means moisture has been building up behind the paint for a long time. Sometimes the top layer isn’t the problem at all it’s an older layer underneath that failed years earlier, but finally reveals itself.
Soft, Rubber-Like Paint
If your walls still feel sticky or soft days after painting, humidity is the usual suspect. That soft film never fully hardens because the curing process is incomplete. This is extremely common in rooms with showers, poor airflow, or high outdoor humidity.
Sagging or Running Paint
Humidity keeps paint wet for longer. Combine that with gravity especially on high walls or ceilings and the paint begins sliding downward. Instead of leveling smoothly, it forms drips, runs, and wavy streaks.
Mold or Mildew Growth
Paint that constantly stays damp becomes a breeding ground for mold spores. Even paints with antimicrobial additives can only resist the problem for so long. Moisture always wins if the environment doesn’t change.
Before Painting: Where Hidden Moisture Starts Trouble
Many painters think moisture problems begin during painting but often, they begin hours or days earlier. The wall itself might already be holding moisture you can’t see. Drywall, plaster, joint compound, and wood all absorb water. They act like sponges. And if you paint before they release that moisture fully, trouble begins.
Here’s where hidden moisture typically hides:
• damp drywall after cleaning
• freshly patched areas
• wood trim that absorbed humidity
• walls that have absorbed bathroom steam
• poorly insulated exterior walls
• areas near plumbing or condensation
• sections affected by past leaks
Painting over any of these without fully drying them is like painting over a wet sponge. It looks fine at first, but eventually, the moisture will push its way out.
During Painting: When Environmental Humidity Works Against You
The warnings on paint cans like “Do not paint above 85% humidity” aren’t just there for liability. They reflect how sensitive paint chemistry is.
Indoor humidity spikes unexpectedly from:
• shower steam
• boiling pots
• laundry cycles
• humid outdoor air
• rainy weather
• poor ventilation
When humidity is high during painting, the paint:
• dries slowly and inconsistently
• forms weak bonds
• tends to sag
• develops uneven sheen
• stays tacky
• traps moisture beneath it
Painting outside introduces another challenge: early mornings and late evenings are the worst because dew drastically raises humidity, even if the day feels dry.
After Painting: How Humidity Slowly Breaks Down Dry Paint
Even perfectly applied paint is vulnerable to long-term humidity exposure. Paint isn’t a solid shell it’s more like a breathable membrane. Moisture can still move through it over time.
Humidity slowly damages paint in several ways:
• moisture penetrates through the paint film
• temperature changes cause condensation behind the paint
• the wall expands and contracts with moisture cycles
• mold begins forming in areas where paint stays damp
This is why bathroom ceilings, near-shower walls, and exterior-facing rooms often show peeling or bubbling long before other parts of the home. The paint is simply reacting to years of silent moisture accumulation.
The Science Behind It (Explained Simply)
From a scientific standpoint, humidity affects paint because paint relies on controlled evaporation. The more water vapor in the air, the slower the evaporation. Latex (water-based) paint requires water to evaporate so the particles can fuse into a solid film. Oil-based paint requires oxygen to penetrate the paint film so it can oxidize and harden.
Humidity interferes with both processes.
On a deeper scientific level, many building materials especially drywall, joint compound, and wood are hygroscopic, meaning they naturally absorb moisture from the air. When walls absorb humidity, they gradually destabilize the paint film attached to them. Understanding that single concept explains nearly every humidity-related paint problem.
Ideal Humidity Levels for Painting
Most professionals agree on this general guideline:
• 40%–50% = ideal
• 50%–70% = safe but slower
• 70%–85% = risky
• above 85% = don’t paint
The challenge? Many homes regularly exceed these levels without homeowners realizing it. Bathrooms after a shower reach 90–100%. Kitchens reach 80% from boiling water. Older homes hit 70% or more with no visible signs.
Different Paint Types React Differently
Not all paints respond the same way to humidity.
Latex Paint
Most vulnerable. Needs stable evaporation to form a strong film.
Oil-Based Paint
More resilient but still sensitive to slow oxidation in humid environments.
Moisture-Resistant Paint
Designed for steamy, damp areas such as bathrooms, kitchens, and laundry rooms. These paints include resins that improve water resistance.
Flat vs. Gloss Finishes
Gloss resists humidity better. Flat finishes absorb it and show wear faster.
Areas Most Vulnerable to Humidity Damage
Certain parts of the home are humidity magnets:
• bathroom ceilings
• shower walls
• kitchen backsplashes and stovetop areas
• laundry rooms
• basements
• exterior-facing corners
• window areas
• walls behind furniture without airflow
• rooms with poor insulation
If a spot regularly stays damp or warm, humidity is shaping that environment—and affecting your paint.
Practical Ways to Prevent Humidity Damage
There’s good news: with the right approach, you can successfully paint in humid environments. You just need to control the moisture.
Reduce Humidity Before Painting
• Use a dehumidifier.
• Run fans.
• Avoid painting after a shower or rainy day.
• Paint during the driest time of day.
Choose Suitable Paint
Opt for moisture-resistant formulations, especially for bathrooms and kitchens.
Improve Ventilation
Exhaust fans, open windows, and proper ducting dramatically reduce humidity.
Prime Properly
Moisture-resistant primers help create a sealed, stable base.
Allow Proper Dry Time
If the label says two hours, expect longer in humid conditions.
Make Sure the Surface Is Truly Dry
Moisture hiding inside drywall is one of the biggest hidden risks.
Fix Underlying Moisture Problems
Leaks, condensation issues, and poor insulation create recurring paint failures.
How to Fix Existing Humidity Damage
If humidity has already wreaked havoc, you can still restore the surface properly.
Identify the Moisture Source
Steam? A hidden leak? Poor airflow? You must fix this first.
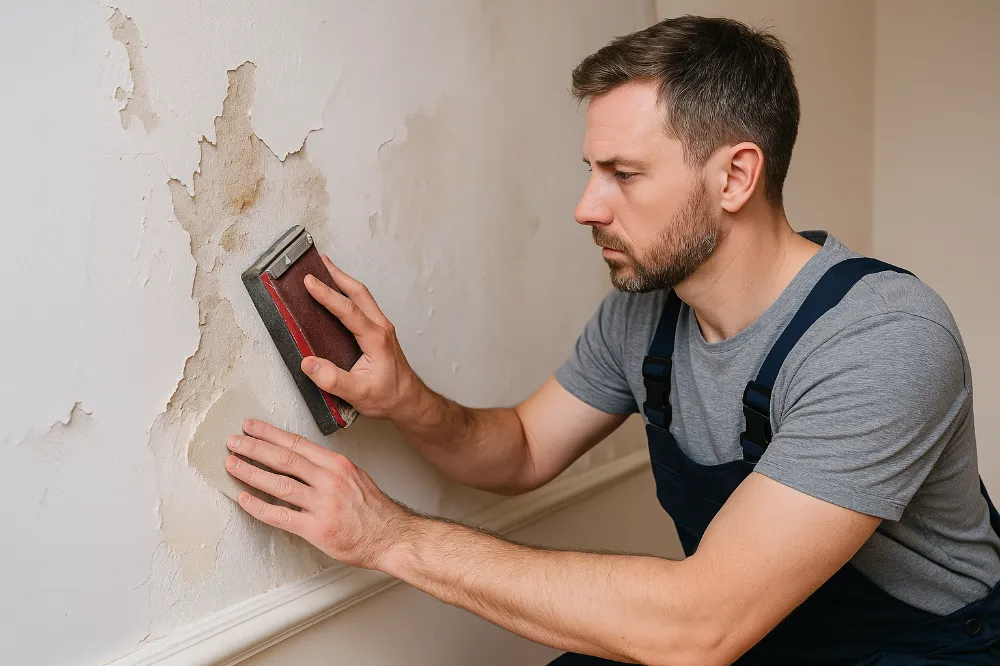
Remove Damaged Paint
Scrape away bubbling or peeling sections to reveal stable layers.
Fully Dry the Wall
Drying may take hours or even days depending on the room.
Sand and Patch
Level the damaged area so the surface looks uniform again.
Prime With a Moisture-Blocking Primer
This is essential for long-term protection.
Repaint Using the Right Product
Choose paint intended for humid spaces for the best results.
Final Thoughts
Humidity might not be visible, but its effects absolutely are. When humidity interferes with paint at any stage before, during, or long after application the results can be messy, frustrating, and expensive. From slow drying to peeling walls, humidity is a quiet but powerful variable every homeowner needs to consider.
The key is simple:
Control the moisture, use the right products, and give your walls time to breathe. Do this, and your paint will reward you with a smooth, durable finish that actually lasts even in the most humidity-prone rooms of your home.
FAQs
High humidity slows evaporation, causing longer dry times, tacky surfaces, and uneven paint texture.
You can, but it’s risky. Paint may not cure properly, which leads to bubbling, streaking, or peeling later.
Moisture gets trapped under the paint film and pushes outward, creating bubbles or blisters as it tries to escape.
Between 40%–50% is ideal. Anything above 70% increases the likelihood of defects.
Yes. Bathrooms need moisture-resistant or mold-resistant paint to withstand constant steam and condensation.
Humidity weakens adhesion, allowing the paint to detach from the surface over time.
Use ventilation, dehumidifiers, moisture-resistant primer, and paint during dry conditions.
Absolutely. Consistent moisture can lead to mold, peeling, bubbling, and discoloration even years after painting.
Use a moisture meter or touch the wall—if it feels cool, damp, or shows condensation, it’s not ready.
Yes. Running a dehumidifier lowers moisture levels, helping paint dry and cure more evenly.


