Humidity is one of those silent forces you don’t really think about until it’s already caused trouble. It’s the invisible saboteur of home improvement the quiet villain behind slow-drying paint, warped boards, sticky doors, bubbling finishes, musty smells, and those mysterious problems that show up days or weeks after you thought a project was done.
When I first started tackling my own home improvements, I made the classic mistake of ignoring humidity altogether. I cared about tools, materials, timing, colors but humidity? I barely gave it a second thought. It wasn’t until a freshly painted wall stayed tacky for two days, and a brand-new wood shelf bowed into a sad little curve, that I realized moisture in the air is not something to brush off. Now, humidity is one of the first things I check before starting any project. This article is a complete, experience-backed look at how humidity affects home improvement, what can go wrong, and how to work around it like someone who has learned sometimes the hard way.
Why Humidity Matters More Than You Think
Humidity affects more things than most DIYers realize. Paint, wood, adhesives, concrete, tile, metal almost every material reacts to humidity in some way. Think of air like a sponge. When the sponge is full (humid), nothing evaporates properly. When the sponge is dry (low humidity), materials lose moisture too quickly. One of the scientific concepts behind this is something called hygroscopy a material’s ability to absorb moisture from the air. Wood, drywall, grout, and many other materials used in home improvement are highly hygroscopic.
Most home improvement tasks depend on controlled drying or stable materials. Humidity disrupts both.
High humidity usually causes:
• Slow drying
• Poor adhesion
• Swelling or warping
• Weak bonding
• Staining and blotching
• Mold or mildew growth
Low humidity usually causes:
• Cracking
• Shrinkage
• Brittle finishes
• Gaps or loosened joints
• Too-fast drying that ruins smoothness
Once you start noticing how many issues trace back to moisture in the air, it’s hard to unsee it.
Painting: The Project Humidity Loves to Wreck
Painting is one of the easiest home improvement tasks to mess up because humidity influences every layer—from primer to topcoat.
Slow, Sticky Drying
Paint dries through evaporation. When the air is already loaded with water, the paint simply has nowhere to release its moisture. Instead of forming a smooth shell, the paint stays soft for hours or even days.
Signs humidity is messing with your paint:
• Walls feel gummy or tacky
• Bugs or dust stick to the surface
• Brush marks won’t level out
• A second coat ruins the first because it wasn’t fully dry
If humidity is above 65–70%, you’re almost guaranteed to run into problems.
Blistering, Bubbling, and Peeling
High humidity causes condensation on paint surfaces especially in bathrooms, kitchens, or exterior walls. Moisture gets trapped between layers, leading to bubbles that eventually peel.
Patchy or Uneven Color
You’ll especially see this with dark paints or satin/eggshell finishes. Different sections dry at different rates, leaving streaks, cloudy spots, or dull areas.
Low humidity isn’t perfect either
When humidity is too low, paint dries so fast that:
• Roller lines stay visible
• Edges dry before you can blend
• The final finish looks chalky or rough
The sweet spot for painting is 40–55% humidity.
Wood and Humidity: A Love-Hate Relationship
Wood is like a sponge it absorbs moisture when the air is humid and releases moisture when it’s dry. It moves constantly with the weather, expanding and contracting like it’s alive. And if you install wood during the wrong humidity, it will absolutely let you know.
What High Humidity Does to Wood
• Doors stick and won’t close smoothly
• Cabinets swell and rub
• Hardwood flooring buckles or warps
• Shelves bow downward
• Furniture pieces shift or loosen
• Mold grows inside cabinets or behind trim
If you’ve ever had a door suddenly refuse to close in summer, humidity is the reason.
Low Humidity Shrinks Wood
Winter dryness can make wood shrink dramatically:
• Floorboards develop gaps
• Trim separates from walls
• Countertops crack
• Furniture joints loosen
Wood is never “finished shrinking or expanding.” It’s a lifelong relationship with moisture.
Why Acclimation Is Non-Negotiable
When you buy hardwood or engineered flooring, the box usually says “Let acclimate for 48–72 hours.” This is not marketing. It allows the wood to match your home’s humidity level before installation. Skipping acclimation can ruin an entire flooring project even if the installation was perfect. Ideal humidity for wood projects: 35–55%
Humidity and Adhesives: When Glue Won’t Do Its Job
Caulk, construction adhesive, wood glue, mortar, grout almost every adhesive has a curing process based on moisture movement. Too much humidity slows it down; too little speeds it up.
High Humidity Effects
• Caulk stays soft
• Wood glue takes forever to cure
• Silicone won’t form a proper seal
• Mortar becomes mushy
• Tile adhesive weakens
• Wallpaper glue refuses to bond
Bathrooms and kitchens are especially tricky because they already contain moisture pockets.
Low Humidity Effects
• Caulk dries too fast and cracks
• Wood glue sets before you align pieces
• Adhesives become brittle
The results might not show immediately, but you’ll feel them later when tiles loosen, trim separates, or caulk starts peeling away.
Flooring Installation: Where Humidity Mistakes Become Expensive
Few home projects suffer from humidity issues as dramatically as flooring.
Hardwood Floors
Hardwood is the most dramatic. If installed during high humidity, boards expand after installation and push against each other, causing buckling or crowning. If installed during low humidity, boards will shrink later and leave gaps wide enough to lose crumbs and your patience in.
Laminate and Engineered Wood
These materials resist humidity better, but not completely. Excess moisture can:
• Warp boards
• Bubble surfaces
• Make planks pull apart
• Damage locking mechanisms
Tile and Stone
Humidity affects the curing of mortar and grout more than the tile itself. Too much moisture leads to:
• Soft mortar
• Weak bonding
• Grout that crumbles
For flooring, aim for 40–55% indoor humidity before and during installation.
Drywall, Joint Compound, and Plaster
If you’ve ever waited for joint compound to dry on a humid day, you know the agony. Humidity extends drying time to the point where a “quick patch job” becomes a two-day ordeal.
When Humidity Is Too High
• Joint compound stays wet for hours
• Seams crack after drying
• Mud shrinks unevenly
• Patches look lumpy or sunken
• Mold forms behind new drywall
Fresh mud + humidity = instant mildew risk, especially in poorly ventilated areas.
Low Humidity Issues
• Mud dries too fast and becomes brittle
• Cracks appear in large patches
• Edges crumble when sanded
This is why contractors obsess over indoor humidity during major renovations.
How Humidity Affects Metal, Tools, and Hardware
Humidity doesn’t stop with wood and paint metal reacts too.
Rust and Corrosion
Nails, screws, tools, hinges, brackets they can all rust quickly in humid environments. Rust isn’t just ugly; it weakens metal and compromises the integrity of your work.
Humidity will:
• Rust your saw blades
• Dull drill bits
• Pit and discolor metal
• Create stains on finished surfaces
• Weaken fasteners inside walls
Anyone who stores tools in a garage knows how fast moisture can damage them.
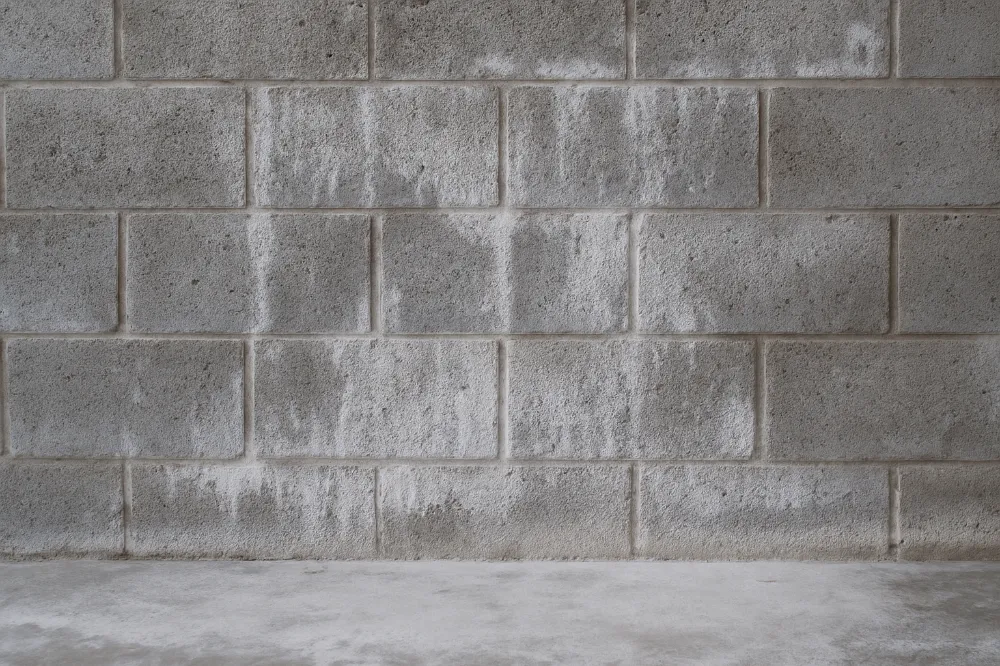
Concrete and Masonry: Humidity Can Weaken the Cure
Concrete and mortar need precise moisture levels to cure correctly.
High Humidity
• Slows the curing process
• Weakens finished concrete
• Causes efflorescence (white mineral deposits)
• Makes surfaces dusty or chalky
Low Humidity
• Causes concrete to dry too fast
• Leads to cracking
• Reduces long-term durability
This is why even professional crews monitor humidity on big pours.
Exterior Projects: The Humidity Battle Outside
Working outdoors means humidity isn’t just a factor it’s a constant battle.
Exterior Painting
Painting the outside of a house during high humidity is asking for trouble. You’ll end up with:
• Blistering
• Peeling
• Sticky surfaces
• Poor adhesion
• Uneven color
Morning dew, lingering moisture, and humid evenings all affect the finish.
Staining Decks or Fences
Staining in high humidity creates blotchy, uneven results. Wood soaks up moisture and rejects stain or absorbs too much.
Outdoor Tile, Concrete, and Masonry
All of these require careful timing. If humidity rises unexpectedly, your project can fail without warning.
Seasonal Humidity: Planning Projects at the Right Time
Humidity isn’t just about the weather it’s about the season you’re working in.
Summer
Hot and humid.
Best for: exterior staining, exterior repairs
Worst for: interior painting, wood installation, adhesives
Winter
Dry and static-filled.
Best for: painting (if humidity is controlled)
Worst for: installing wood floors, cabinetry, trim
Spring
Can be unpredictable.
Best for: sanding, drywall, interior repairs
Worst for: anything requiring precise curing
Fall
Often ideal.
Best for: painting, flooring, cabinets
Worst for: outdoor finishing if temperatures dip too low
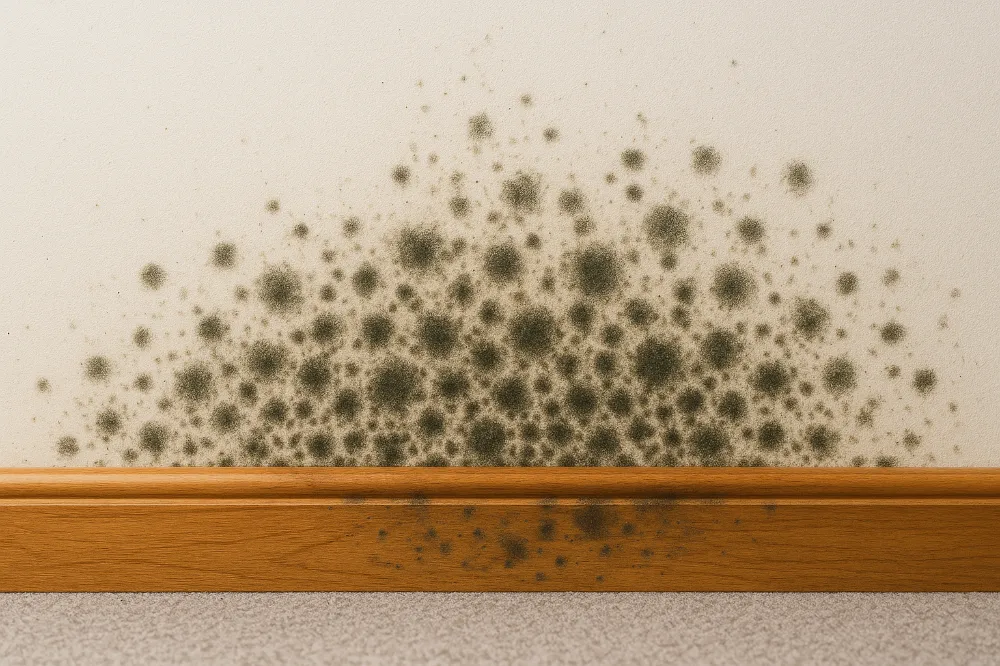
Mold: The Humidity Danger Nobody Wants to Talk About
One of the biggest dangers of humidity is mold. Fresh paint, new drywall, recently installed cabinets these materials seal moisture inside if humidity is too high. The U.S. Environmental Protection Agency (EPA) actually provides guidelines on ideal indoor humidity ranges to help prevent mold and protect indoor air quality.
Mold thrives when:
• Humidity stays above 60%
• Ventilation is poor
• Surfaces remain damp
• Materials are freshly installed
Nothing ruins a new renovation faster than mold creeping up behind drywall seams or underneath trim.
How to Control Humidity for Better Home Projects
Humidity control doesn’t need to be complicated. A few small steps can prevent big problems.
Use a Hygrometer
This little device becomes your best friend. Always check humidity before starting a project.
Run a Dehumidifier
Especially during summer it stabilizes humidity fast.
Use Fans and Ventilation
Airflow helps paint, caulk, and compound dry evenly.
Run the HVAC System
Air conditioning reduces humidity dramatically.
Acclimate Materials
Let wood, flooring, or cabinets sit indoors before installation.
Avoid Rush Jobs
Humidity slows drying give materials the time they need.
Real Examples of Humidity Ruining Projects (From Hard Lessons)
The Sticky Bedroom Walls
I once painted a room on a hot, humid day. Twelve hours later, the walls still felt tacky. Dust, pet hair, and even a bit of shirt fabric stuck to the surface. I eventually repainted weeks later but only after humidity dropped.
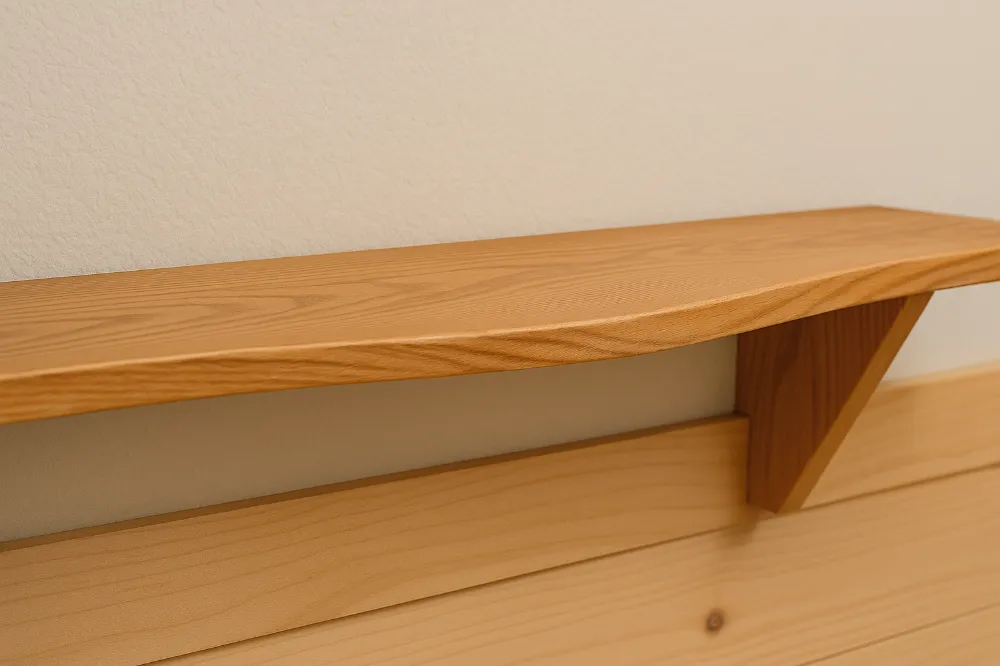
The Warped Wood Shelf
I built a custom shelf, installed it right away, and admired my work. A week later it bowed downward like a sad hammock. I hadn’t let the wood acclimate.
The Cracked Caulk Around a Tub
I applied caulk during a dry winter weekend. It cured too fast, cracked within days, and I had to redo the entire job. Humidity played villain in every scenario.
Final Thoughts: Respect the Humidity, Save Your Projects
If there’s one thing experience has taught me, it’s this: humidity will always win unless you pay attention to it. You don’t need fancy tools or contractor-level equipment just awareness, timing, and basic humidity control. Whether you’re painting a room, installing new floors, building furniture, staining a deck, or doing anything that involves drying or bonding, humidity is silently affecting your results. Once you start watching humidity the way you check the weather, your projects will look better, last longer, and involve far fewer surprises.
FAQs
High humidity slows evaporation, causing paint to stay tacky longer, form streaks, or develop bubbles.
You can, but it’s risky. Use air conditioning, fans, or a dehumidifier to bring humidity below 55% for best results.
Wood is hygroscopic, meaning it absorbs moisture from the air. High humidity causes swelling and warping.
Aim for 35–55% humidity and let the wood acclimate for 2–3 days before installation.
Yes. Excess humidity slows mortar and grout curing, potentially weakening the bond.
Definitely. High humidity delays curing, while low humidity can cause cracking or brittle adhesion.
Joint compound relies on evaporation. If the air is moist, the mud can stay wet for hours or even overnight.
Moist air gets trapped behind new materials, creating perfect conditions for mold, especially above 60% humidity.
Yes. Let them sit in the home’s environment to avoid expansion, contraction, or warping after installation.
Use dehumidifiers, AC, ventilation fans, and hygrometers to monitor and maintain proper levels.


