Curtain clips have their moment. And then… they don’t. They rattle, they pinch fabric in odd places, and sometimes they cheapen an otherwise well-styled room. That’s why more homeowners, renters, and designers are quietly searching for how to use curtain rings without clips—and discovering that the result is cleaner, quieter, and far more intentional.
I’ve used clip-less curtain rings in apartments, staged homes, and lived-in spaces. Once you get the hang of it, you won’t go back. The key is knowing which method fits your curtain type, fabric weight, and design goal. This guide walks through exactly how to do that—step by step—with no fluff and no shortcuts.
Why Skip the Clips in the First Place?
Let’s be honest. Clips solve one problem but create several others.
They can:
- Visibly pinch fabric instead of letting it drape
- Slide unevenly over time
- Make noise every time you open the curtains
- Damage delicate materials like linen, silk, or sheers
Using curtain rings without clips gives you control. Control over spacing. Over length. Over how the fabric falls. And when done right, it looks custom—even if the curtains weren’t.
That’s why learning how to use curtain rings without clips is less of a hack and more of an upgrade.
What Curtain Rings Without Clips Actually Are
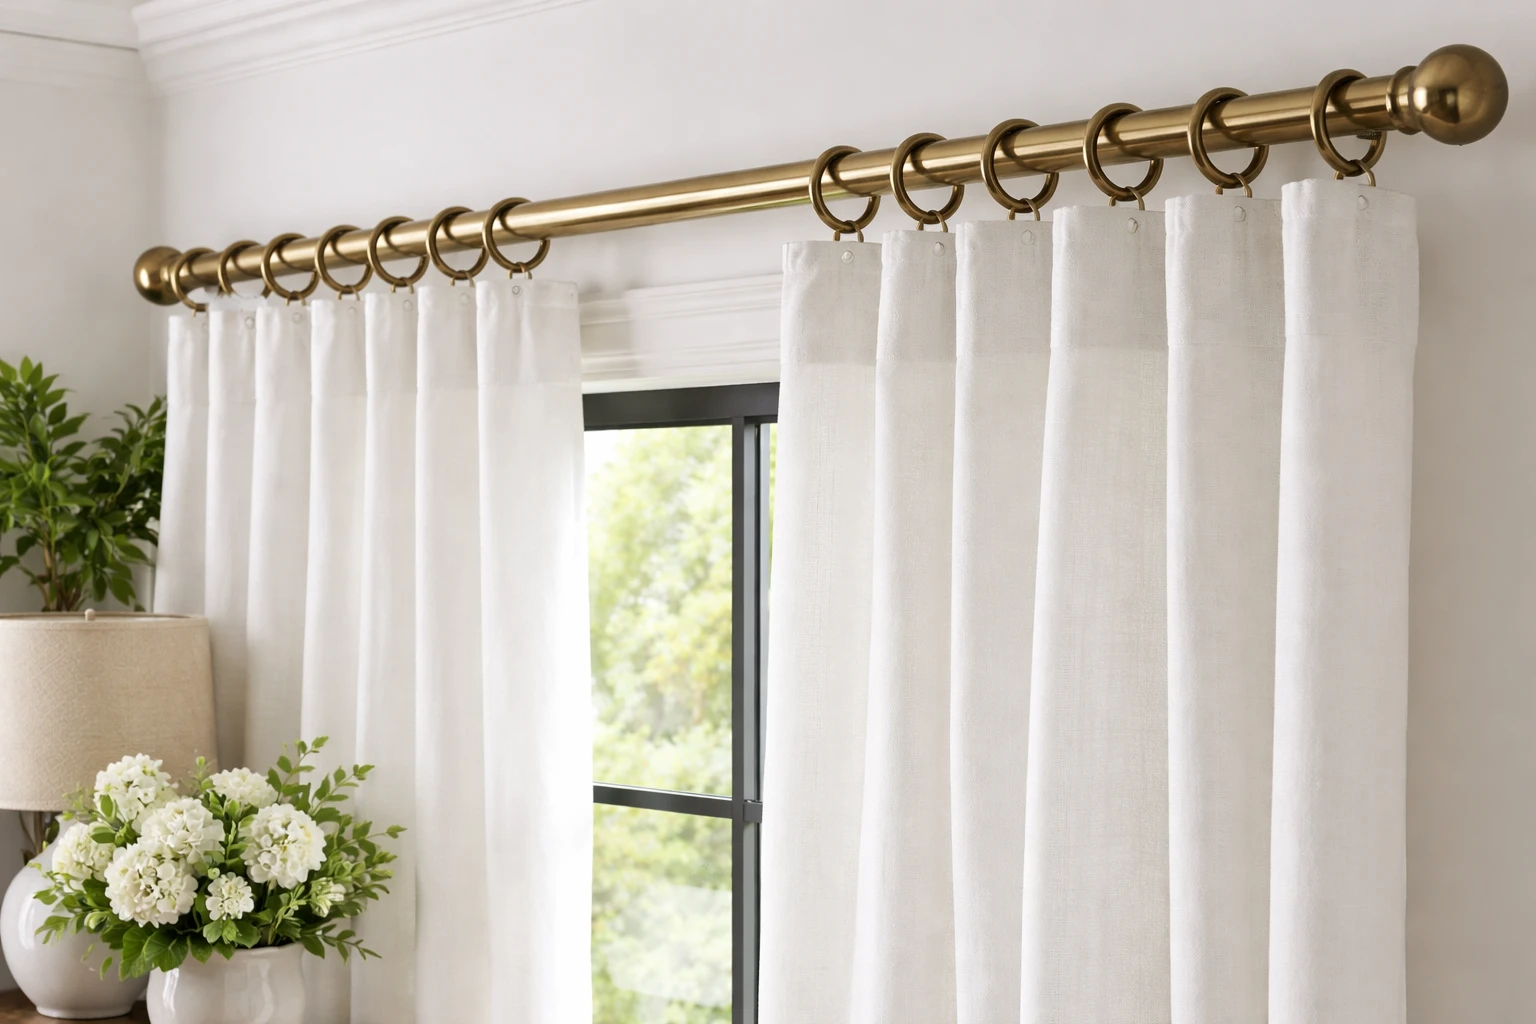
At their core, curtain rings without clips are just smooth rings—usually metal, wood, or acrylic—that slide onto a curtain rod. No clamps. No pinch points. Nothing visible holding the fabric except your chosen attachment method.
They typically come in:
- Metal (modern, durable, great for heavier panels)
- Wood (warm, classic, ideal for farmhouse or traditional rooms)
- Plastic or acrylic (lightweight, budget-friendly, often overlooked)
The inner diameter matters. Your ring should be at least ½ inch wider than the rod to allow smooth movement.
Before You Start: A Quick Reality Check
Before attaching anything, pause. Five minutes of prep saves hours of frustration later.
Ask yourself:
- What type of curtain header do I have?
- How heavy is the fabric?
- Is this a permanent setup or temporary?
Here’s a fast reference table:
| Curtain Type | Best Clip-Free Method |
| Flat panel | Drapery pins or sewn rings |
| Rod pocket | Pins or creative threading |
| Back tab | Rings through tabs or hooks |
| Sheer curtains | Sewing or fabric loops |
| Heavy blackout | Drapery pins only |
Once you know this, everything else becomes easier.
Method 1: Drapery Pins (The Professional Favorite)
If you want curtains that hang like they came from a showroom, this is the method.
Drapery pins are small metal hooks that slide into the back of the curtain header. The curved end hooks directly into the curtain ring.
How to Do It
- Lay the curtain flat.
- Insert pins evenly along the top back edge.
- Hook each pin into a curtain ring.
- Slide the rings onto the rod.
That’s it. No sewing. No visible hardware from the front.
Why It Works
- Creates even pleats
- Supports heavier fabrics
- Allows easy height adjustment
If someone asks me how to use curtain rings without clips for blackout curtains or long panels, this is always my answer.
Method 2: Sewing Curtain Rings Directly to the Fabric
This method looks incredibly clean when done well. It’s also more permanent.
Instead of attaching rings to the rod first, you attach them to the curtain itself.
This method looks incredibly clean when done well, especially when enhanced with software machine embroidery techniques. It’s also more permanent.
Best Use Cases
- Lightweight to medium-weight fabrics
- Custom or DIY curtains
- Rooms where curtains won’t be changed often
How to Sew Them
- Fold over the top hem for reinforcement
- Hand-stitch or machine-stitch each ring
- Space rings evenly (we’ll cover spacing later)
The result? Rings that disappear into the fabric line. Elegant. Quiet. Intentional.
Method 3: Fabric Loops (Simple and Stylish)
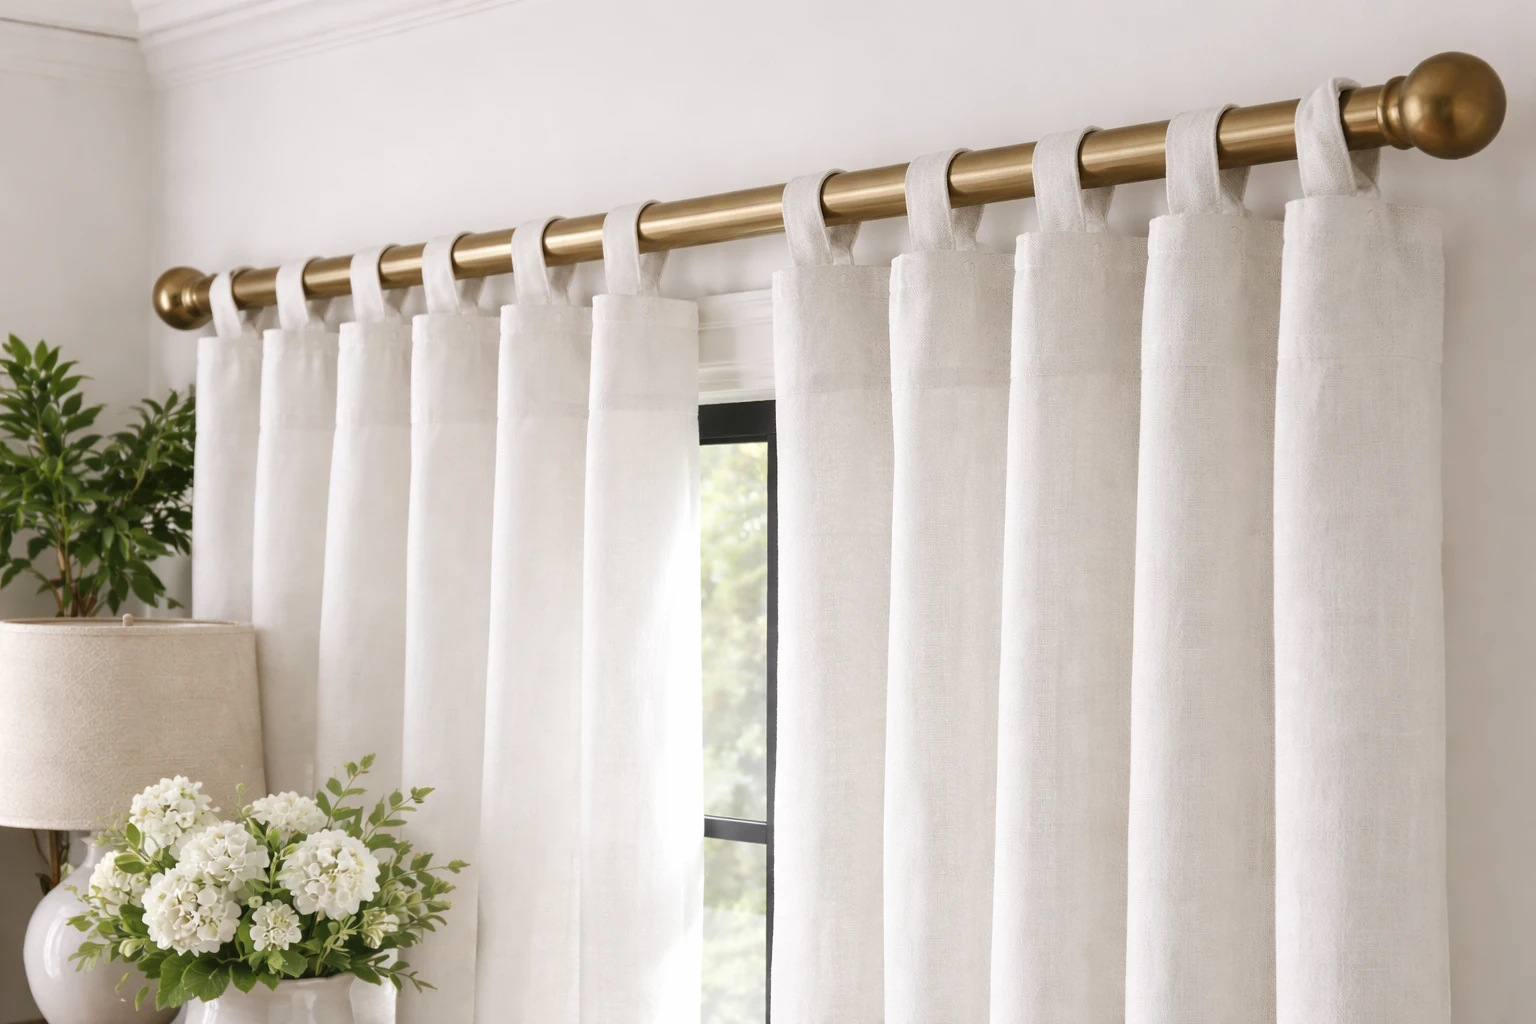
Fabric loops are underrated. They’re easy, forgiving, and visually soft.
You can make loops from:
- Matching curtain fabric
- Grosgrain ribbon
- Leather strips
- Twill tape
Steps
- Cut strips 4–6 inches long.
- Fold into loops.
- Sew loops into the top hem.
- Slide curtain rings through loops.
This is a favorite method when people ask how to use curtain rings without clips in casual or bohemian spaces. It’s relaxed. Not stiff. And surprisingly durable.
Method 4: Shower Rings or S-Hooks (Yes, Really)
This one surprises people. And it works.
Shower curtain rings and S-hooks can act as a bridge between fabric and ring—especially for renters or temporary setups.
When to Use This
- No sewing allowed
- Budget constraints
- Rental apartments
Thread the hook through a stitched seam or reinforced hole, then connect it to the ring. It’s not invisible. But it’s functional and adjustable.
Method 5: Using Existing Curtain Headers Creatively
Sometimes the solution is already there.
Rod Pocket Curtains
You can:
- Thread rings through the pocket itself
- Or insert drapery pins through the pocket seam
Back Tab Curtains
Slide rings directly through the tabs. It creates soft folds and keeps the hardware visible in a clean way.
This approach is often overlooked when learning how to use curtain rings without clips, but it’s one of the fastest solutions.
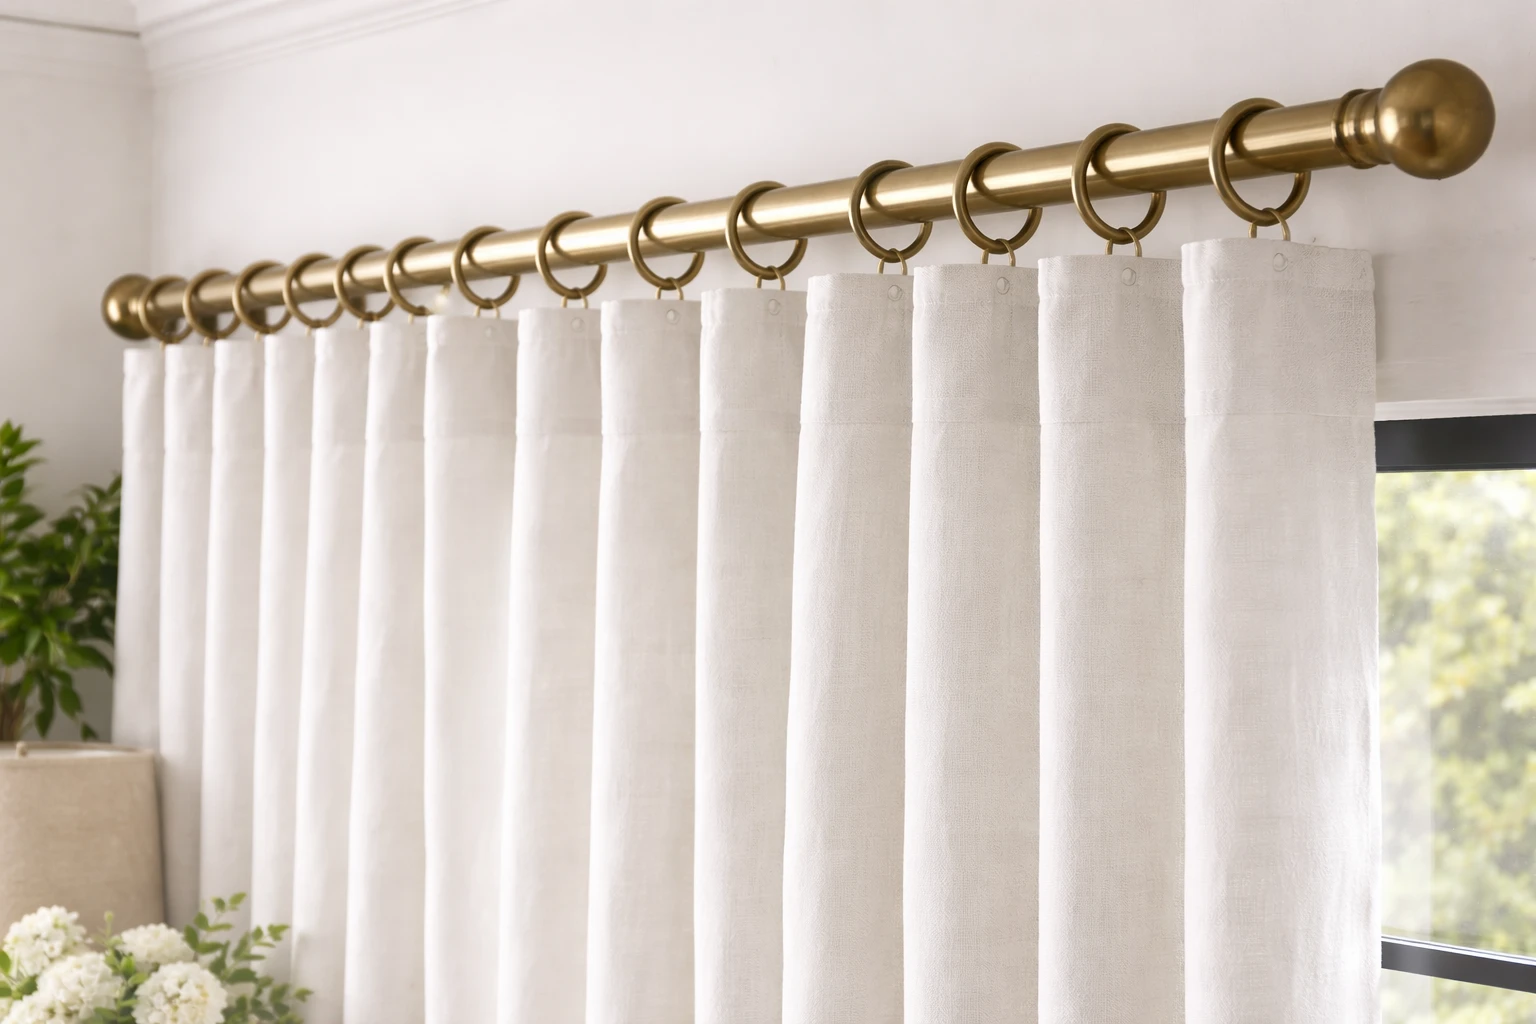
Ring Spacing: The Detail That Changes Everything
Spacing is where amateur setups give themselves away.
Too few rings? The curtain sags.
Too many? It bunches awkwardly.
General Rule
- One ring every 4–6 inches
Spacing Guide
- Sheer curtains: 4 inches
- Medium-weight panels: 5 inches
- Heavy curtains: 6 inches
Always add one extra ring at each end. It prevents light gaps and keeps edges crisp.
Styling Tips That Make It Look Intentional
Curtain rings aren’t just functional. They’re visible design elements.
A few rules I follow:
- Match ring finish to the rod, not the curtain
- Use darker rings for contrast, lighter rings for softness
- Keep rings consistent across layered curtains
Layering sheers and panels? Use the same ring size for both. It keeps movement smooth and visually aligned.
Common Mistakes (And How to Avoid Them)
I’ve made all of these. Learn from my mistakes.
- Using rings that are too small for the rod
- Skipping reinforcement on heavy fabrics
- Uneven pin placement
- Not testing curtain height before final hanging
When people struggle with how to use curtain rings without clips, it’s almost always one of these issues.
Long-Term Care and Adjustments
Curtains settle over time. Fabric stretches. Gravity wins.
Check your setup every few months:
- Adjust pins if fabric sags
- Tighten stitched areas
- Clean rings to prevent drag
Metal rings benefit from a quick wipe. Wooden rings prefer dry dusting only.
Final Thoughts
Learning how to use curtain rings without clips changes how you think about window treatments. It turns curtains from an afterthought into a design feature. The fabric hangs better. The room feels calmer. And everything looks just a bit more finished.
You don’t need custom drapery or expensive hardware. You just need the right method for your space—and a willingness to skip the clips.
Once you do, you’ll never miss them.
FAQs
Yes, most curtain types work as long as you use drapery pins, sewn loops, or reinforced headers.
Using drapery pins is the easiest and most flexible option because it requires no sewing.
They do, but only when paired with sturdy drapery pins or reinforced stitching.
Use one ring every 4–6 inches of curtain width, plus one extra ring at each end.
Yes, and often more smoothly, since there’s no metal clip catching or twisting on the rod.
Yes, drapery pins and hooks are renter-friendly and easily removable.
No, standard curtain rods work as long as the ring diameter is slightly larger than the rod.
Yes, sewing rings or using fabric loops works especially well for lightweight sheers.
It can slightly affect length, so always test hang before final placement.
Yes, they reduce pinching and stress, making them ideal for linen, silk, or cotton panels.


")


