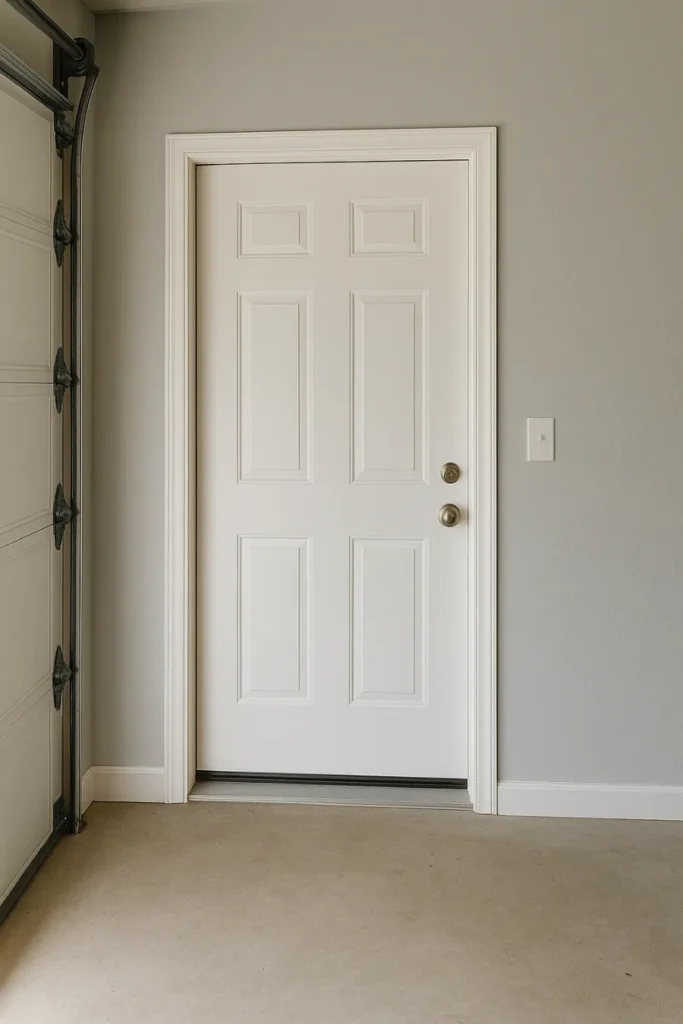
A garage entry door is more than just a passageway between your garage and home—it’s a silent guardian of security, energy efficiency, and convenience. Many homeowners overlook its importance, focusing more on the large overhead garage door. But here’s the truth: the right garage entry door can make your daily life smoother, keep your home safer, and even add to your overall curb appeal. Let’s dig into everything you need to know before choosing one.
What Is a Garage Entry Door?
A garage entry door is the smaller, people-sized door that allows you to walk in and out of your garage. Unlike the overhead garage door meant for vehicles, this door serves as a direct connection—either from your garage to the inside of your house, or from the garage to your backyard or driveway.
Think of it as a hybrid between your front door and a utility door. It has to be strong enough to secure your home, insulated enough to handle temperature changes, and stylish enough to complement your overall design. Pick wisely, and it will feel like a hidden upgrade that adds safety and comfort to your home.
Key Factors to Consider Before Choosing a Garage Entry Door
When selecting your next garage entry door, keep these essentials in mind:
Security
Your garage often holds expensive tools, bikes, and of course, your car. A weak entry door is an open invitation for intruders. Look for:
- Solid-core or steel construction
- Reinforced frames
- Deadbolt locks
- Smart lock compatibility
Energy Efficiency
If your garage is climate-controlled or attached to your home, insulation matters. An energy-efficient garage entry door reduces drafts and keeps your HVAC system from working overtime. Energy Star–rated doors typically feature:
- Insulated cores
- Weatherstripping
- Double or triple-pane glass inserts (if applicable)
Fire Safety
Many building codes require that a garage entry door leading into the home be fire-rated. These doors are designed to slow the spread of flames and smoke. Check your local code, but in most cases:
- A minimum 20-minute fire rating is required.
- Solid-core wood, steel, or fiberglass are suitable materials.
Weather Resistance
Your garage door may face extreme weather. Fiberglass and steel are excellent at resisting moisture, drafts, and temperature swings, while wood—although beautiful—can warp if not maintained properly.
Style and Design
It should flow with your home’s architecture. Options range from modern glass inserts to rustic wood finishes. The style should complement both the garage exterior and the rest of the house.
Maintenance
Ask yourself: do you want a low-maintenance option, or are you okay with seasonal touch-ups? Fiberglass and steel are the easiest to maintain, while wood requires regular sealing or painting.
Budget
The good news? There’s a garage entry door for every price point. Steel is generally the most affordable, while solid wood and custom fiberglass are on the higher end. Keep in mind long-term maintenance costs as well.
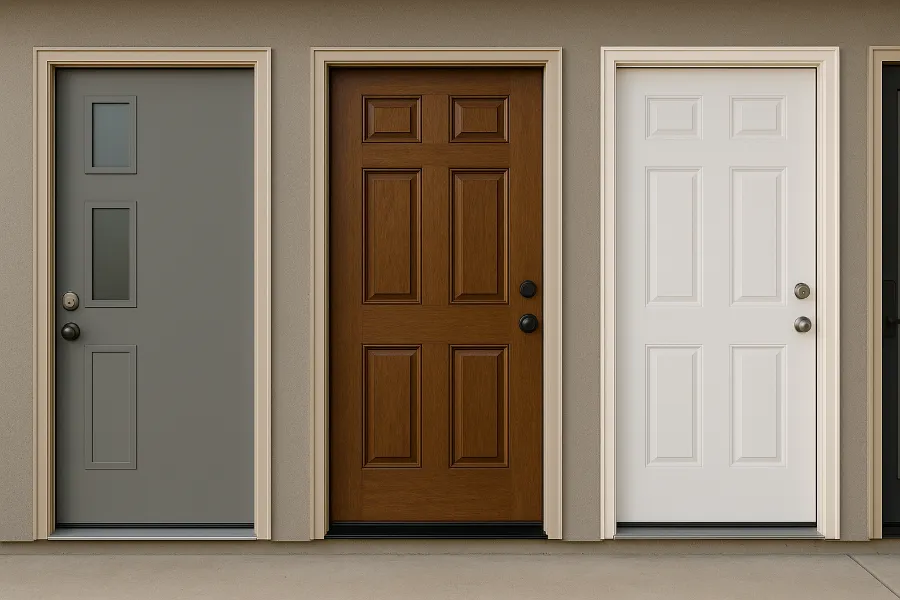
Types of Garage Entry Doors by Material
Each material has its strengths and weaknesses. Here’s a breakdown:
Steel
- Pros: Affordable, secure, low-maintenance, weather-resistant
- Cons: Dents easily, prone to rust if scratched
- Best For: Budget-conscious homeowners who want strength without the fuss
Fiberglass
- Pros: Durable, resistant to dents and moisture, can mimic wood, low maintenance
- Cons: More expensive than steel, may crack under severe impact
- Best For: Coastal or humid climates where warping and rust are concerns
Wood
- Pros: Timeless, elegant, customizable, solid-core strength
- Cons: Expensive, high maintenance, susceptible to warping
- Best For: Homeowners seeking classic beauty and willing to maintain it
Aluminum
- Pros: Lightweight, rust-resistant, sleek modern look
- Cons: Not as strong, dents easily
- Best For: Contemporary homes where weight and corrosion resistance matter
Vinyl
- Pros: Low cost, weatherproof, won’t rust or warp
- Cons: Limited design options, not as stylish
- Best For: Utility-focused homeowners who want a functional, inexpensive solution
Glass
- Pros: Modern, allows natural light, stylish
- Cons: Expensive, less privacy, needs frequent cleaning
- Best For: Modern homes aiming for a high-end look
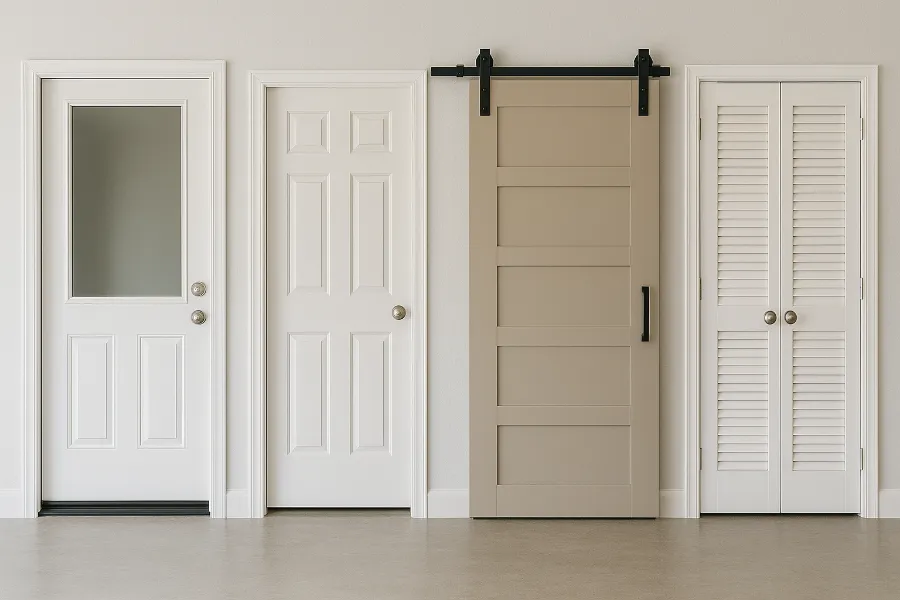
Types of Garage Entry Doors by Functionality
Beyond materials, think about how your garage entry door will function:
Standard Swing Doors
The most common type—simple hinged doors that swing open and closed like your front door. Available in steel, fiberglass, or wood.
Insulated Doors
If your garage doubles as a laundry room, gym, or workshop, insulation is key. An insulated garage entry door helps regulate temperature.
Fire-Rated Doors
A must-have for attached garages. They’re built to delay the spread of fire, giving your family more time to react.
Smart Lock–Ready Doors
Tech-savvy homeowners can opt for doors designed to integrate with smart locks, keypads, or even biometric access.
Interior vs. Exterior Garage Entry Doors
There are two types of garage entry doors:
- Interior Garage Entry Door (to the house): Needs to be fire-rated, well-insulated, and secure.
- Exterior Garage Entry Door (to the outside): Should be weather-resistant and secure, much like a front door.
If your garage faces the elements, prioritize insulation, weatherstripping, and durability.
Cost Comparison of Garage Entry Doors
Here’s a quick snapshot of what you might expect:
| Material | Price Range | Maintenance | Durability |
|---|---|---|---|
| Steel | $200–$700 | Low | High |
| Fiberglass | $400–$1,200 | Low | High |
| Wood | $600–$2,500 | High | High |
| Aluminum | $300–$900 | Medium | Medium |
| Vinyl | $150–$600 | Very Low | Medium |
| Glass | $1,000+ | Medium | Medium |
Checklist for Choosing the Best Garage Entry Door
Before buying, make sure your garage entry door ticks these boxes:
- Fire-rated if attached to your home
- Solid-core or insulated design
- Strong locking mechanism
- Weatherstripping for efficiency
- Style that matches your home
- Maintenance you’re comfortable with
- Fits within your budget
Frequently Asked Questions
1. Can I use a regular interior door as a garage entry door?
Not recommended. Interior doors lack the security, insulation, and fire rating needed for safety and durability.
2. Which is better—steel or fiberglass?
Steel is stronger and cheaper. Fiberglass offers better resistance to weather and requires less upkeep.
3. Do I need a fire-rated garage entry door?
Yes, if your garage connects directly to your home. Always check local building codes.
4. How long do garage entry doors last?
With proper maintenance, steel and fiberglass can last 20–30 years. Wood typically lasts 15–20 years with regular care.
5. Can I paint my garage entry door?
Absolutely. Steel, fiberglass, and wood can all be painted to match your home’s style.
Conclusion
A garage entry door might seem like a small detail, but it’s a powerhouse of functionality. The right choice balances security, efficiency, style, and budget. If you’re focused on affordability and strength, steel is your friend. For low-maintenance elegance, fiberglass is a smart bet. And if you want timeless beauty, wood delivers—just be ready for upkeep.
Bottom line? Choose the garage entry door that fits your lifestyle, climate, and design preferences. It’s not just about aesthetics—it’s about protecting your home, boosting comfort, and adding lasting value.


