If you’ve ever handled a transfer or trash pump, you already know how crucial the diaphragm for AMT pumps is in keeping things running smoothly. This flexible yet durable membrane is what makes these pumps capable of moving thick, abrasive, or muddy fluids when impellers alone can’t do the job. Think of it as the heart muscle of your water pump — contracting and releasing to keep the fluid flow consistent and powerful.
Understanding How a Diaphragm Pump Works
At its core, a diaphragm pump uses suction and pressure to move liquids, slurries, or even semi-solids. When the diaphragm moves back, it creates a vacuum that pulls the fluid in. When it pushes forward, it forces that liquid out through a discharge valve. This cycle repeats rapidly, ensuring a steady, pulse-like flow — perfect for construction sites, agriculture, or dewatering jobs.
I first learned this lesson the hard way while trying to drain a flooded backyard after a storm. A neighbor lent me an older pump that wasn’t drawing water, no matter how many times I primed it. The culprit? A small tear in the diaphragm. That experience taught me just how essential this part really is — one small defect can make the entire system useless.
If you ever need a reliable diaphragm for AMT pumps, make sure to choose one that matches your pump’s material and specifications — it can make all the difference between a quick fix and a costly replacement.
Common Signs Your Diaphragm Needs Replacement
It’s easy to overlook diaphragm wear, especially when everything seems to be working fine. But over time, exposure to abrasive fluids, chemicals, or even temperature swings can weaken the material. Here’s what to look for before the situation escalates:
- Reduced suction power: The pump isn’t drawing as efficiently as before.
- Unusual noises: A slapping or clicking sound might signal that the diaphragm has lost tension.
- Fluid leakage: If water is escaping where it shouldn’t, the diaphragm could be cracked.
- Inconsistent output: The flow suddenly drops or pulses irregularly.
During one project, I noticed the pump’s flow slowing down midway through cleaning a fish pond. At first, I thought it was debris clogging the valves. After dismantling the casing, it turned out the diaphragm had a pinhole-sized tear. Replacing it immediately restored full power, saving me hours of frustration.
Materials That Matter: Rubber, Neoprene, and Nitrile
Not all diaphragms are created equal. Different materials serve different purposes, depending on the type of liquid being handled.
- Rubber diaphragms are flexible and affordable, suitable for clean or lightly contaminated water.
- Neoprene versions resist oil, fuel, and mild chemicals — ideal for small construction or maintenance jobs.
- Nitrile (Buna-N) diaphragms are perfect for industrial use, offering resistance to petroleum-based fluids.
- Santoprene or EPDM diaphragms handle hot or corrosive liquids, providing excellent durability.
Choosing the right material ensures longevity and performance. It’s like picking the right pair of boots before stepping into mud — the wrong choice, and you’ll regret it halfway through the task.
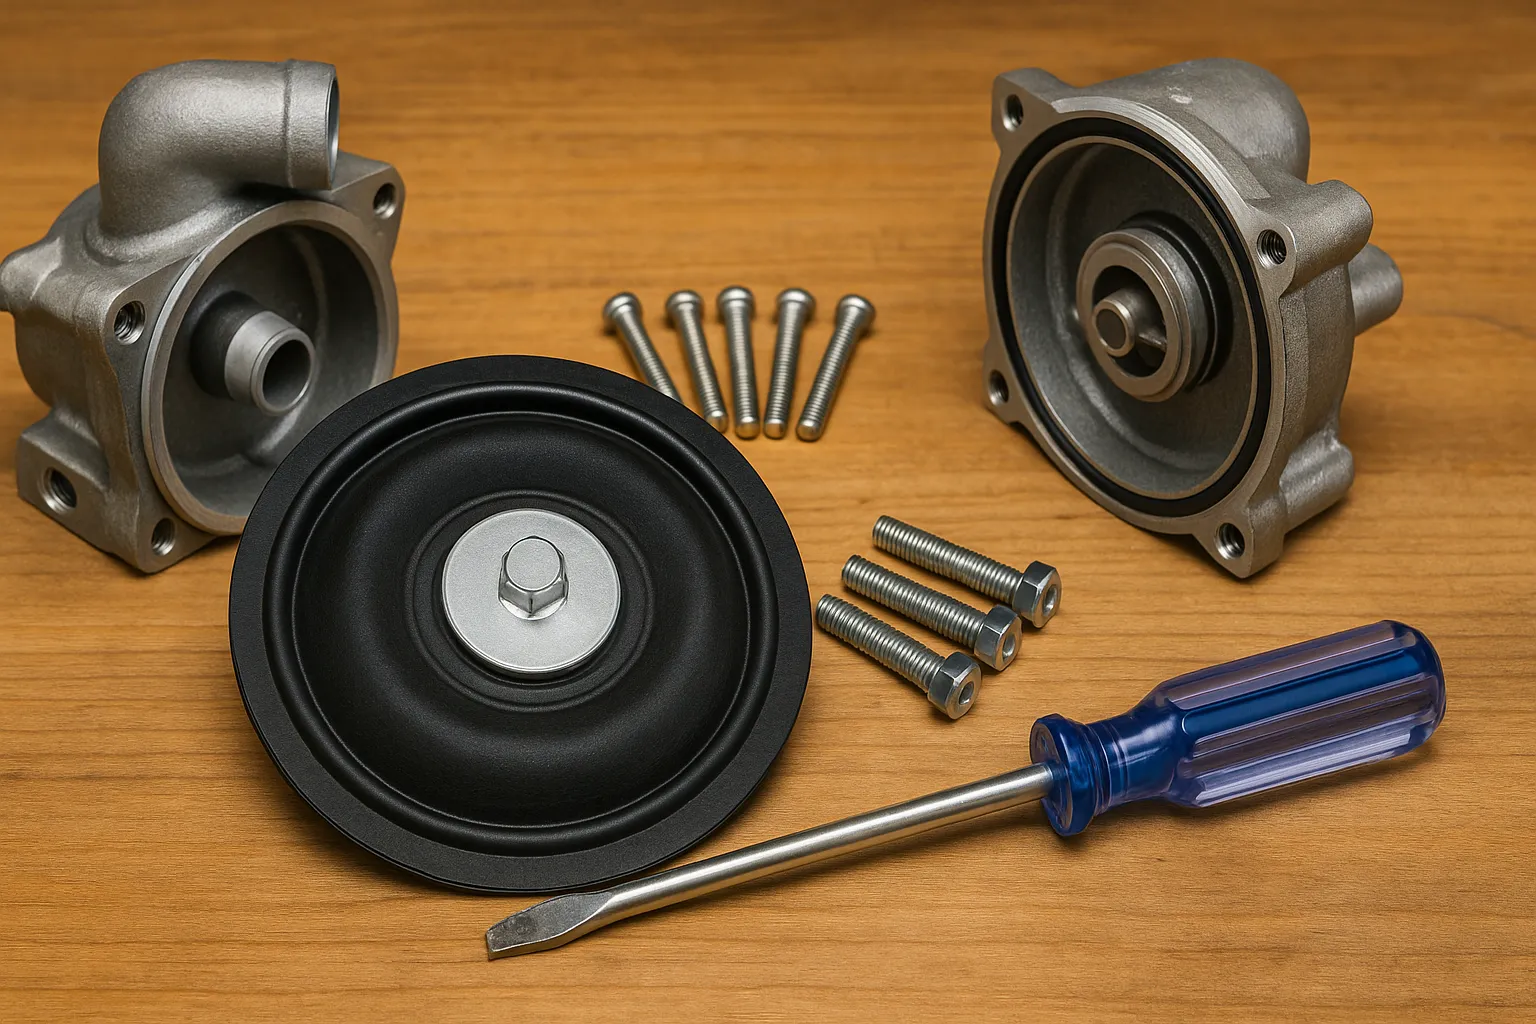
How to Replace a Worn Diaphragm Pump Part
Replacing a diaphragm isn’t as intimidating as it sounds, especially if you’ve done basic equipment maintenance before. Here’s a quick breakdown:
- Disconnect the power source or engine. Safety first — no exceptions.
- Drain any remaining fluid from the pump chamber.
- Remove the pump housing using a wrench or screwdriver, depending on the design.
- Inspect the old diaphragm for cracks, tears, or brittleness.
- Install the new diaphragm securely, ensuring it aligns with the connecting rod.
- Reassemble the pump, tightening all bolts evenly to prevent leaks.
- Prime and test the pump before putting it back into service.
When I replaced my first diaphragm, I realized the biggest mistake most people make — overtightening the bolts. That can warp the seal and shorten its life. A gentle, even tightening pattern works best.
Preventive Maintenance Tips
Proper maintenance extends the life of your pump and reduces downtime. Here are a few simple habits to adopt:
- Flush the pump after each use, especially if handling muddy or chemical-laden liquids.
- Store in a cool, dry place to prevent rubber or neoprene from hardening.
- Check the valves and seals regularly for buildup or corrosion.
- Replace the diaphragm annually if the pump is used frequently or under heavy load.
- Use manufacturer-recommended parts for consistent fit and performance.
Routine checks take less than 20 minutes but can save hundreds in repair costs. It’s a bit like checking tire pressure before a long drive — minor effort, major payoff.
Why DIYers and Contractors Prefer Diaphragm Pumps
Unlike centrifugal pumps, diaphragm pumps can handle debris-laden fluids without clogging. That’s a lifesaver for landscapers, farmers, or construction crews who often deal with dirty water. They also don’t need priming once the chamber is sealed properly — just start the engine and go.
A local contractor once told me he relies on his diaphragm pump every time he drains basements or trenches after heavy rain. He swears by their ability to keep working even when small stones or sand slip through. He keeps a spare diaphragm on hand at all times — because once you’ve seen a job grind to a halt from a $20 part, you never want to risk it again.
Troubleshooting Common Pump Problems
If your pump isn’t performing as it should, a few quick checks can help diagnose the issue:
- No suction: Air leak or damaged diaphragm.
- Weak discharge: Clogged valves or suction hose.
- Overheating: Pump running dry for too long.
- Vibration: Loose bolts or misaligned parts.
In my experience, most “broken” pumps are perfectly fine — it’s just the diaphragm or gasket that needs attention. A quick inspection and part swap usually get things back on track.
Choosing the Right Replacement Diaphragm
When it’s time to buy a replacement, check your pump’s model and serial number first. Compatibility matters — even slight differences in size or material can affect performance. Look for genuine or OEM-compatible parts that meet your pump’s pressure and chemical resistance specifications. If you’re unsure, a simple call to a pump specialist can save you guesswork and wasted money.
Final Thoughts
A diaphragm for AMT pumps might look like a small, simple part, but it’s the unsung hero behind every smooth operation. Whether you’re draining a construction site, cleaning a pond, or managing agricultural irrigation, this component ensures reliable flow and consistent performance. Like any essential tool, taking care of it pays off in the long run — fewer breakdowns, less frustration, and more time getting the job done.
Every DIYer and contractor eventually learns that a little maintenance goes a long way. Once you replace your first diaphragm successfully, you’ll never overlook it again — and that’s the true sign of experience.
FAQs
A diaphragm pump moves liquids or slurries using a flexible membrane that expands and contracts to create suction and pressure.
Watch for reduced suction, irregular flow, or fluid leaks—these are signs your diaphragm is worn or torn.
Yes, most diaphragms can be replaced at home with basic tools like a wrench and screwdriver, as long as you follow safety precautions.
If used frequently or in tough conditions, it’s best to replace it annually to maintain optimal performance.
Common materials include rubber, neoprene, nitrile, Santoprene, and EPDM—each suited for different fluids and temperatures.
It acts as the pump’s heart, controlling suction and discharge to keep fluid flow steady and powerful.
Abrasive fluids, extreme temperatures, or chemical exposure can weaken or crack the diaphragm over time.
Inspect the diaphragm and valves first—most issues come from leaks, blockages, or small tears in these parts.
No, once properly sealed, diaphragm pumps self-prime, making them ideal for dewatering and dirty-water applications.
Flush the pump after each use, store it in a dry place, and use manufacturer-recommended parts for replacements.


