If you’ve ever stared at the edges of your trim or molding and thought, something feels unfinished, you’re not alone. That’s where end cap molding comes in. This small but mighty piece can transform a raw edge into a polished, professional detail. Whether you’re upgrading crown molding, installing chair rail, or working with baseboards, end cap molding is the finishing touch that makes the entire room look intentional. Let’s dive into everything you need to know about end cap molding—from when to use it, to how to install it, and why it’s a game-changer for your home interiors.
What Is End Cap Molding?
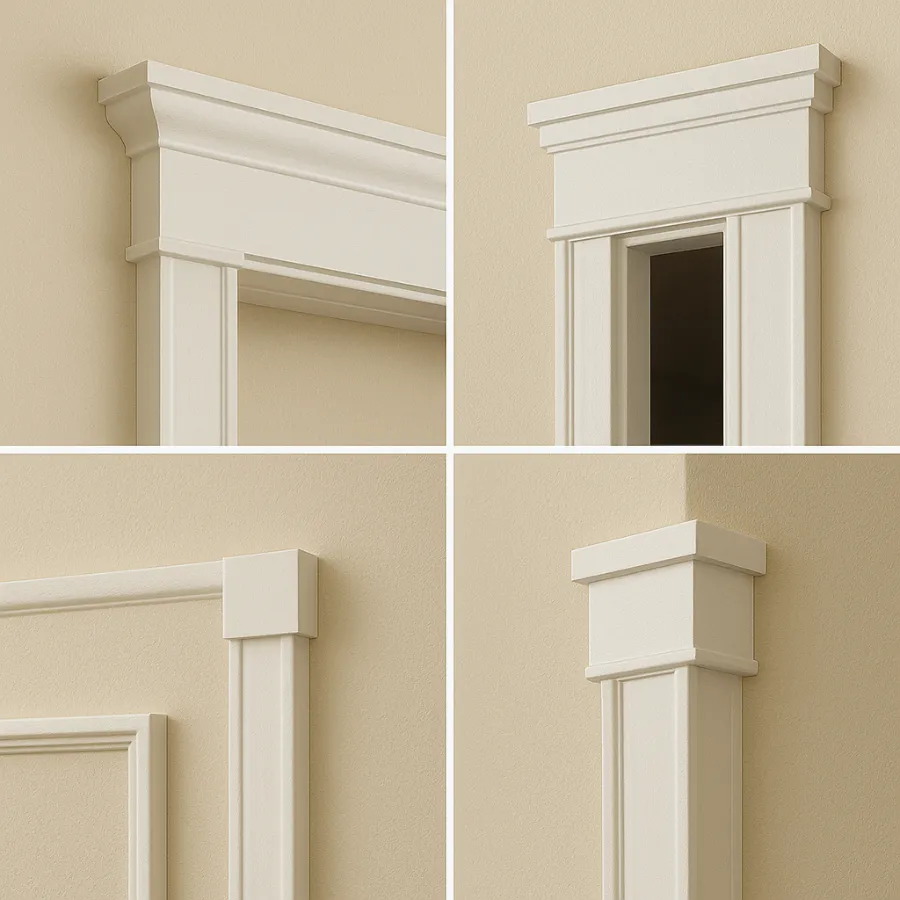
At its simplest, end cap molding is a small trim piece used to neatly finish the edge of molding where it doesn’t connect to another wall, corner, or surface. Without it, trim can end abruptly, leaving an awkward cut edge that looks out of place. An end cap closes that gap, creating a seamless transition.
Think of it as the punctuation mark of your trim work. It signals the end of the molding line in a way that looks polished rather than accidental.
When Should You Use End Cap Molding?
Not every piece of trim needs an end cap. But in many situations, it’s the difference between a DIY project that looks amateur and one that looks custom-built. Here are the most common scenarios where you’ll need end cap molding:
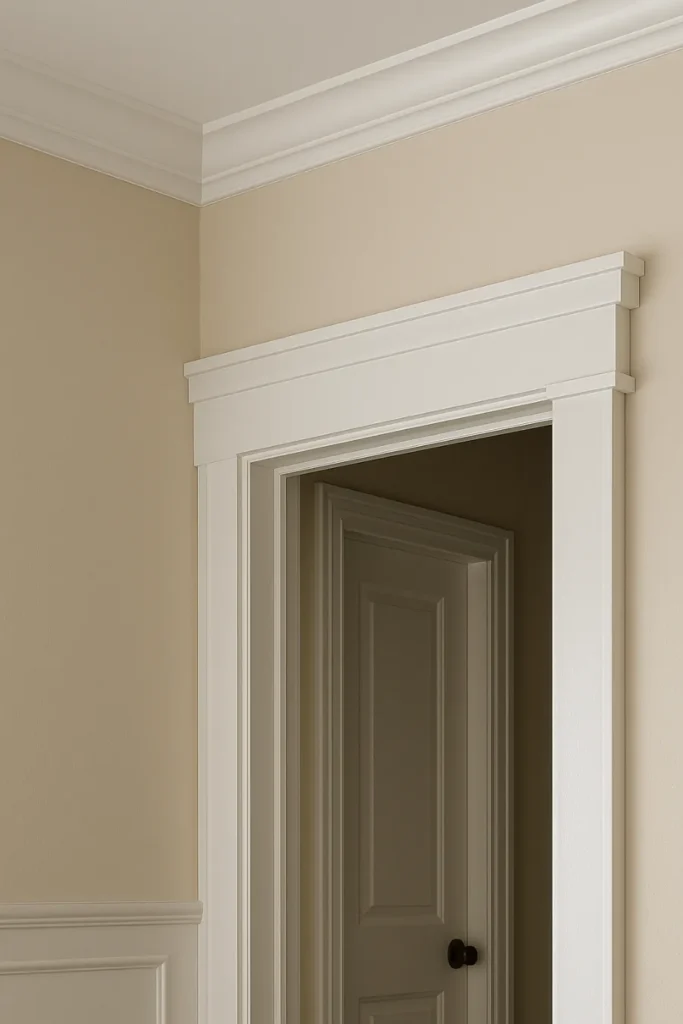
- Where molding meets a doorway or window frame – Often, trim is wider or thicker than the frame. An end cap ensures the transition looks clean.
- At the end of a chair rail on an open wall – Instead of leaving the cut edge exposed, the end cap finishes it with style.
- When crown molding meets a cabinet or tile backsplash – End caps provide a neat stop, especially if heights don’t align.
- Flooring transitions – End cap moldings are also used on floors to bridge two different heights or materials. For example, between hardwood and carpet.
- Anytime molding stops mid-wall – Whether for design reasons or architectural challenges, end caps protect the edge while keeping the look intentional.
Types of Molding That Use End Caps
End caps aren’t limited to one type of trim. They work with almost every molding style in your home:
- Crown molding – Adds elegance where the ceiling meets the wall, and needs clean terminations at doorways or height changes.
- Chair rail molding – Protects walls and adds architectural detail; end caps polish its open ends.
- Baseboards and quarter round – End caps hide raw edges against doors, cabinets, or transitions.
- Picture rails and wainscoting – Give these decorative trims a crisp finish.
- Flooring trims (thresholds and transitions) – End caps here smooth the shift between different floor materials or heights.
Tools and Materials You’ll Need
Installing end cap molding doesn’t require a professional workshop. Here’s a simple toolkit to get the job done:
- Miter saw (or miter box with hand saw)
- Wood glue or construction adhesive
- Finish nails or painter’s tape (to hold pieces while glue dries)
- Caulk or wood filler
- Sanding block
- Measuring tape
- Pencil
- End cap molding piece (to match your trim)
Step-by-Step: How to Install End Cap Molding
Installing end cap molding is straightforward once you understand the steps. Here’s a clear guide you can follow:
Step 1: Measure Your Molding
Decide where the molding will stop and measure its length. It’s often best to cut the piece slightly long and trim down after you’ve created the end cap.
Step 2: Make a 45-Degree Cut
On the exposed end of the molding, cut a 45-degree angle. The back edge should be shorter than the front edge. This creates the profile needed for the cap.
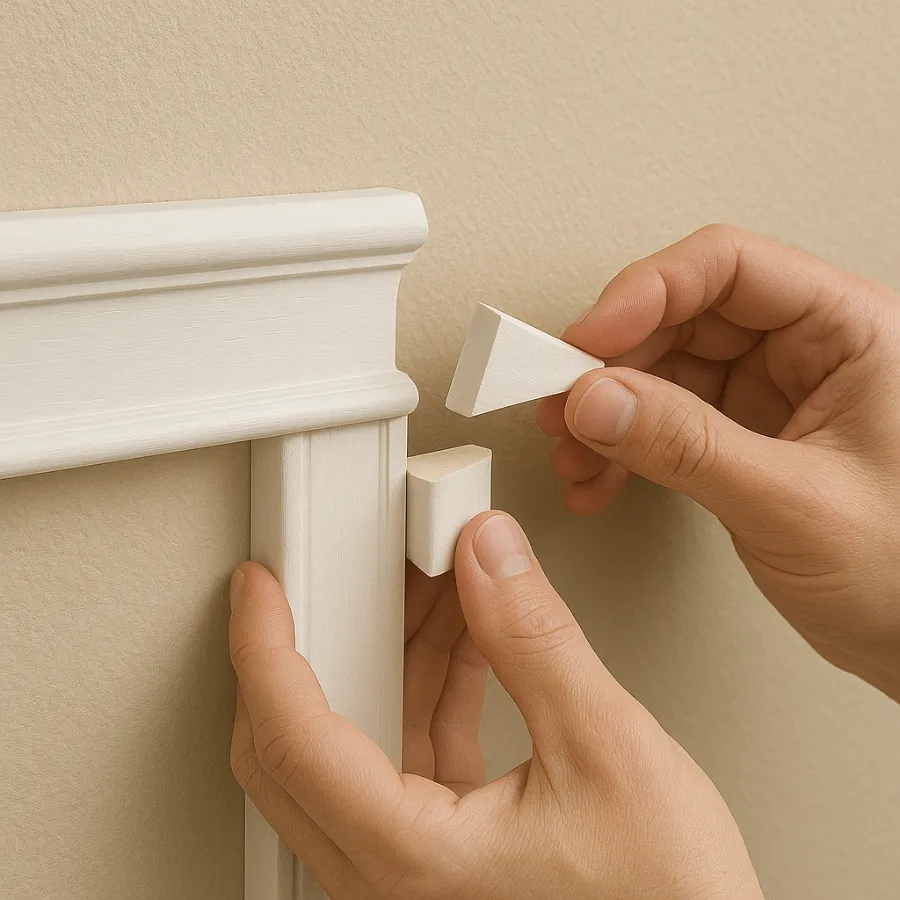
Step 3: Create the Filler Piece
Using another piece of molding, cut an opposite 45-degree angle. This tiny wedge will serve as the “face” of the end cap. Trim it down to size with a straight cut.
Step 4: Fit and Attach the Cap
Dry-fit the filler piece against the angled end of your molding. Once it matches, glue it in place with wood glue. Use painter’s tape or a dab of rapid fuse adhesive to hold it while drying. Avoid nails here, as they may split the small cap.
Step 5: Sand and Caulk
Once the glue has dried, sand the edges lightly to smooth out any unevenness. Fill small gaps with caulk or wood filler. This step makes the joint disappear into a single piece.
Step 6: Finish With Paint
Finally, paint or stain the molding and end cap to match. When done correctly, the cap looks like it was always part of the molding.
Design and Aesthetic Considerations
Beyond function, end cap molding plays a big role in style. Here are a few tips to make sure it blends seamlessly:
- Match materials – If your trim is wood, stick with a wood cap. For PVC or MDF, find a cap in the same material.
- Color consistency – Paint or stain caps to match the trim. Even a slight mismatch can draw the eye.
- Style coordination – End caps should reflect the design of the molding. A square cap pairs with modern flat trims, while a profiled cap suits ornate crown molding.
- Balance – Consider symmetry. If you end molding on one side of a doorway with a cap, mirror it on the opposite side for consistency.
Common Mistakes to Avoid
Even a small piece like an end cap can go wrong if you rush. Watch out for these pitfalls:
- Cutting the wrong angle – Double-check saw settings before cutting. Opposite angles are easy to mix up.
- Skipping sanding – Rough edges show through paint. A quick sanding makes all the difference.
- Overusing caulk – Caulk should fill small gaps, not build up the joint. Too much can look messy.
- Ignoring alignment – Always dry-fit before gluing. Once the glue sets, adjustments are harder.
Why End Cap Molding Is Worth It
Adding end cap molding isn’t just about looks—it’s about longevity and quality. Here’s why it’s worth your effort:
- Professional appearance – Eliminates raw edges that make a project look unfinished.
- Durability – Protects vulnerable ends of trim from chipping, splitting, or wear.
- Flexibility – Easy to remove or replace if you update your molding in the future.
- Cost-effective – A small detail that adds big value without breaking the budget.
Conclusion
The truth is, end cap molding might be one of the smallest details in your home, but it’s also one of the most powerful. It turns cut edges into polished statements. It protects your trim while elevating your design. Whether you’re finishing crown molding around a doorway, ending a chair rail mid-wall, or transitioning flooring, end caps provide the perfect stopping point.
Next time you take on a DIY molding project, don’t stop at the raw edge. Cap it off. You’ll be amazed at how such a simple detail can take your home from “nice” to “professionally finished.”


