Tired of guessing which jar holds flour and which one is powdered sugar? Take your pantry from chaos to calm with DIY Pantry Labeling using Chalkboard Labels! This easy, affordable, and stylish organizing solution turns basic jars and containers into Pinterest-worthy staples—while keeping everything neat and functional.
With just a few key tools and a creative spark, you’ll be on your way to a well-organized, Instagram-ready pantry.
Tools & Supplies You’ll Need

Chalkboard Labels for Jars – 98pcs with Marker & Towel
Includes 12 unique shapes and 3 sizes—plus a liquid chalk marker and towel for easy customization and cleanup.

Chalkola White Chalk Markers – Fine Tip, 6 Pack
These fine-point markers are perfect for detailed, crisp writing on chalkboard labels. They’re smudge-proof but easily erasable with a damp cloth.

32 oz Regular-Mouth Glass Mason Jars – 6 Pack
Spacious quart-sized jars are ideal for pantry items like rice, sugar, pasta, and lentils. Airtight and aesthetically pleasing.

Koala Japanese Microfiber Lens Cleaning Cloths – 6 Pack
Use these to gently clean glass jars or wipe off old chalk label designs. Safe and streak-free.

MaxGear 2″ x 2″ Printable Square Labels – 360 pcs
Want to go beyond chalkboard style? These printable matte white labels let you create uniform, professional-looking stickers using your printer.
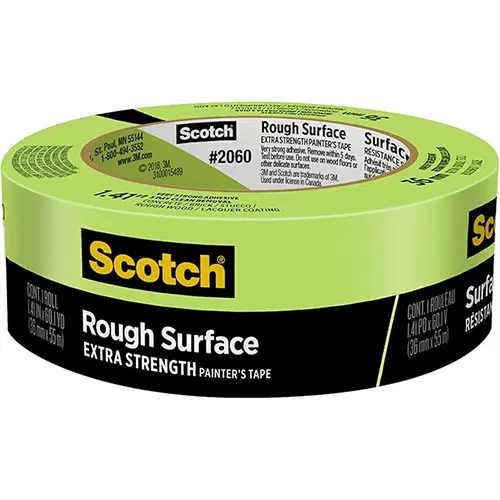
Scotch Rough Surface Extra Strength Painter’s Tape – 1 Roll
Use this to mark spacing, position your labels evenly, or protect surfaces while applying or removing old labels.
Step-by-Step: DIY Pantry Labeling with Chalkboard Labels
Step 1: Clean & Prep Your Jars
Start by washing your mason jars and allowing them to dry fully. Use the Koala Microfiber Cloths to remove any smudges or residue on the jar’s surface.
Step 2: Choose & Apply Labels
Pick your favorite shape from the Chalkboard Label Pack. Stick each one on the jar front—use painter’s tape as a guide to ensure the labels are applied straight and at a consistent height.
Step 3: Write It Right
Using the Chalkola White Chalk Markers, write the name of the item: “Flour,” “Quinoa,” “Brown Sugar,” etc. Go slow—these markers deliver clean, sharp lines and dry quickly. If you make a mistake, use the mini towel or a Koala cloth with water to wipe it clean.
Step 4: Optional – Go Printable
If you want a sleeker, uniform look for some containers, use the MaxGear Printable Labels and create custom text in your favorite font. These labels stick well and don’t smudge.
Step 5: Arrange Your Pantry
Now it’s time to stock the shelves! Organize jars by frequency of use, food category, or size. Step back and admire your perfectly labeled collection.
Pro Pantry Labeling Tips
- Include Expiration Dates: Add small stickers to the bottom of jars with “best by” dates.
- Color-Code by Food Type: Use different shaped labels for grains, baking items, and snacks.
- Use Extra Chalk Labels for bins, spice jars, or bulk bags.
Why You’ll Love This Project
- Customizable: Use chalk markers for temporary labels or printable ones for a polished look.
- Reusable: Chalkboard labels can be wiped clean and re-written any time.
- Budget-Friendly: All tools are affordable and long-lasting.
- Visually Appealing: It turns your pantry into a space you’ll actually want to show off.
Pantry Staples to Label
- Flour (all-purpose, almond, oat)
- Rice (white, brown, jasmine)
- Sugar (granulated, coconut, powdered)
- Pasta (penne, spaghetti, orzo)
- Grains (quinoa, couscous, farro)
- Baking items (baking soda, cocoa powder, yeast)
- Snacks (trail mix, crackers, granola)
Final Thoughts
DIY Pantry Labeling with Chalkboard Labels is an easy weekend project that brings both beauty and order to your kitchen. Whether you’re a minimalist, a maximalist, or somewhere in between, labeling gives your pantry personality—and function.
Get started today, and make your pantry the prettiest part of your home.
Chalkboard Labels for Jars – 98pcs with Marker & Towel
Includes 12 unique shapes and 3 sizes—plus a liquid chalk marker and towel for easy customization and cleanup.
Chalkola White Chalk Markers – Fine Tip, 6 Pack
These fine-point markers are perfect for detailed, crisp writing on chalkboard labels. They’re smudge-proof but easily erasable with a damp cloth.
32 oz Regular-Mouth Glass Mason Jars – 6 Pack
Spacious quart-sized jars are ideal for pantry items like rice, sugar, pasta, and lentils. Airtight and aesthetically pleasing.
Koala Japanese Microfiber Lens Cleaning Cloths – 6 Pack
Use these to gently clean glass jars or wipe off old chalk label designs. Safe and streak-free.
MaxGear 2″ x 2″ Printable Square Labels – 360 pcs
Want to go beyond chalkboard style? These printable matte white labels let you create uniform, professional-looking stickers using your printer.
Scotch Rough Surface Extra Strength Painter’s Tape – 1 Roll
Use this to mark spacing, position your labels evenly, or protect surfaces while applying or removing old labels.


