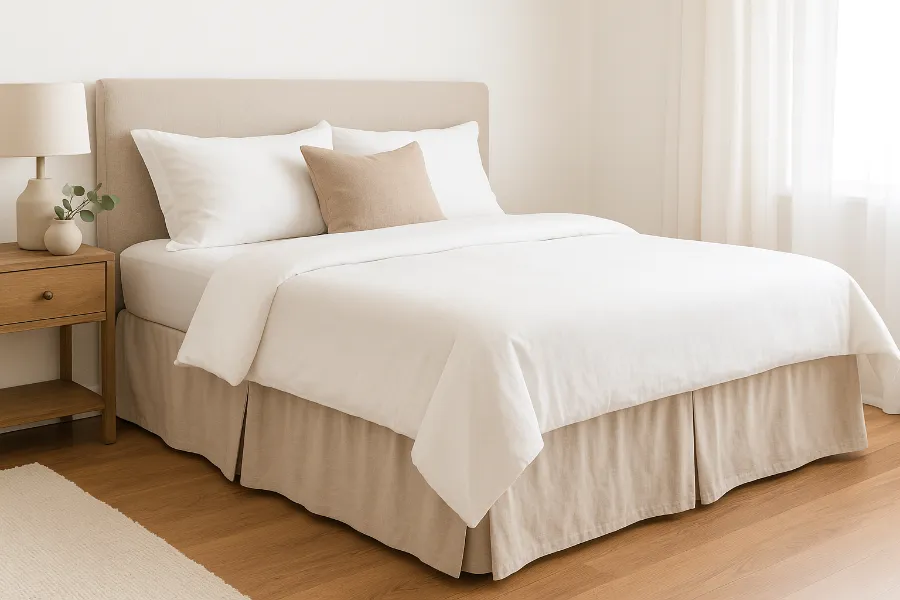
If you’ve ever tried to wrestle a store-bought bed skirt into place, you already know the frustration. They shift, wrinkle, and sometimes the fit is just off. Not to mention, they’re often expensive for what they are. That’s why making your own DIY bed skirt no sew is such a game-changer. You get the custom look you want, in the fabric you love, without ever threading a needle. The best part? It’s simple, affordable, and surprisingly fun.
This guide will walk you through everything you need to create a no-sew bed skirt that looks polished but takes just an afternoon to put together. Whether you want farmhouse charm, a crisp tailored style, or something soft and romantic, this project puts the design in your hands.
Why Make a DIY Bed Skirt No Sew?
The beauty of making your own bed skirt comes down to three things: budget, style, and control.
- Budget-friendly: You can easily whip one up using drop cloths, curtain panels, or even a flat sheet you already own. That’s a fraction of the price of buying a designer bed skirt.
- Style flexibility: Choose fabrics and finishes that suit your space—tailored, ruffled, rustic, or sleek. A no-sew approach means you can change things out seasonally without guilt.
- Hides storage: If you use the space under your bed for storage bins, suitcases, or blankets, this simple skirt keeps everything hidden while making your bed look complete.
Materials You’ll Need
Before you start, gather your supplies. The good news? You don’t need a sewing machine.
- Fabric: drop cloth, curtain panels, or a flat sheet
- Measuring tape
- Fabric scissors
- Fabric glue, hot glue gun, or upholstery tacks
- T-pins or safety pins (for removable options)
- Pencil or chalk for marking
- Optional: iron or fabric steamer for smooth edges
Step 1: Measure Your Bed
Measure the height from the floor to the top of your box spring or bed frame. Then, measure each side of your bed (two long sides and one short end). This gives you the exact fabric size you’ll need. Add an extra inch or two for overlap.
Step 2: Cut Your Fabric Panels
Decide if you want three separate panels (two sides and one end) or one long piece that wraps around. Cutting three panels is usually easier to work with, especially if your bed is heavy and hard to move.
If you’re using curtain panels or a sheet, take advantage of pre-hemmed edges for a professional finish without extra work.
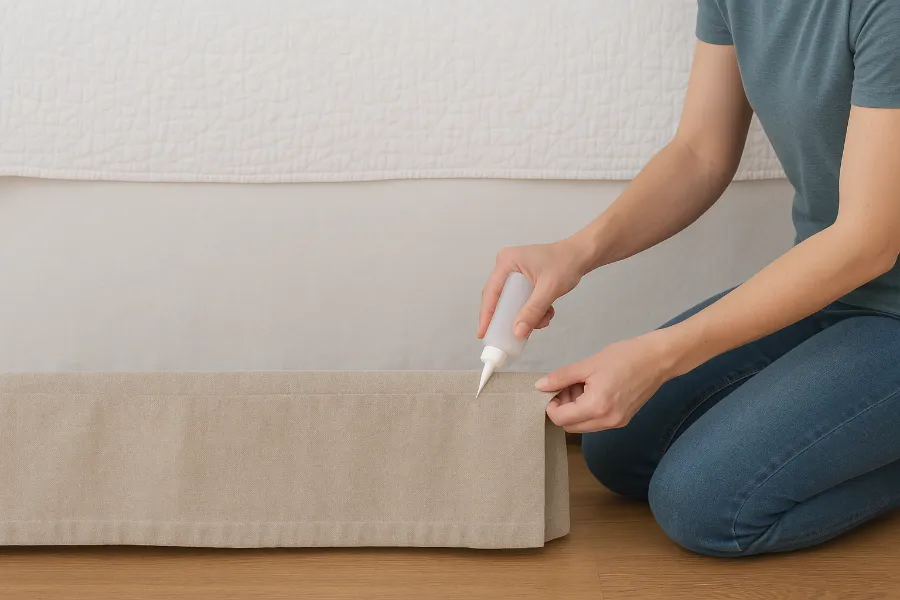
Step 3: Attach the Bed Skirt (No Sewing Required)
Here’s where your creativity comes in. Choose the attachment method that works best for you:
- Upholstery tacks: Hammer fabric directly into the wooden bed frame for a snug, tailored look.
- Hot glue gun: Great for attaching fabric to a box spring. Just be sure to work in sections and press firmly.
- Fabric glue: Works well if you want ties or pleats along the top edge.
- T-pins: Perfect if you want the option to remove or wash the skirt easily. Simply pin along the top edge into the box spring fabric.
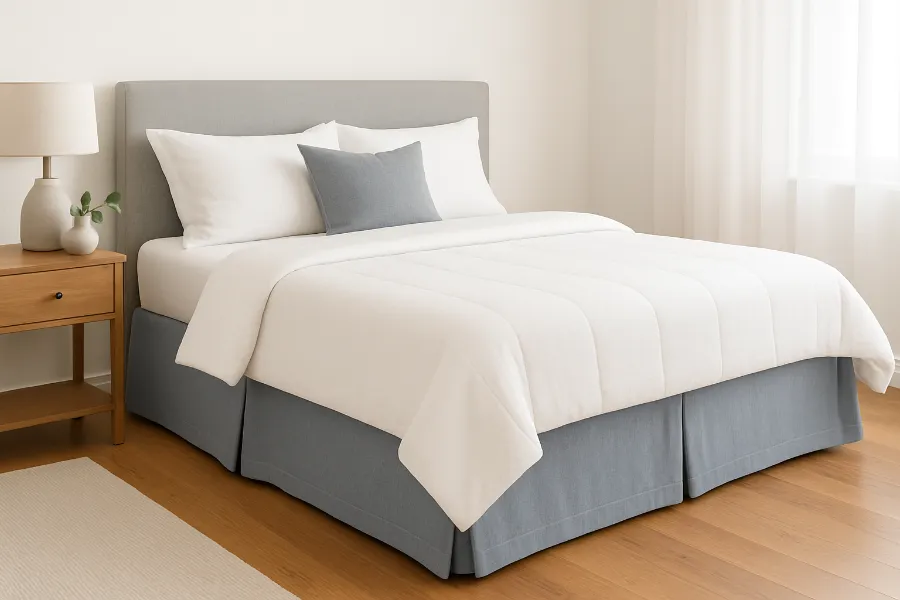
Step 4: Customize the Style
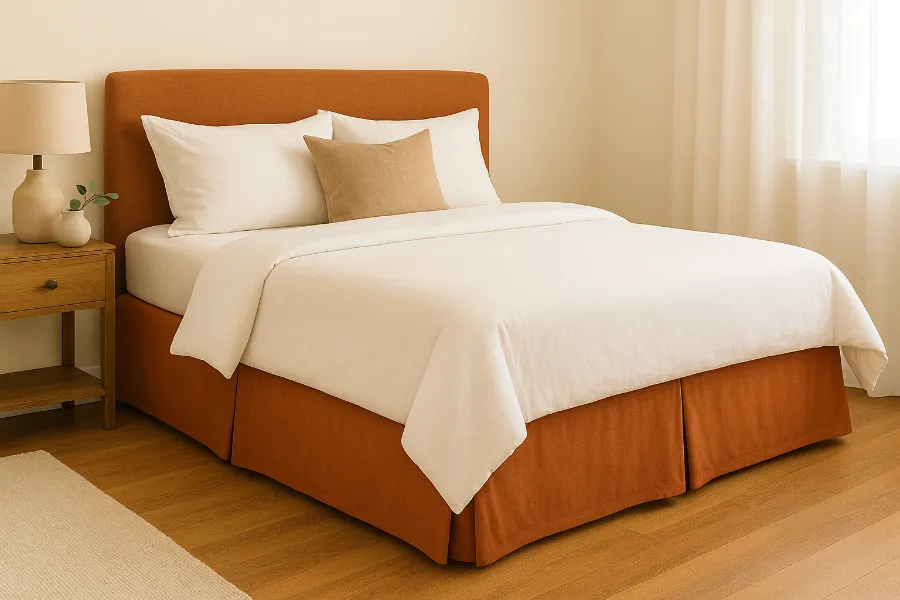
This is where your no-sew skirt can really shine. Try these variations:
- Farmhouse rustic: Use bleached drop cloths for that soft, weathered look. Let the edges fray slightly for charm.
- Tailored and modern: Curtain panels in linen or cotton blend give you clean, crisp lines.
- Romantic and whimsical: Add pleats or ruffles by folding fabric as you attach it.
- Kids’ rooms: Bright flat sheets work perfectly and can be swapped out as styles change.
Step 5: Finishing Touches
Smooth out wrinkles with an iron or fabric steamer. Overlap panels slightly at the corners so the bed looks seamless. If you like the look of volume, gather the fabric slightly as you attach it instead of keeping it flat.
Pro Tips for Success
- Use pre-hemmed fabrics to save time.
- Go heavier with fabric if you want the skirt to hang straight and not shift around.
- Match the color of your fabric glue or pins to your fabric for a seamless finish.
- For cleaning, vacuum the skirt regularly. If you use removable T-pins, you can wash the panels occasionally.
Why This DIY Works So Well
A traditional bed skirt can be frustrating because it sits between the mattress and box spring. Every time you change the sheets, the skirt shifts. By attaching your DIY bed skirt no sew directly to the bed frame or box spring, you solve that problem. Plus, you can customize it to the exact length you need—no more skirts that are either too short or puddle awkwardly on the floor.
Conclusion
A DIY bed skirt no sew project is one of the easiest ways to upgrade your bedroom without spending much money or effort. It hides storage, adds softness, and lets you put your personal stamp on the space. Whether you choose rustic drop cloths, sleek curtain panels, or a playful flat sheet, the end result is a polished bed that looks thoughtfully styled.
So roll up your sleeves, grab some fabric, and give your bed the finishing touch it deserves. You’ll be amazed at how something so simple can make your whole bedroom feel more complete.


")


