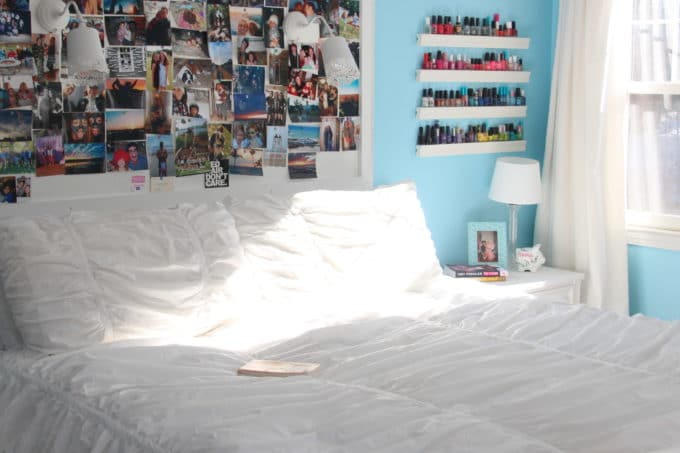
My teen daughter had a vast collection of nail polish that needed a storage solution. I considered buying Ikea ledges to get the nail polish off of Hannah’s desk and use the colorful bottles as functional art in her room.
The only problem: Massachusetts’ only Ikea is a bit of a roadtrip in a direction I don’t normally travel, and picture ledges for Hannah’s nail polish collection weren’t meriting a trip and my gas, However, I DO have some big box hardware stores in close proximity to me and here is the inexpensive and easy idea I came up with.
Whatcha Need
PVC BRICK MOULDING (I used 8 feet, cut into 4 2′ lengths)
Nails
Hammer
Nail set
Level
Spackle/nail hole filler
White paint
This is really self explanatory – here is the basic “design”. I basically made ledges, or very narrow shelves, out of moulding and attached them to the wall with nails. Since the nail polish even en masse is quite light, the nails suffice for weight, but if you’re putting something heavier on these ledges you may consider using anchors and screws.
1 | Cut your molding into 4 even lengths.
(oops! “one of these is not like the other”…I missed the class on measuring)…if you are not comfortable with a saw you can ask your hardware store to cut the moulding for you. They would probably measure a bit better than me. 🙂
2 | Nail the first piece onto the wall, placing a nail right in the center.
This way you can check for level, tweak the position of the moulding if needed, and then add nails to either end of the molding. Don’t worry too much about driving the nail all the way into the moulding yet, just get those suckers up on the wall.
3 | Determine spacing.
I used the tallest nail polish bottle to determine how much space I would need between ledges. After adding the second ledge, I just marked on a piece of paper how far apart the first two were and then marked the other ledges accordingly.
4 | Sink nails.
After you nail all the ledges to the wall, use a nail set to sink the nails into the moulding a little bit, just past the surface of the moulding.
5 | Fill nails.
After sinking the nails, fill with spackle, let dry for a few minutes and give those spots a quick sand.
6 | Paint.
Paint the front of the ledges to disguise your filled nail holes and then you are good to go!!!
A colorful and fun way to organize nail polish or even essential oils!
This turned out to be a much less expensive alternative to the Ikea ledges.
The Ikea ledges are $9.99 for a 22″ length – I would have needed 4 = $40.
One 8 foot length of moulding, chopped into 4 24″ pieces = $12.50.
Even if you have to purchase nails, nail filler, and paint, this way is still less than 4 store bought ledges.
Easy to make, easy to install, and the gratification from doing it yourself = priceless!
Have a wonderful day my lovelies!