If you’ve ever wanted to give your garden structure, beauty, and a touch of timeless charm, a DIY cedar trellis might just be the project you’ve been waiting for. A trellis not only supports climbing plants—it transforms plain spaces into living walls of greenery and blooms. And when built from cedar, you get durability, natural rot resistance, and a warm rustic look that weathers beautifully over time.
This guide will walk you step-by-step through planning, building, and maintaining your very own cedar trellis. Whether you’re looking for a simple flat design against a fence or a striking tower in the middle of your garden, you’ll have everything you need to get started.
Why Build a DIY Cedar Trellis?
Cedar is the MVP of outdoor projects. Unlike pine or pressure-treated wood, cedar contains natural oils that resist rot, moisture, and insect damage. That means your trellis will last longer without constant upkeep. Plus, it looks stunning—fresh cedar has a reddish tone that eventually fades into a soft silvery gray if left untreated.
Here are a few reasons people love building their own cedar trellis:
- Cost savings: Store-bought trellises often come with a steep price tag, especially larger or decorative ones.
- Customization: Build to your exact space and plant needs—no cookie-cutter designs.
- Sustainability: A DIY cedar trellis means fewer disposable garden structures.
- Satisfaction: There’s nothing quite like seeing your plants climb a trellis you built with your own hands!
Planning and Designing Your Cedar Trellis
Before you cut the first board, take a moment to plan.
Ask yourself:
- Where will the trellis go? Against a wall, free-standing, or in a planter box?
- What plants will it support? Lightweight flowers need less support than heavy grapevines.
- Do you want a minimalist ladder design, a grid lattice, or an eye-catching tower?
Sketch your design on paper, noting dimensions. For most small gardens, a 6–7 foot tall trellis works well. If it’s against a fence, match the width to the fence panel. If free-standing, consider an A-frame or obelisk style for stability.
Materials and Tools You’ll Need
Materials:
- Cedar lumber (commonly 1x2s, 2x2s, or 2x4s depending on design)
- Galvanized screws or outdoor-rated brad nails
- Wood glue (optional for extra stability)
- Post anchors or concrete (if setting in the ground)
- Outdoor wood sealer or stain (optional)
Tools:
- Tape measure
- Carpenter’s square
- Circular saw or hand saw
- Drill/driver with bits
- Clamps
- Level
- Post-hole digger (for in-ground trellises)
- Safety gear (goggles, gloves)
Preparing the Site
Pick a spot that gets plenty of sunlight—most climbing plants thrive on full sun. Clear away weeds, level the soil, and mark where the trellis will stand. If it’s free-standing, dig holes at least 12–18 inches deep for the posts. If attaching to a wall, check for obstructions and make sure your surface can handle the anchor points.
Cutting and Assembling Your Trellis
Now comes the fun part—building!
- Cut the frame pieces according to your design. For a flat lattice, you’ll need two vertical side pieces and several horizontal crossbars.
- Assemble the frame. Lay it out flat on the ground and secure with clamps. Attach crossbars evenly, using screws or nails.
- Add decorative elements if desired—angled tops, curved edges, or finials.
- For tower or obelisk styles, cut four equal legs and connect them at the top, adding horizontal rungs at intervals.
Pro tip: Pre-drill screw holes to prevent cedar from splitting.
Installing and Anchoring the Trellis
For a free-standing trellis, set the posts into holes with gravel or quick-set concrete. Check that it’s level and straight before the concrete hardens.
For a wall-mounted trellis, use galvanized brackets or spacers. Keeping it an inch or two off the wall improves air circulation and prevents mold growth.
If you’re going with a planter box trellis, secure the trellis to the planter before filling with soil.
Finishing Touches
Cedar can be left untreated, which allows it to age into a soft gray patina, or you can seal it to preserve its warm tones. Use a penetrating wood sealer for outdoor protection. If you prefer color, an exterior-grade stain works beautifully.
Paint is also an option, but it hides cedar’s natural grain—something many gardeners love.
Planting and Training Vines
Once your trellis is in place, it’s time to bring it to life.
Great climbing plant options for a cedar trellis include:
- Clematis
- Morning glories
- Jasmine
- Honeysuckle
- Grapevines
- Peas or beans (if you’re a veggie gardener)
Guide new growth by loosely tying vines with twine or plant clips until they naturally twine around the structure. Be patient—within a season, your trellis will start filling out beautifully.
Maintenance Tips for Longevity
A cedar trellis requires surprisingly little upkeep, but a few small habits go a long way:
- Inspect annually for loose fasteners.
- Tighten screws or replace cracked boards if needed.
- Reapply sealer every 2–3 years if you want to maintain color.
- Clear away dead plant material at the end of each season.
Done right, a cedar trellis can last 15–20 years with minimal attention.
Inspiration and Variations
The beauty of a DIY cedar trellis is flexibility. Here are a few popular variations:
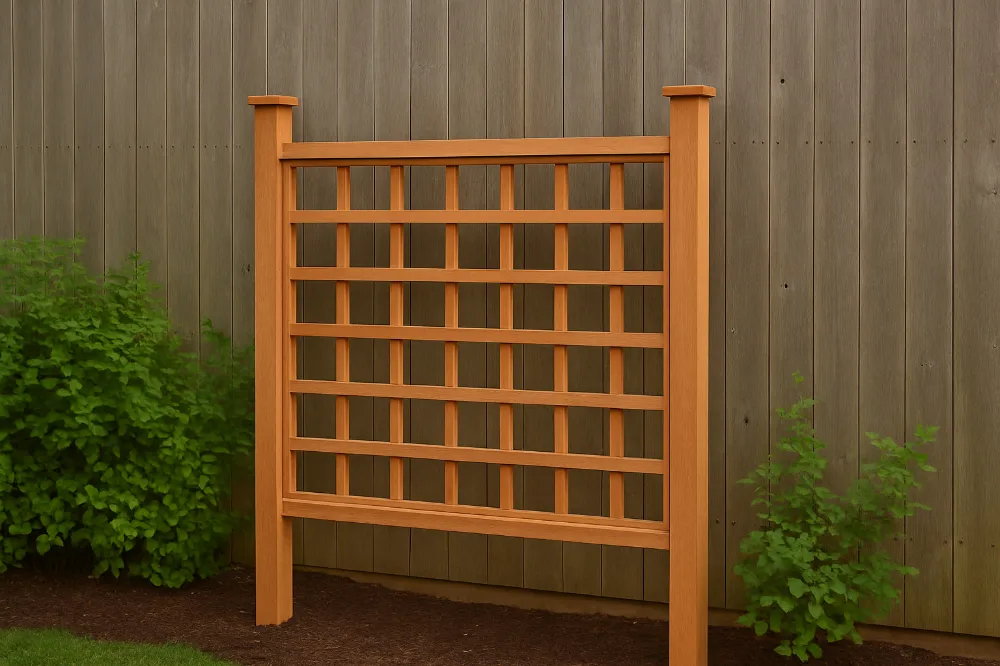
- Flat lattice trellis: Great against fences or walls for climbing roses.
- A-frame trellis: Perfect for veggie gardens—supports cucumbers, beans, or peas.
- Tower/obelisk trellis: Adds vertical interest in flower beds.
- Trellis with planter box: Combines function and style for patios or balconies.
Mix and match styles based on your needs, and don’t be afraid to experiment.
Final Thoughts
A DIY cedar trellis is one of those rare projects that pays off in beauty, function, and satisfaction. With just a few tools, some cedar boards, and an afternoon of work, you can create a structure that will support your plants for years and elevate your garden’s style.
The best part? Every season, you’ll see it transform—bare cedar in winter, fresh shoots in spring, lush greenery in summer, and golden vines in autumn. It becomes a living piece of art.
So grab some cedar, sketch your design, and start building. Your garden will thank you!


