Home renovations promise transformation and value, but they also carry real risks that demand respect and preparation. Every year, thousands of enthusiastic DIYers end up injured because they underestimated hidden dangers lurking behind walls, beneath floors, and within outdated systems. Whether you’re tackling a simple weekend refresh or a multi-room overhaul, understanding how to identify and neutralize hazards is not optional; it’s essential.
This comprehensive guide equips you with the knowledge and strategies to navigate structural concerns, electrical threats, hazardous materials, and everyday jobsite dangers. It ensures your renovation journey is as safe as it is successful. From pre-project planning to post-completion checks, you’ll learn how to protect yourself, your family, and your investment at every step of the process.
Why Hazard Detection Matters
According to the U.S. Consumer Product Safety Commission, more than 135,000 Americans land in emergency rooms each year due to DIY renovation injuries. This guide walks you through every stage so you can spot danger early, take preventive action, and complete your project with confidence.
Pre-Renovation Planning for Safety
A safe renovation begins long before the first hammer swings. Proper planning is your first line of defense against unexpected dangers. Start by researching local building codes and identifying which parts of your project require permits. Codes are designed to ensure structural, electrical, and plumbing work meets established safety standards.
Your budget should also reflect a commitment to safety. Allocate funds for Personal Protective Equipment (PPE), tool rentals like GFCI extension cords, and professional help for high-risk tasks. If you discover cracked beams, outdated wiring, or suspect asbestos, call certified professionals. Realistic planning prevents surprise costs and unsafe improvisation later on.
Personal Safety Measures
Your most important tool is your well-being. For eye protection, use ANSI-rated safety glasses or goggles. When using loud power tools, protect your hearing with properly rated earmuffs. For dust protection, use an N95 respirator or better. When working with solvents or chemical fumes, use a respirator with appropriate cartridges
Beyond gear, readiness is key. Stock a dedicated first-aid kit with items relevant to construction injuries, such as burn gel and eye-wash pods. Post emergency contacts clearly and add them to your phone. Invest time in training by reading tool manuals and vetting online tutorials to ensure you are prepared.
Site Safety Practices During Renovation
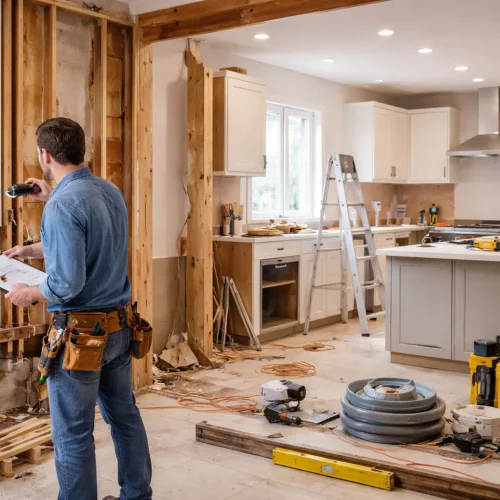
A chaotic worksite is a hazardous one. Maintaining a clean and organized space is crucial for preventing accidents. Sweep debris daily, ensure walkways are clear, and use labeled bins to store screws and nails. Always plug power tools into GFCI-protected outlets and inspect ladders before each use.
Securing the work area from unintended visitors is another critical step. Install temporary barricades or safety netting around any floor openings. Use child-proof gates and pet barriers to keep curious family members out of the active zone. A tidy, contained site significantly reduces trip hazards and tool mishaps.
Hazard-Specific Safety Tips
Different tasks present unique dangers. For electrical work, always shut off the power at the breaker and double-check with a non-contact voltage tester. Ensure you match the wire gauge to the circuit’s amperage. When you’re done, label each breaker clearly for future reference.
Invisible hazards from paints and solvents, such as volatile organic compounds (VOCs), can lurk in even well-ventilated spaces. Use a portable gas detector to monitor for carbon monoxide and volatile organic compounds. Always follow manufacturer guidelines for adhesives to avoid ignition and dispose of chemicals properly.
When making structural modifications, confirm which walls are load-bearing and consult an engineer if unsure. Always brace ceilings with adjustable steel posts before removing load-bearing supports. For dust control, attach HEPA vacuums to your tools to minimize harmful airborne particles.
Environmental & Neighborhood Considerations
A responsible renovation extends beyond your own property lines. Be a good neighbor by scheduling noisy work during standard business hours. Minimize your project’s environmental impact by recycling materials like drywall, concrete, and metal. Consider donating reusable items such as cabinets, doors, and fixtures to reduce waste.
Emergency Preparedness
Even with careful planning, you must be prepared for the unexpected. For fire safety, keep a multipurpose (ABC) fire extinguisher nearby during any hot work (welding, grinding, torch use). Protect your work area from rain by keeping tarps readily available. A quick response can separate a minor scare from a major incident.
Post-Project Safety Checks
Once the tools are put away, a final sweep is essential to ensure the space is safe. Conduct a thorough inspection walk-through. For electrical systems, test all GFCI and arc-fault breakers using their test buttons. Check plumbing for slow drips around new fittings after 24 hours.
Perform a deep cleaning to remove fine dust particles, and replace your HVAC filters. To clear residual VOCs, run exhaust fans with windows open for at least 72 hours. Finally, show your family how to reset breakers and GFCI outlets. This final check ensures your space is genuinely safe.
Common Mistakes to Avoid
Some of the most common DIY injuries stem from a few critical mistakes. One major mistake is skipping professional consultations on structural or electrical work to save money. Another error is rushing and removing PPE for a quick task. Avoiding these critical mistakes ensures a successful, safe project.
Your Project, Your Safety
Smart DIYers know that great renovations begin and end with safety. By planning ahead, wearing the proper PPE, and maintaining a tidy worksite, you can transform your house into a home you’re proud of. A commitment to safety protects the value you add and prevents costly accidents.
FAQs
Because identifying hidden dangers like faulty wiring, asbestos, or structural issues early prevents accidents, costly repairs, and project delays.
The most common include cuts, falls, electrical shocks, and chemical burns — usually caused by improper tool use or lack of protective gear.
Check blueprints or consult a structural engineer. Load-bearing walls support your home’s weight and must never be removed without proper reinforcement.
Safety glasses, gloves, hearing protection, dust masks or respirators, and steel-toed shoes are basic must-haves for every DIY project.
Always call licensed experts for electrical rewiring, plumbing involving main lines, asbestos removal, or major structural changes.
Sweep debris daily, label storage bins, secure tools when not in use, and use child or pet barriers around active work zones.
Stop work immediately and contact certified abatement professionals. Disturbing these materials can release toxic particles into the air.
Use HEPA-filter vacuums, open windows, run exhaust fans, and wear N95 respirators to limit exposure to fine dust and volatile organic compounds (VOCs).
Turn off the power at the breaker, use a voltage tester to confirm no current, and never overload circuits. Label breakers after work is complete.
Inspect electrical systems, test GFCI outlets, check for plumbing leaks, change HVAC filters, and ventilate the area for at least 72 hours to clear residual fumes.


