A DIY outdoor oven is one of those projects that feels ambitious at first, then becomes much more manageable once you break it into stages. If your main goal is cooking pizza, this guide will help you build a practical wood-fired pizza oven that also lets you bake bread, roast vegetables and cook meat in your own back garden.
The appeal is easy to understand. A proper outdoor pizza oven reaches the high temperatures needed for crisp bases, blistered toppings and that unmistakable smoky flavour. It also gives you something more permanent than a barbecue. Once finished, your garden pizza oven becomes a focal point for outdoor cooking, whether you are feeding family on a weeknight or entertaining at the weekend.
This guide focuses on a realistic home build rather than an overly complex showpiece. You will learn how to plan the build, choose the right materials, create a stable base, lay the oven floor, shape the dome, add insulation and cure the oven safely. The emphasis is on a step-by-step guide that keeps the building process clear, practical and achievable in British home conditions.
Why build your own outdoor oven?
Building your own pizza oven gives you three things at once: better food, a satisfying DIY project and a useful feature in the garden. Wood-fired ovens are not just for pizza. Once you understand how they hold and release heat, you can use them to bake bread, roast trays of vegetables, slow-cook joints of meat and even make bread after the main fire has burned down.
There is also the cost factor. A ready-made pizza oven can be expensive, especially if you want something with decent thermal mass and proper insulation. Building your own oven lets you control the budget, the size, and the look. You can keep it simple, use some recycled materials, and still end up with a durable brick oven that performs well.
For many people, the real attraction is the mix of function and character. A well-built own garden pizza oven looks right at home in a backyard, especially if you have moved into a new house and want to make the space feel more personal. It is practical, but it also has that old-world feel you associate with Italian homes, rustic kitchens and traditional outdoor cooking.
What type of oven should you build?
Before you start buying bricks, decide what sort of oven makes sense for your space, budget, and skill level.
The most common choice is a simple wood-fired pizza oven with a solid base, a firebrick floor and a dome that reflects heat back down on to the food. That design works well because it can reach very high heat for pizza, then hold enough residual heat for bread and slower cooking afterwards.
A brick oven is the classic option. It tends to be more durable, more weather-resistant and better at storing heat. If you want a neat, long-lasting finish, this is often the best route. It usually involves fire bricks or hearth bricks inside the cooking chamber and ordinary house bricks around the outside where there is less direct heat.
A cob oven or earth oven is a more rustic alternative. This kind of build uses a clay-and-sand mix, often with straw, formed around a temporary sand form. If you like natural building methods and want an own earth oven, this can be a very appealing project. It is often cheaper than a full masonry build and can be shaped more freely.
A hybrid design is often the smartest choice for first-time builders. You can make the stand from breeze blocks, create the hot cooking chamber with proper refractory materials, and finish the outside in a simpler way. That gives you the reliability of masonry ovens without making the whole job harder than it needs to be.
Plan the build before you start
The best DIY pizza oven projects are usually the ones that were planned properly before the first bag of cement was opened. Start by choosing the right location. You need a level, stable area with enough fresh air, enough working room, and safe clearance from fences, sheds, planting and overhanging branches. A wood-fired build should never be tucked into the only place that happens to be free if that spot is awkward or unsafe.
Think about how you will actually use the oven. You want it close enough to the house to be practical, but not so close that smoke becomes a nuisance. Consider the prevailing wind, where people will stand while cooking, and whether you want log storage beneath the oven.
Size matters too. Many first-time builders assume bigger is better, but a huge chamber takes more fuel and longer to heat. For a domestic outdoor pizza oven, something that comfortably fits one or two pizzas at a time is usually enough. The goal is not to build the largest oven in the street. The goal is to build one that is easy to fire, easy to use and efficient at retaining heat.
It also helps to sketch the entire oven before starting. Decide on the base size, dome height, doorway shape, chimney position and outer finish. You do not need architectural drawings, but you do need a clear plan. That will keep the build in your comfort zone and stop you making expensive changes halfway through.
Materials and tools you will need
The exact materials depend on the design, but most builds include the same core elements. The hot inner parts must be able to withstand high temperatures, while the outer shell mainly needs to protect the structure and help it stay dry.
For the base and support, breeze blocks, concrete and standard bricks are common choices. For the cooking chamber, use fire bricks or hearth bricks on the oven floor, and suitable refractory products around the hottest sections. Specialist suppliers such as Vitcas Shop carry refractory materials used for outdoor oven projects, including fire bricks, refractory mortars and insulation products designed for high-heat applications.
For a cob or earth oven, you will also need clay, plenty of sand, and often some straw. A wet clay slip can help bind natural materials in certain stages. For reinforcement, some builders use chicken wire on outer layers, though it should not sit where it will be exposed directly to the fiercest heat.
Insulation is critical. A proper insulation layer helps the oven retain heat and cook more evenly. Ceramic fibre blanket is a common modern solution because it insulates very well while keeping the build compact. Lower-cost builds sometimes use wet newspaper, perlite mixes or even empty beer bottles and glass bottles in cooler structural areas, especially under the supporting slab or in non-direct-heat zones. Refractory insulation products, including ceramic fibre and insulating fire bricks, are commonly sold for these high-temperature applications.
Your basic tools will usually include a shovel, spirit level, trowel, buckets, a rubber mallet, tape measure, gloves, and eye protection. A wooden pallet can also be useful for moving materials around the garden if access is awkward.
Step 1: Build a strong base and foundation
Start from the ground up. A pizza oven is heavy, and a weak base will cause problems later. Mark out the footprint, dig down if needed, and create a solid foundation that suits your ground conditions. In many gardens, that means a reinforced concrete slab or another firm, level base.
Once the foundation has set, build the stand. Breeze blocks are a common choice because they are affordable, strong and fairly easy to work with. Lay the first layer carefully and check everything with a spirit level. If the stand is not square and level now, the rest of the building process becomes harder.
Build to a working height that feels comfortable. Many people make the oven too low, then regret it every time they cook. A good outdoor oven should let you work naturally rather than stooping for hours. You can also leave an open space in the stand for wood storage, which is useful for keeping good wood close at hand.
This stage is not glamorous, but it is one of the most important. If you slowly build a stable base now, the rest of the project will feel much more straightforward.
Step 2: Create the oven floor
The oven floor is the part your pizza and bread sit on, so it matters more than many beginners realise. A poor floor means uneven cooking, awkward loading and a frustrating start every time you light the oven.
Lay fire bricks or hearth bricks tightly together on a level bed. The goal is a flat, even cooking surface with minimal gaps. Avoid thick mortar joints between the bricks on the actual cooking area, because you want peels to glide smoothly, and you do not want raised edges catching dough.
This is also where you should think beyond pizza. A good floor supports more than quick bakes. It helps create the steady, stored warmth needed to bake bread after the live flame has dropped. In simple terms, if the floor is right, the whole pizza oven works better.
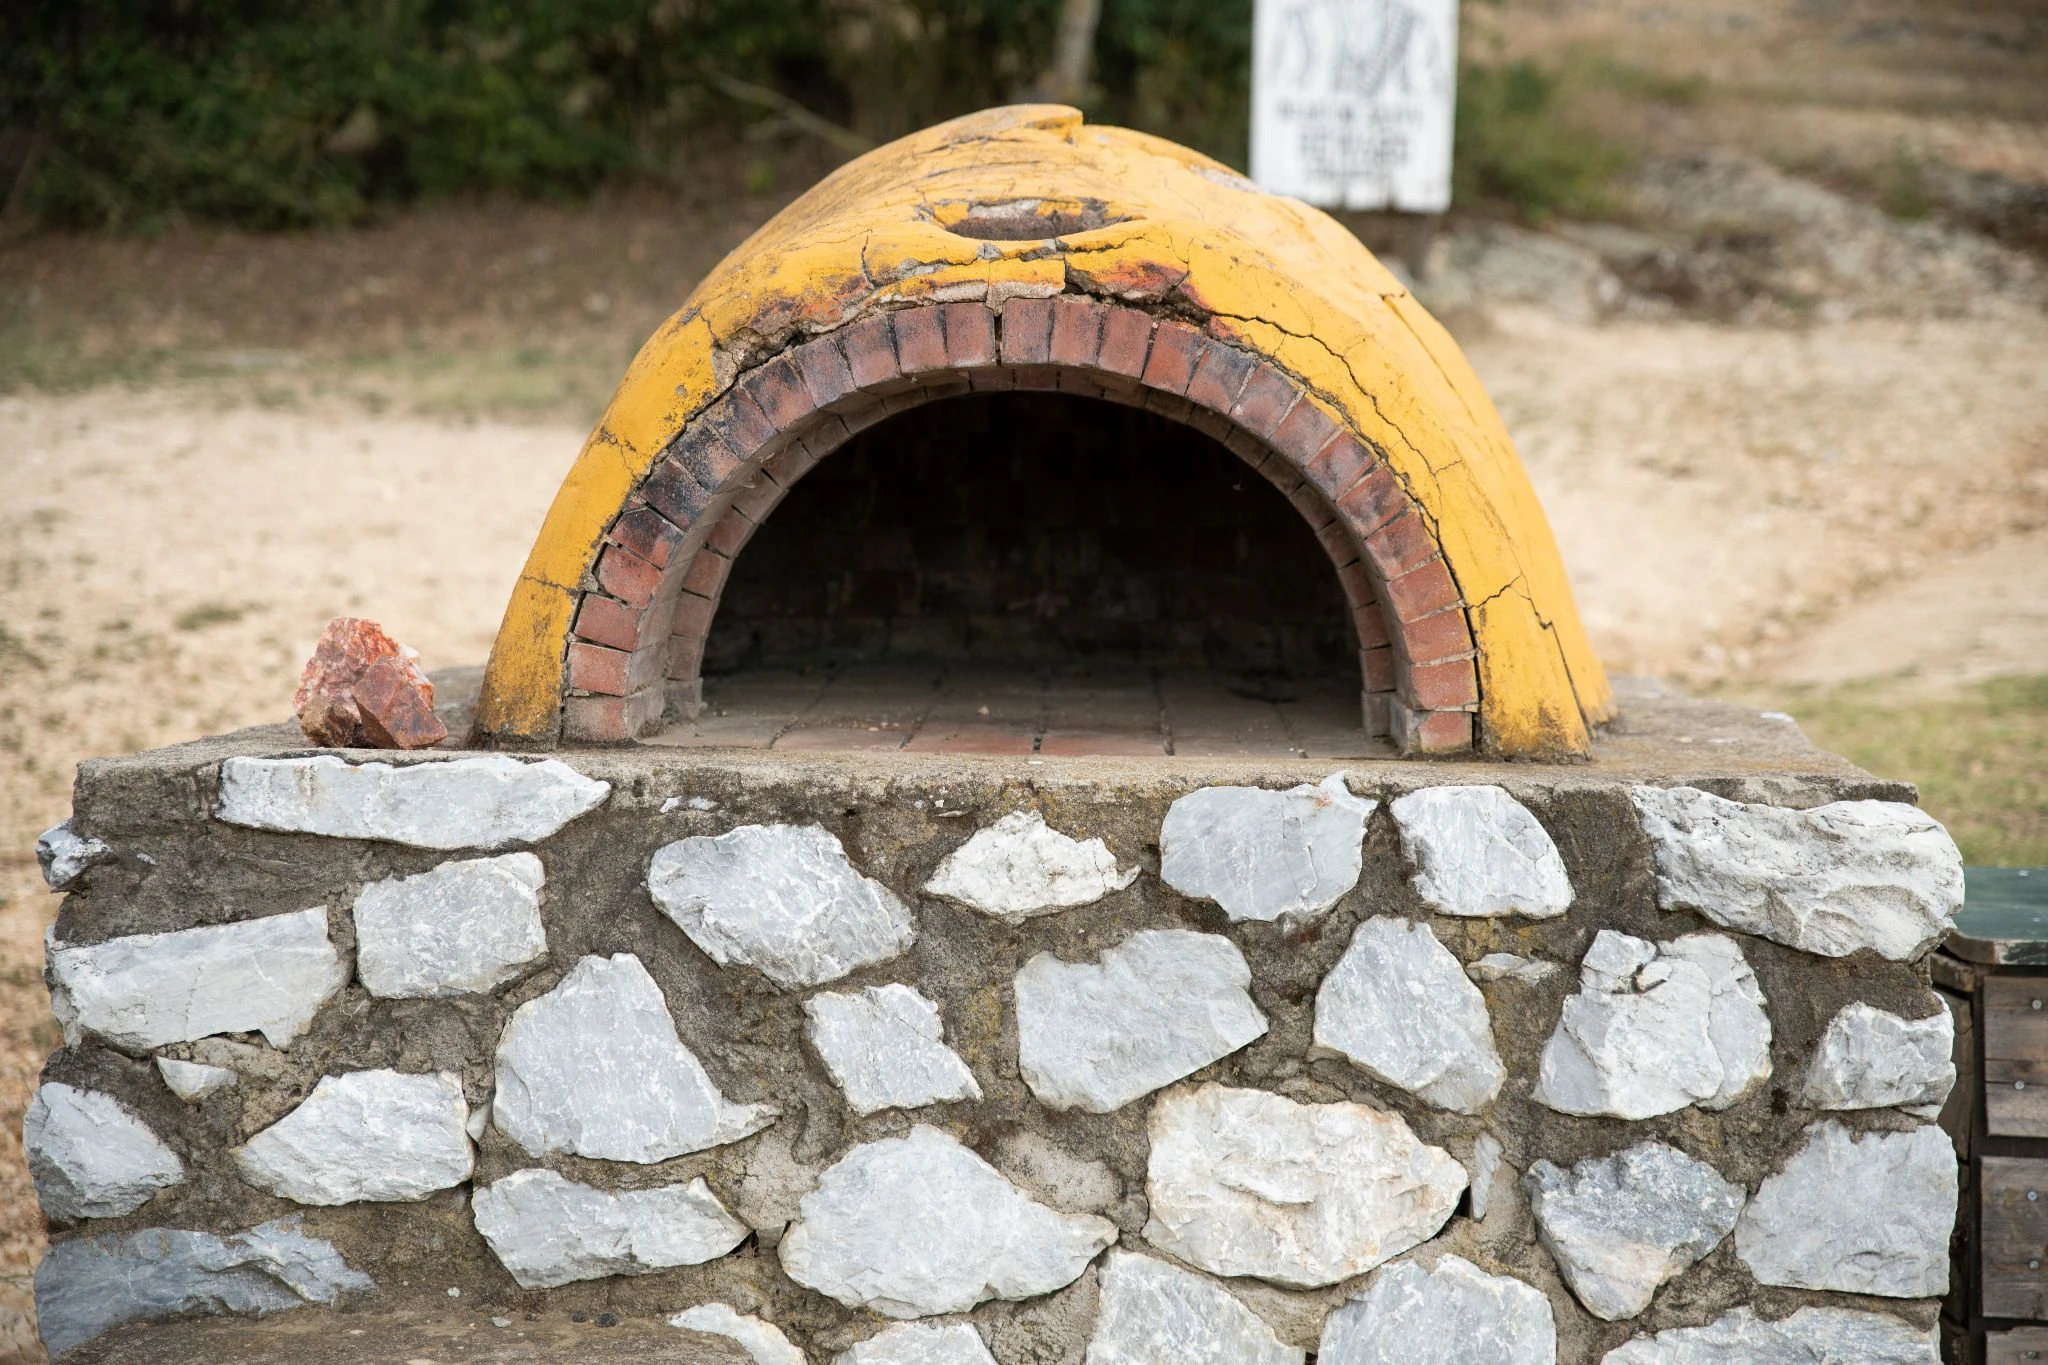
Step 3: Build the dome or cooking chamber
Now you get to the heart of the oven. The dome is what traps and circulates heat. It is also what gives a wood-fired oven its ability to hit the fierce heat needed for wood-fired pizza while still holding warmth afterwards.
If you are building a brick dome, work gradually in courses and keep checking the shape. Many builders use a temporary support or internal guide while placing the bricks. The entrance can be formed with a brick arch, which gives strength and also creates a clean opening for loading food. Leave proper space for the doorway and chimney, because both affect how the oven draws air and handles smoke.
If you are making a cob oven, begin with a compact sand form shaped like the inner cavity of the oven. Once that is smooth and stable, cover it with a protective separator such as damp paper. Some builders use wet newspaper for this stage so the sand can be removed more easily later. Then apply the clay-and-sand mix around the form, starting with a thin layer and building up gradually. A wetter clay slip may be used in places to improve bonding, while chicken wire can reinforce outer coats in some designs.
Whatever system you use, the aim is the same. You want a smooth chamber that encourages hot air and flame to move up, over and back across the food. That is why dome shape matters. It is not just about looks. It changes how the oven cooks.
When the shell has firmed up enough, remove the internal support. In a cob build, that means digging out the remaining sand. Take your time here. You want the chamber to keep its shape without stressing the walls.
Step 4: Add insulation to keep the heat in
A pizza oven without proper insulation is like a kettle with no lid. It will get hot, but it will waste fuel and cool too quickly. If you want an oven that can do more than one batch of pizza, you need a proper insulation layer.
Modern builds often use ceramic fibre blanket over the dome because it does an excellent job of reducing heat loss. That helps the oven reach cooking temperature faster and hold it longer. It also improves consistency, which matters when you are cooking several pizzas back to back.
Natural and lower-cost methods can work too. In some builds, bottle layers using beer bottles, empty beer bottles or glass bottles are placed in cooler structural zones to reduce heat loss and bulk out sections economically. Cob-style ovens may also use lighter outer mixes, straw-rich insulation coats or similar methods. The key point is simple: the insulation should sit outside the hot structure, not replace the hot structure.
Good insulation does more than save fuel. It allows the oven to store enough heat for second-round cooking. That is where residual heat becomes useful. After pizza, you can use the falling temperature to bake bread, dry tomatoes, roast garlic or cook slow dishes that do not need flames licking the roof of the oven.
Step 5: Finish the outer shell and fit the chimney
Once the insulation is in place, protect it. The outer shell can be made from render, brick, lime-based finishes or another weather-resistant coating depending on the style you want. This part turns the oven from a construction project into a finished oven.
Fit the chimney carefully and make sure the route for smoke is sensible. A poor flue arrangement can make the oven smoky at the mouth and awkward to light. A good one helps pull air through the chamber and improves combustion. In practical terms, that means a cleaner burn and better control of the fire.
Weather protection matters as well. Even a well-built oven suffers if it stays damp. A small roof, shelter, or waterproof cover will help it last much longer. That is particularly important in the British climate, where repeated wetting and drying can shorten the life of the outer finish.
Step 6: Dry and cure the oven properly
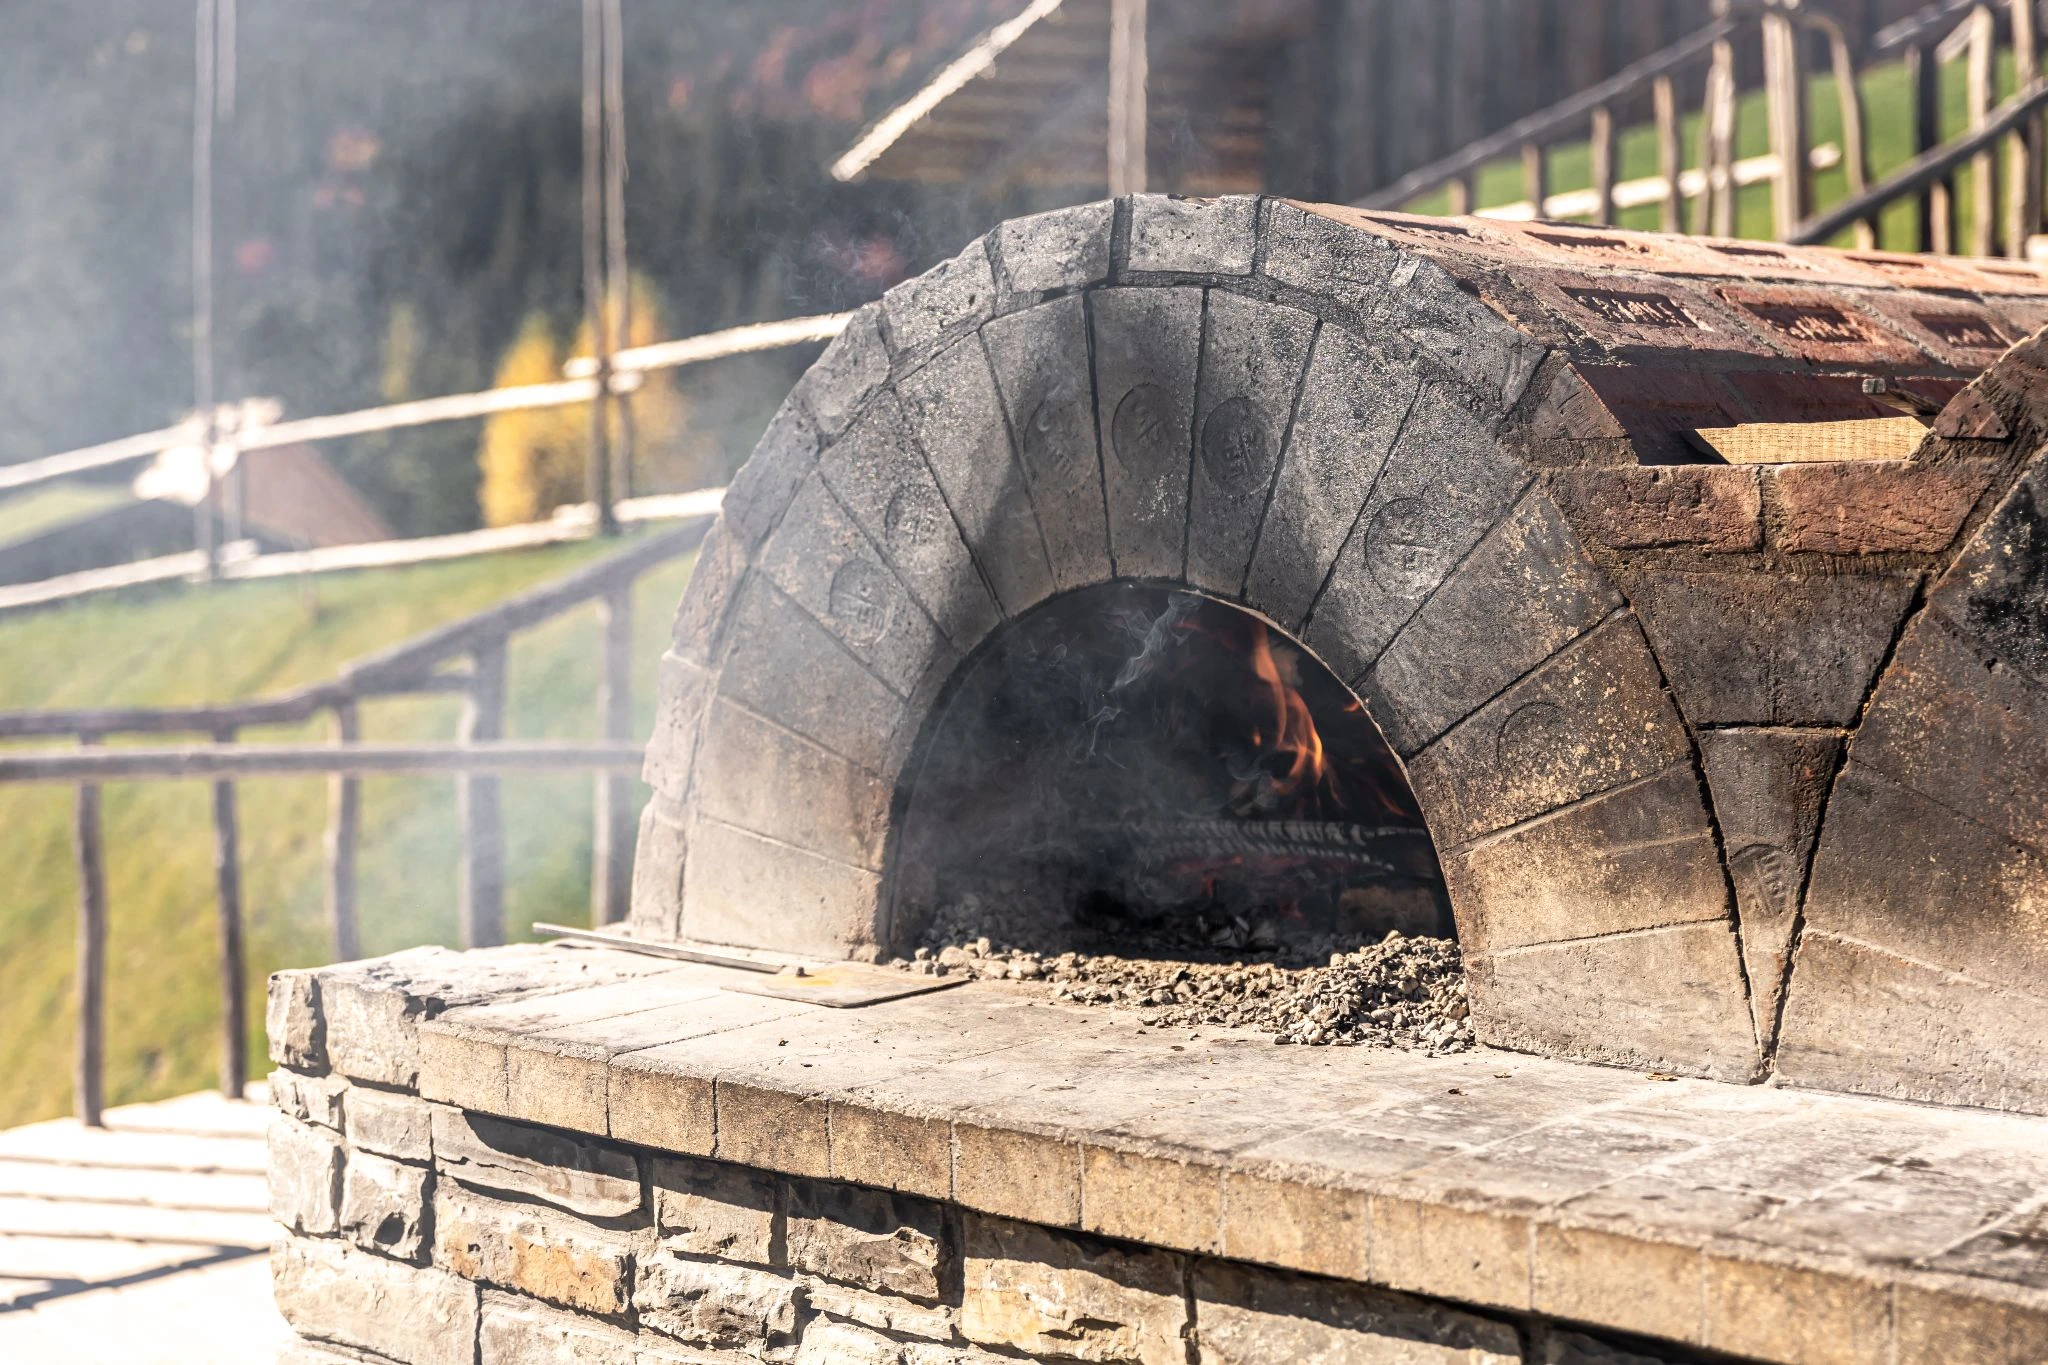
This is the stage impatient builders often rush, and it is one of the main reasons new ovens crack badly. The oven must dry fully and then be cured gradually. Never jump straight to a roaring blaze.
Begin with a small fire using dry kindling and small sticks. Keep the temperature modest. The point is to drive moisture out of the materials, not to test how much heat the oven can take on day one. Over several firings, increase the size of the fire slowly. Use good wood and let the oven adjust bit by bit.
Some small cracks are common, especially in clay-based ovens, and not all of them are serious. What matters is whether the structure remains stable and whether heat is being retained properly. A slow curing schedule gives the wood-fired oven the best chance of settling without major damage.
Once the dome and floor are fully dry and the oven responds well to repeated firings, you can start using it at proper pizza temperatures.
How to cook in your wood-fired pizza oven
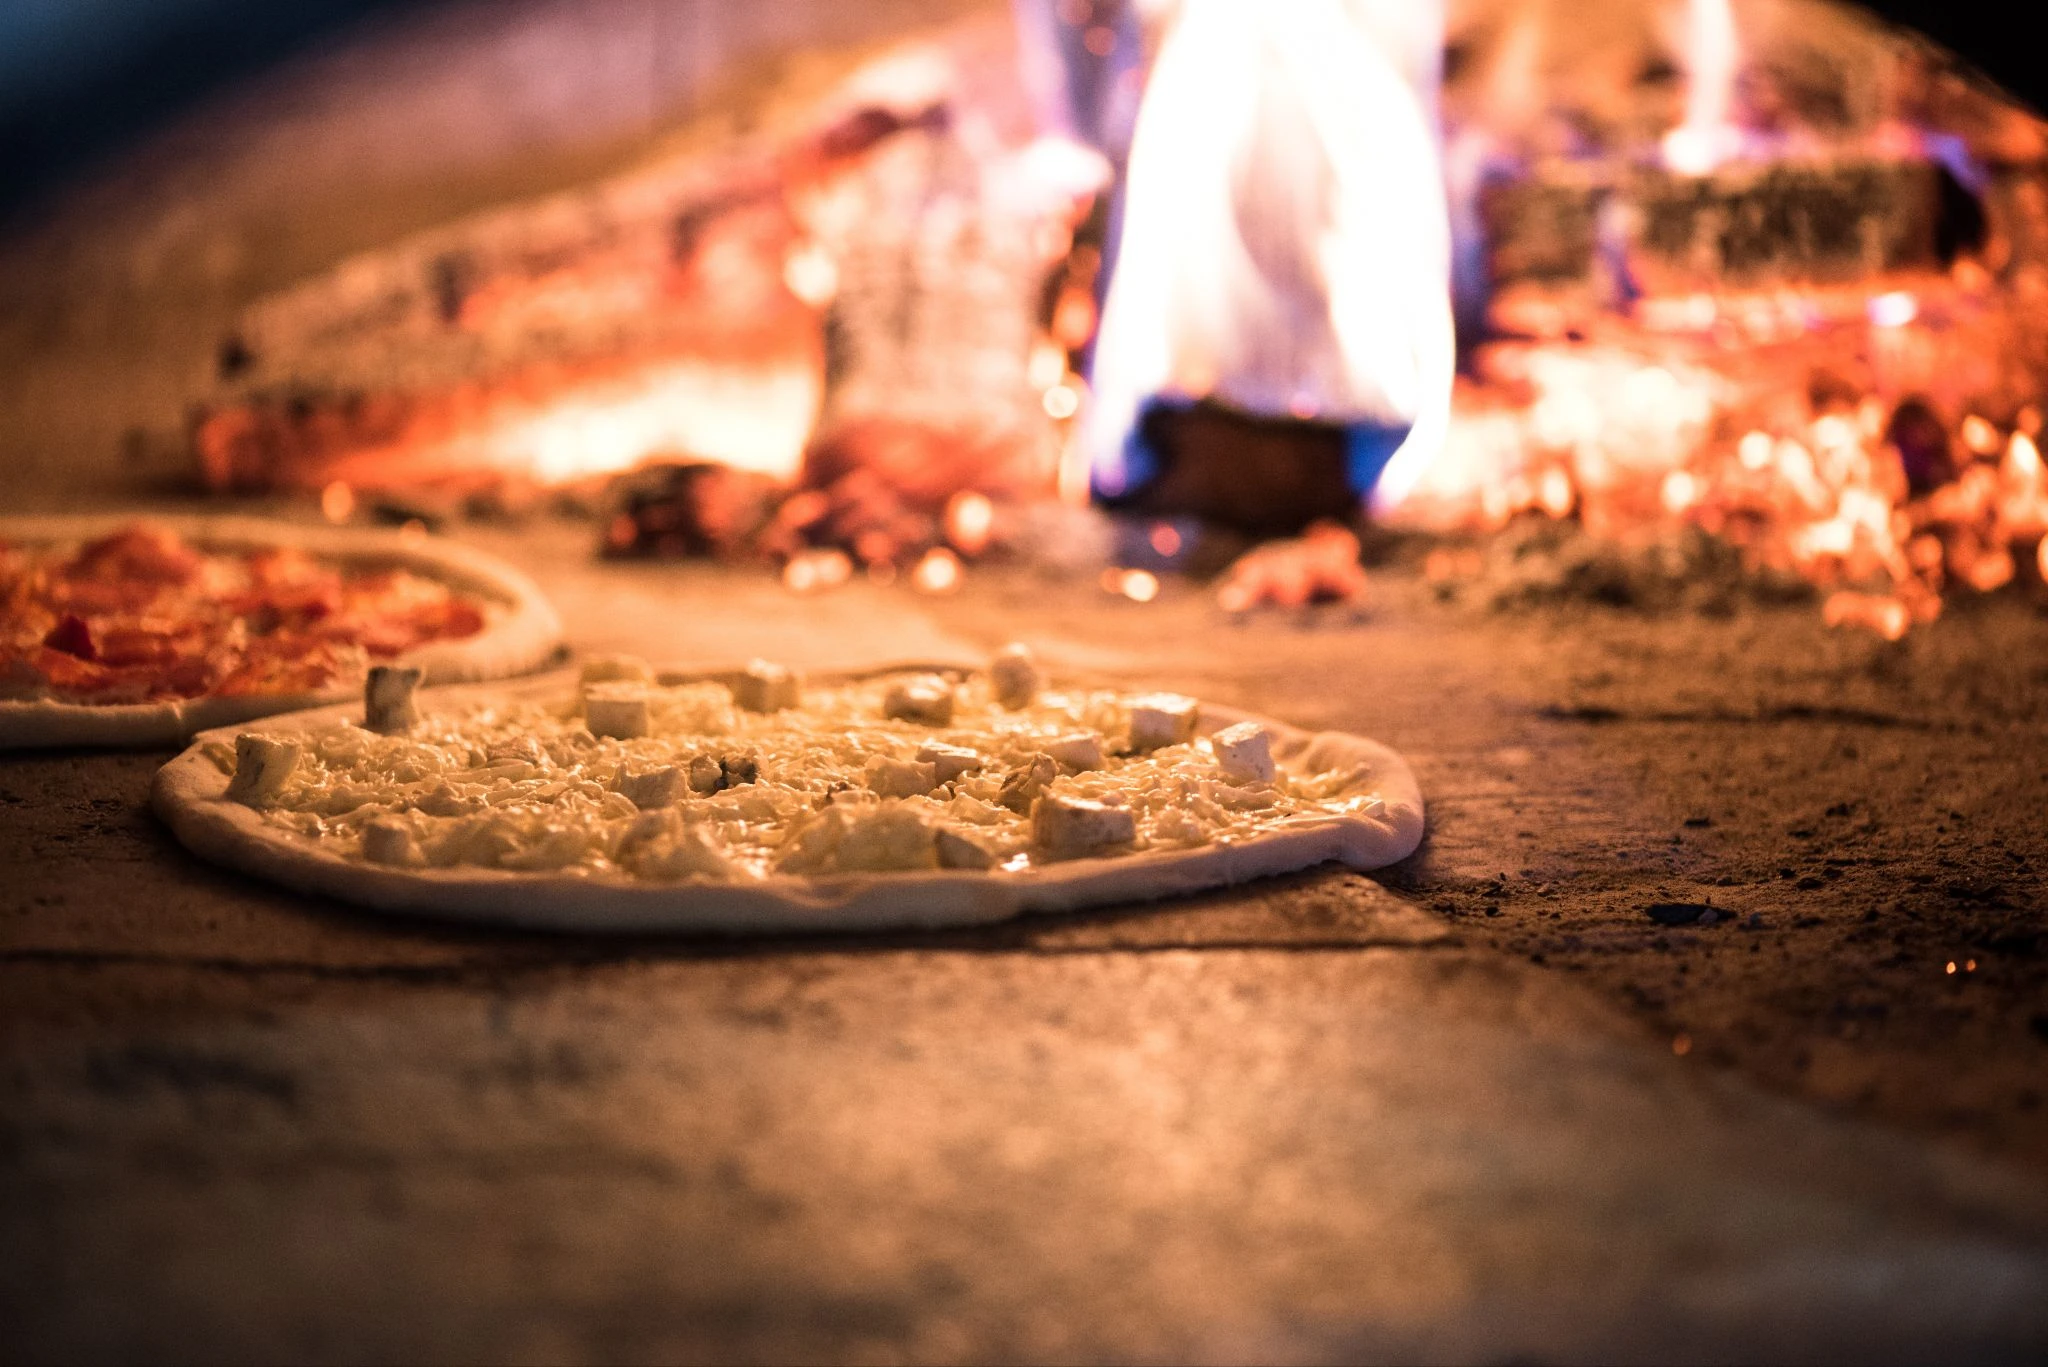
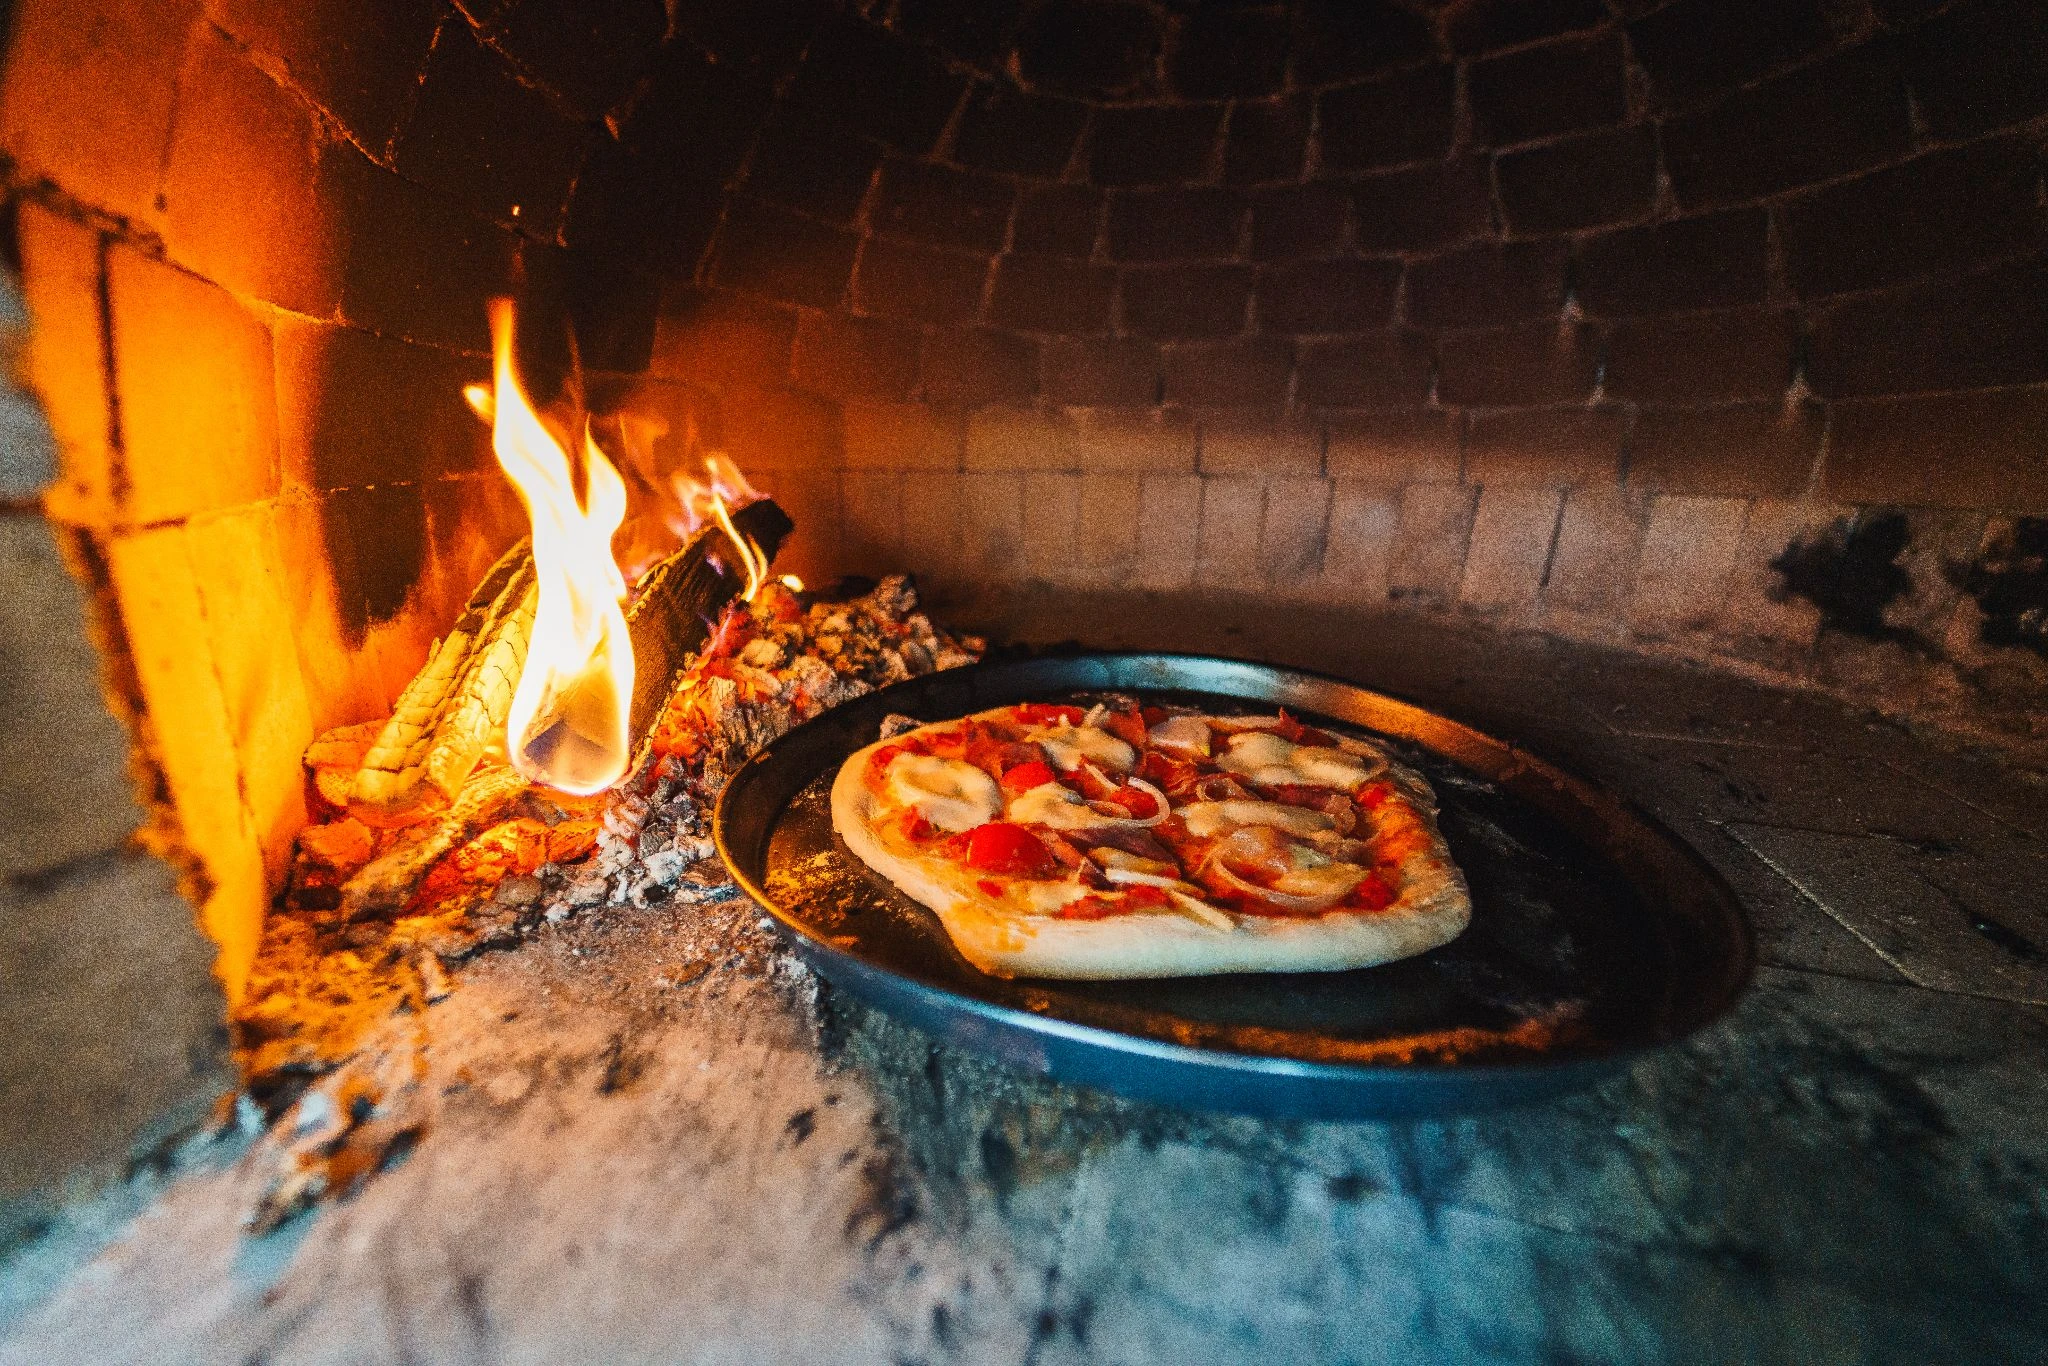
To cook great pizza, heat the oven thoroughly before you bake. You want the dome hot, the floor hot and a healthy live fire still burning to one side. That is what gives you the fast cooking and slight charring associated with wood-fired pizza.
Push the fire aside, brush the floor clean and launch the pizza on to the hot cooking surface. Turn it as needed so it cooks evenly. This is where the project starts to pay you back. A well-built wood-fired pizza oven gives you the crisp base, airy crust and light smoky edge that home kitchen ovens struggle to match.
Once the pizza session is done, do not waste the remaining heat. This is the moment to think like traditional bread ovens. Let the live flame die down, even out the temperature and use the stored warmth to bake bread. Later still, you can cook meat, trays of vegetables or slow dishes that benefit from gentler heat. That versatility is the real strength of a good outdoor pizza oven. It is not just a novelty for one type of food. It becomes a proper outdoor cooker.
Common mistakes to avoid
The most common mistake is using the wrong materials in the wrong places. Standard decorative bricks may be fine for the outside, but the hot core needs materials made to withstand high temperatures. The second big mistake is skimping on insulation. Without it, the oven heats poorly and cools fast.
Another frequent problem is poor planning. Builders sometimes start enthusiastically, then realise the doorway is too big, the dome is too low, or the chimney is badly placed. Others make the oven too large, which only means more fuel, longer firing times and less frequent use.
Rushing the curing stage is another classic error. So is choosing poor fuel. Wet or unsuitable wood makes the oven harder to manage and can produce excess smoke. Keep things simple, follow the sequence, and let the build develop steadily rather than trying to finish everything in a rush.
Can you build one with recycled materials?
Yes, to a point. Using recycled materials can keep costs down and add character. Reclaimed bricks may be suitable for the outer shell. A wooden pallet can help with transporting materials. In some designs, glass bottles may be used in cooler zones as part of a low-cost insulating approach.
That said, this is not the place to cut corners on the hot face of the oven. The oven floor, the dome interior and any area exposed directly to flame should use reliable, heat-resistant materials. Build economically where it makes sense, but do not compromise the parts that determine safety and performance.
Final thoughts
Building your own pizza oven is a project that rewards patience more than speed. It is not difficult because every individual task is complex. It is difficult because it asks you to stay methodical from foundation to first firing.
If you do that, you end up with more than a DIY outdoor oven. You get a reliable garden pizza oven that can cook pizza at high heat, hold enough warmth to bake bread, and make outdoor meals feel far more special. And once you have built one, the next oven will always seem easier.
Frequently asked questions
It depends on size, finish and material choice. A simple build using a block stand and practical finish can cost far less than a premium ready-made oven. Costs rise when you choose more decorative masonry, a larger footprint or higher-spec insulation.
Use fire bricks or hearth bricks for the cooking chamber and floor. Standard house bricks are better kept for the cooler outer shell unless they are specifically rated for high heat use.
Yes. A cob oven or earth oven can be an excellent DIY option if you prefer a natural building style. It is often cheaper and more forgiving in shape, though it still needs careful drying and weather protection.
Not every design uses one in the same way, but many domestic ovens benefit from a properly placed chimney because it improves airflow and helps manage smoke at the oven mouth.
Plenty. Along with pizza, a good oven can bake bread, roast vegetables, crisp potatoes, and cook meat using both direct fire and retained heat.


