Walk into a room and your eye is often drawn to the finishing details—the trim around doors, the crown molding above, or the wainscoting below. But one element that quietly ties the look together is the chair rail end cap. It’s small, often overlooked, but without it, even the most carefully installed chair rail molding can look unfinished. A chair rail end cap does more than just plug a gap; it brings polish, protects your walls, and offers the kind of crisp detailing that separates a “good enough” job from a professional-looking finish.
Let’s dive into why the chair rail end cap matters, how to install it, and how it can elevate your interior design.
Why Use a Chair Rail End Cap?
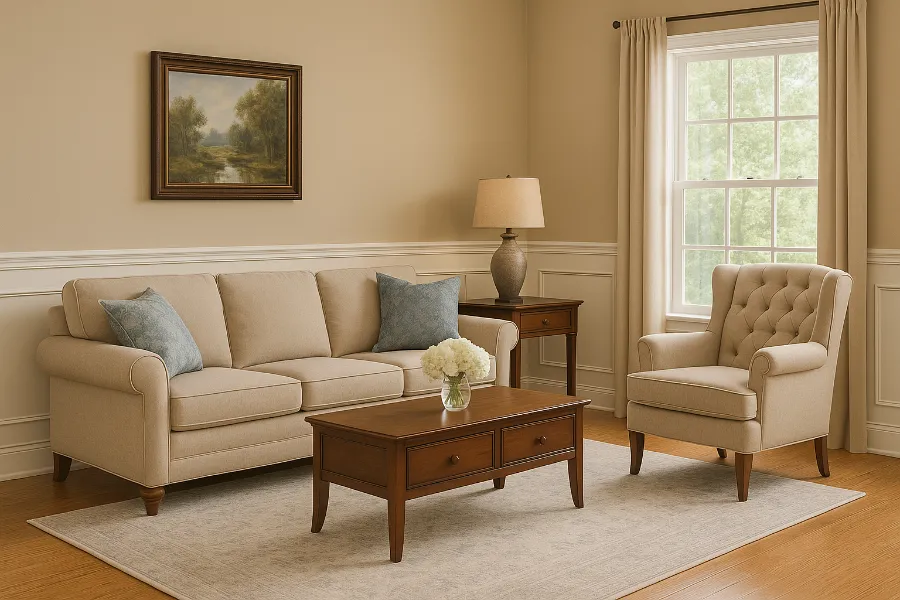
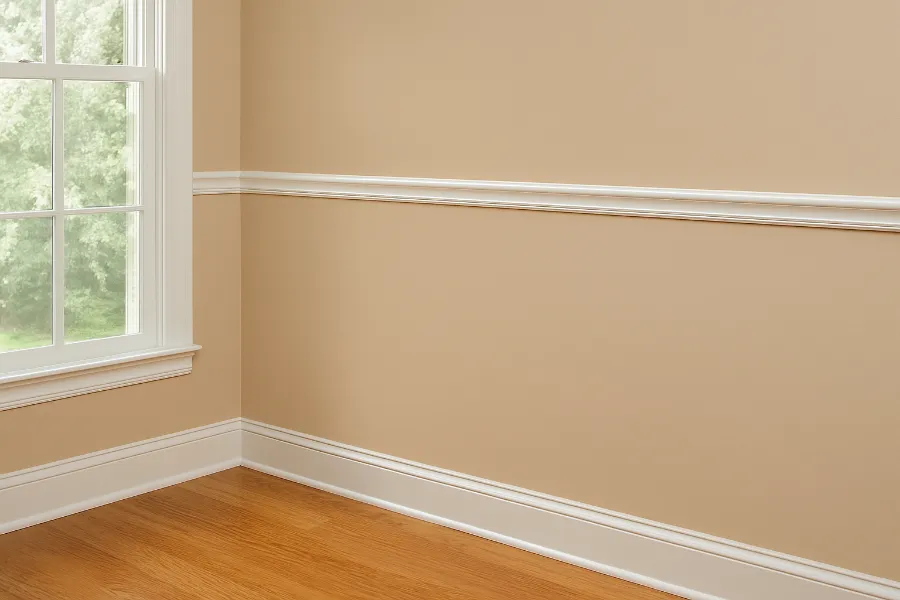
A chair rail serves a dual purpose: it protects your walls from the backs of chairs and creates a natural horizontal line that defines a room. But the rail doesn’t always run seamlessly around every corner. Sometimes it stops abruptly—maybe at a doorway, a fireplace, or at the end of a wall. That’s where the chair rail end cap comes in.
- Aesthetic finish: Instead of leaving an exposed cut edge of molding, the end cap neatly transitions the rail into the wall. This eliminates awkward or raw-looking stops.
- Functional strength: By capping the end, you protect both the molding and the wall from wear, bumps, and splintering.
- Design continuity: End caps can be styled to blend seamlessly or add a subtle decorative highlight depending on the overall room design.
Think of it as putting the last period on a beautifully written sentence—it’s the detail that makes the whole thing feel complete.
Types and Styles of Chair Rail End Caps
Just like molding itself, chair rail end caps come in a variety of materials and profiles. Choosing the right one depends on your home’s style and your personal taste.
- Traditional profiles: Rounded, ogee, or beveled end caps that work well in classic interiors.
- Contemporary designs: Clean, squared-off ends that align with modern and minimalist aesthetics.
- Common materials:
- Wood – A timeless option, easy to cut and paint.
- MDF (Medium-Density Fiberboard) – Budget-friendly and smooth, great for painted finishes.
- Vinyl or composite – Low-maintenance, moisture-resistant, and often pre-finished.
- Tile or stone caps – Used in mixed-material designs, particularly in transitional or eclectic spaces.
A well-chosen end cap doesn’t just finish the rail; it can subtly enhance the entire wall treatment.
Tools and Materials You’ll Need

Before diving into installation, gather your materials. Preparation makes the project smooth and keeps mistakes to a minimum.
Tools:
- Tape measure
- Pencil and square
- Miter saw (or a coping saw for detail work)
- Sandpaper
- Painter’s tape
- Safety goggles
Materials:
- Chair rail end caps (matching your molding profile)
- Nails (or brads for larger caps)
- Wood glue
- Filler or caulk
- Primer and paint (or stain and sealer for wood finishes)
Having everything on hand ensures you’re not running back and forth mid-project.
Step-by-Step Guide: Installing a Chair Rail End Cap
Here’s the process to take your chair rail from incomplete to polished perfection.
1. Measure and Mark
Use a tape measure to mark exactly where your chair rail will end. Check that the line is level—any error here will stand out once the cap is on.
2. Cut the End Cap
Depending on your molding profile, you’ll either:
- Use a miter cut to create a return piece that folds back into the wall.
- Or use a pre-made cap designed to fit the profile directly.
Cut carefully—precision matters for a snug, seamless look.
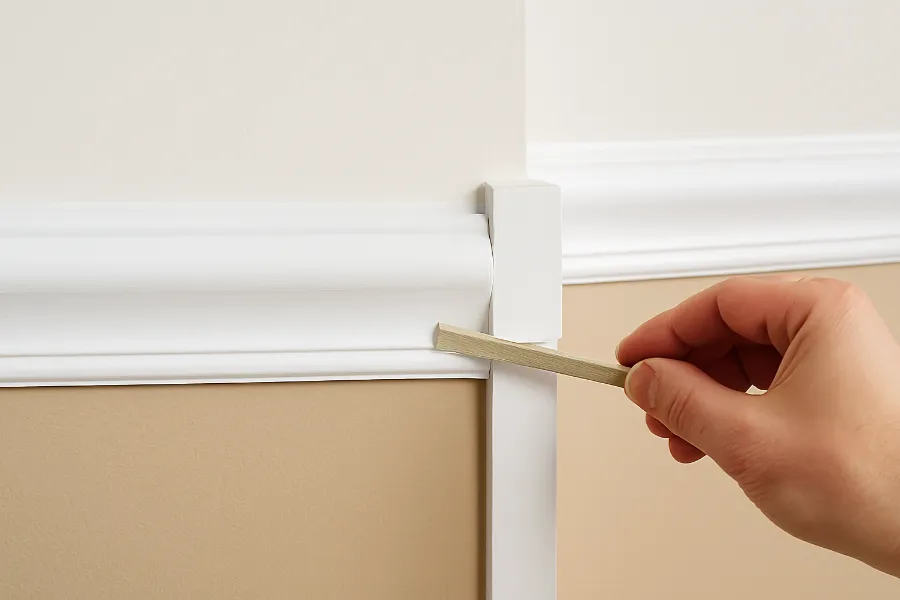
3. Attach the Cap
Apply wood glue to the cut edge and press the cap firmly in place. For larger pieces, use clamps to hold it while the glue sets. Nails can be added for stability, but avoid using them on very small caps to prevent splitting.
4. Fill, Sand, and Smooth
Fill any tiny gaps with wood filler, then sand lightly for a flush surface.
5. Finish With Paint or Stain
Match the finish to your chair rail for a cohesive look. Many homeowners use semi-gloss paint for durability, but staining is also an option if you’re working with natural wood.
Pro tip: Mask with painter’s tape before finishing to keep your walls clean.
Tips and Warnings
Even though installing a chair rail end cap is straightforward, a few small tips go a long way:
- Avoid splitting: Don’t nail directly into tiny end pieces; rely on glue instead.
- Safety first: Always wear goggles when using a saw.
- Consistency matters: Keep all caps in the room the same style to maintain visual flow.
- Check alignment twice: A crooked cap can throw off the entire chair rail line.
Design Ideas With Chair Rail End Caps
A chair rail is functional, but it’s also a design opportunity. Pair it with end caps to create a statement look.
- Contrasting walls: Paint the area above and below the rail in different shades. The cap becomes the clean boundary between the two.
- Layered molding: Combine a chair rail with panel molding or wainscoting for a sophisticated, custom look.
- Bold finishes: Paint the rail and caps in a high-gloss or darker shade to add drama to a neutral wall.
- Mix materials: Use wooden rails with stone or tile caps in transitional spaces like mudrooms or kitchens.
These ideas elevate the chair rail end cap from a simple necessity to a feature worth showing off.
Conclusion
A chair rail end cap might be a small piece of trim, but it carries a big impact. It protects, it polishes, and it completes the look of your room. Whether you’re going for a traditional, timeless style or a sleek modern vibe, this finishing detail ensures your chair rail looks intentional and refined.
So next time you’re installing trim, don’t stop at the rail itself—give it the ending it deserves. A chair rail without an end cap is like a story without a conclusion.


")


