When it comes to simple kitchen skills that make a big impact, learning how to cut lemon wedges ranks at the top. Lemons are more than just a pretty garnish for your drink; they add brightness to meals, enhance cocktails, and even freshen up your home. And yet, so many people grab a knife and hack away without realizing that there’s a right way—and a few better ways—to cut this citrus superstar.
If you’ve ever ended up with lopsided lemon chunks or wedges that spray juice everywhere, this guide will change that. Today, I’ll walk you step by step through how to cut lemon wedges like a pro, plus share variations, storage tips, and creative uses that go way beyond drinks.
What You’ll Need
Before we get started, gather the basics:
- A sharp chef’s knife (dull knives will squash the lemon and waste juice)
- A large cutting board (give yourself room to work)
- A fresh lemon (seedless lemons make life easier, but any will do)
Optional but helpful:
- A paring knife for fine trimming
- A juicer if you want to squeeze wedges later
Step 1: Wash and Prep the Lemon
Always wash your lemon before cutting. Citrus fruits often have wax or stickers on the peel, and you don’t want that ending up in your food or drink. If your lemon feels firm, roll it gently on the counter with the palm of your hand. This softens the membranes inside, making it easier to squeeze later.
Pro tip: Remove those little produce stickers. Nothing ruins a garnish faster than a paper dot staring back at your guest from their cocktail glass.
Step 2: Trim the Ends (Optional)
This step is partly aesthetic. Cutting off the top and bottom of the lemon gives your wedges a clean, squared-off look. Some bartenders prefer leaving the ends on for a more rustic, natural vibe. Both work—the choice is yours.
Step 3: Cut the Lemon in Half
Now for the first real cut. Place the lemon lengthwise on your cutting board (that’s from the pointed end to the other pointed end). Slice it cleanly down the middle.
Alternatively, if you want a different wedge shape, you can cut the lemon crosswise. This method produces shorter, chunkier wedges that sit nicely on the side of a plate.
Step 4: Slice into Wedges
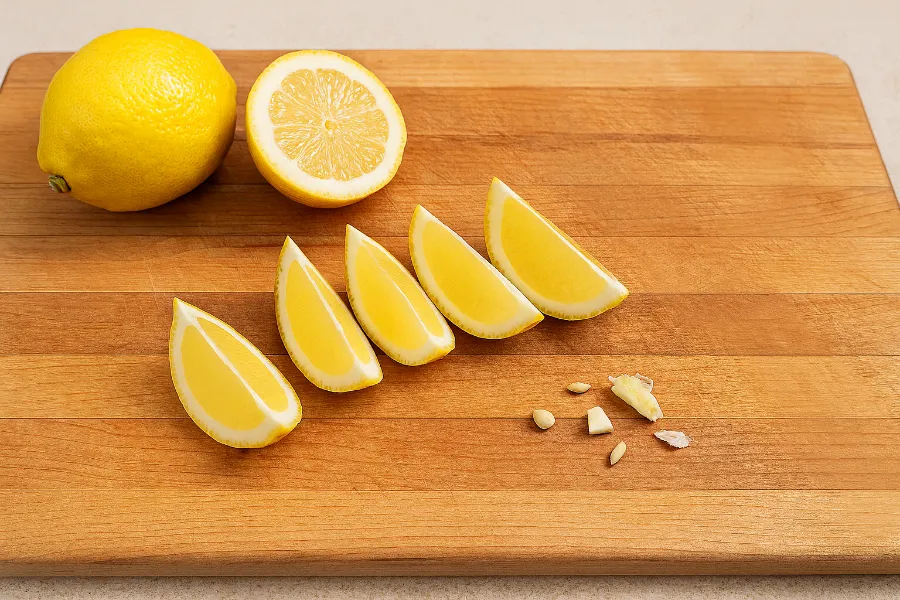
With your two halves on the board, place one cut-side down. For standard wedges:
- Make two cuts through the half → yields 6 wedges total
- Make three cuts through the half → yields 8 wedges total
Each cut should run from the peel toward the center. Aim for even spacing so every wedge looks uniform.
If you’re preparing wedges for cocktails, you might want slightly smaller pieces. Just cut the standard wedges in half again.
Step 5: Remove Seeds and Pith
Nobody enjoys biting into a lemon seed. After cutting, check your wedges and pick out seeds with the tip of your knife. If there’s a ragged bit of white pith running down the middle, trim that away too. This makes the wedge look cleaner and easier to squeeze.
Seedless lemons eliminate this hassle entirely, which is why many bartenders swear by them.
Step 6: Optional Notch for Garnishes
Here’s a little pro move: cut a small slit at the center of the wedge’s flesh. This allows it to perch perfectly on the rim of a glass. For lemon wedges, place the slit closer to the end so they stand upright. For limes, bartenders often notch right in the middle so they drape over the glass.
Variations in Cutting Lemon Wedges
Lemon wedges don’t have to be one-size-fits-all. Depending on how you’ll use them, try these variations:
Standard Wedges
Perfect for plating fish, chicken, or vegetables. Six to eight wedges per lemon.
Smaller Cocktail Wedges
Cut standard wedges in half again. These are easier to balance on drinks and give just enough juice without overwhelming the cocktail.
Decorative Cuts
- Twists: Slice a round, make a cut, and twist into a spiral garnish.
- Crowns: Zig-zag cuts around the lemon create a spiky, decorative edge.
- Supremes: Remove peel and pith entirely, leaving clean, juicy segments.
These are more for presentation but elevate dinner parties instantly.
How to Store Cut Lemons
Whole lemons last up to 3–4 weeks in the fridge, but once cut, the clock starts ticking.
- Store lemon wedges in a sealed glass container (they keep better than in plastic).
- Refrigerate immediately; they’ll last 3–4 days.
- To keep wedges fresher, place a small piece of parchment paper between layers.
If wedges look dried out, don’t toss them yet. Use them for cleaning instead!
Best Uses for Lemon Wedges
Here’s where your perfectly cut wedges shine:
In the Kitchen
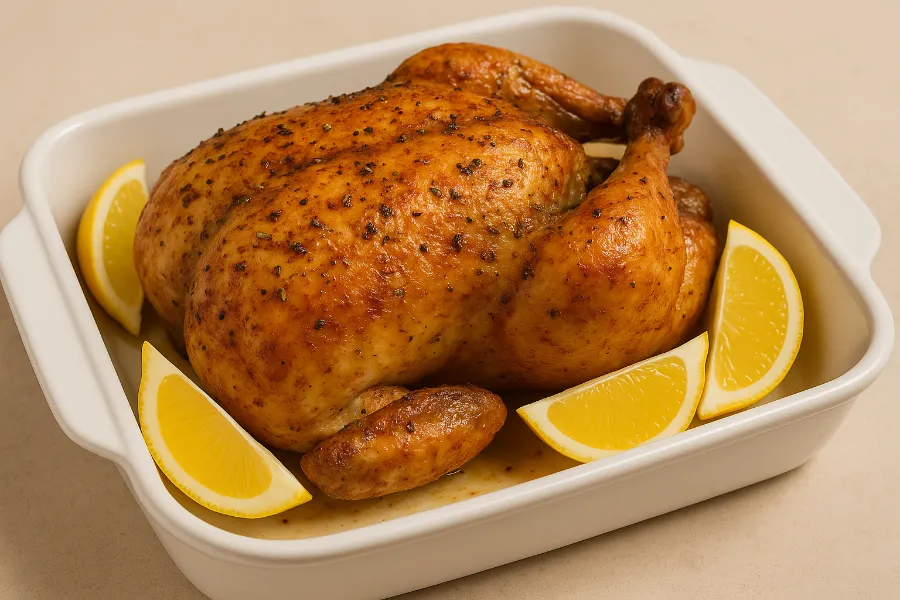
- Squeeze over grilled fish or roasted chicken
- Brighten up a salad or grain bowl
- Add to marinades for proteins
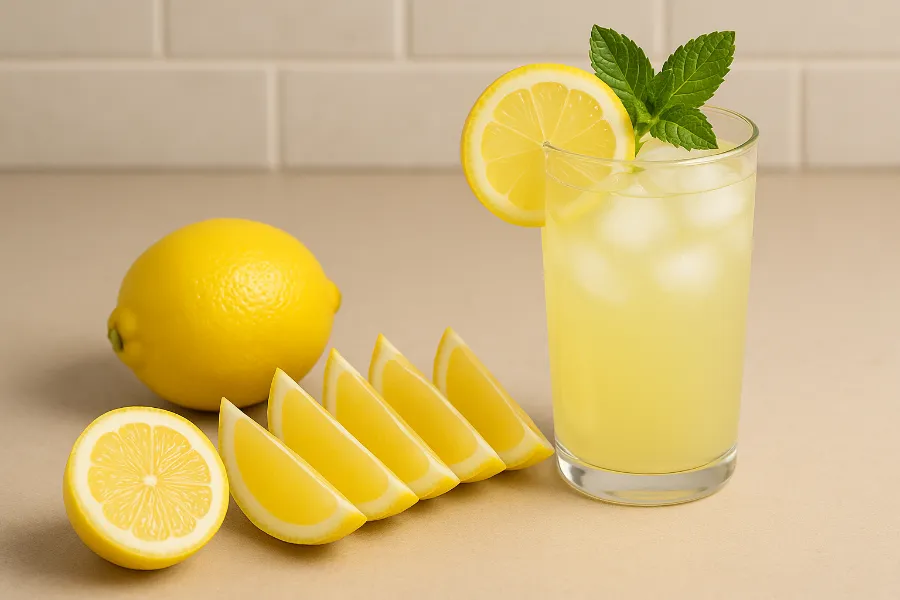
In Drinks
- Classic cocktail garnish (think gin & tonic, whiskey sour, mojito)
- Fresh squeeze for iced tea, water, or lemonade
- Stylish accents for party punch bowls
Around the Home
- Drop a wedge in your garbage disposal to freshen it
- Rub over faucets to remove water stains
- Place in the dishwasher utensil basket for a citrusy boost
Extra Tips for Success
- Roll lemons before cutting for more juice release.
- Use a sharp knife—dull blades squeeze and bruise the fruit.
- Choose heavy lemons with smooth skin; they’re juicier.
- Avoid over-cutting wedges into tiny slivers. They look stingy and don’t deliver enough juice.
Conclusion: Mastering Lemon Wedges
Knowing how to cut lemon wedges might seem simple, but it’s one of those small kitchen skills that transforms everyday meals and entertaining. From elegant cocktails to roasted chicken to keeping your sink fresh, lemon wedges pull double (and triple) duty. Once you’ve got the technique down—wash, trim, cut, seed, and notch—you’ll never go back to sloppy chunks again.
The next time you’re hosting, serving, or just making a glass of water for yourself, take that extra moment. A cleanly cut lemon wedge shows care, adds style, and most importantly, delivers that bright burst of flavor we all love.


