Razor scooter storage doesn’t have to be a headache. If you’ve ever walked into your garage and nearly tripped over a scooter lying flat on the floor, you know exactly what I mean. Scooters are fun, easy to use, and perfect for kids (and adults who like a quick ride), but they’re not exactly great when it comes to staying put. They tip over. They block walkways. They somehow end up scattered across the driveway just waiting for a car tire to find them.
That’s where smart razor scooter storage solutions come in. Whether you want a DIY stand, a quick hook system, or a store-bought organizer, the goal is simple: keep your scooters upright, out of the way, and easy to grab when it’s time to ride. In this article, I’ll walk you through the best ways to do just that—based on tried-and-true garage organization projects that actually work.
What Makes a Good Razor Scooter Storage System?
Before we dive into the builds and hacks, let’s break down what really matters in scooter storage. A good solution should check at least these boxes:
- Kid-friendly – If your kids can’t put the scooter away themselves, it won’t stay organized.
- Stable – No more scooters sliding into a pile or tipping over with the slightest nudge.
- Compact – Garages are already crowded; your storage solution shouldn’t eat up valuable floor space.
- Affordable – Fancy systems are nice, but a few pieces of wood and screws can do the job just as well.
- Durable – Kids can be rough, so whatever you build or buy needs to hold up.
When you keep these factors in mind, the right razor scooter storage setup becomes obvious.
DIY Razor Scooter Stand: A Simple Build That Works
One of the most popular solutions—and honestly one of the most satisfying—is building your own wooden scooter stand. Not only does this keep scooters neatly in line, but it also gives you the flexibility to size it exactly for your family’s collection of scooters.
Supplies You’ll Need
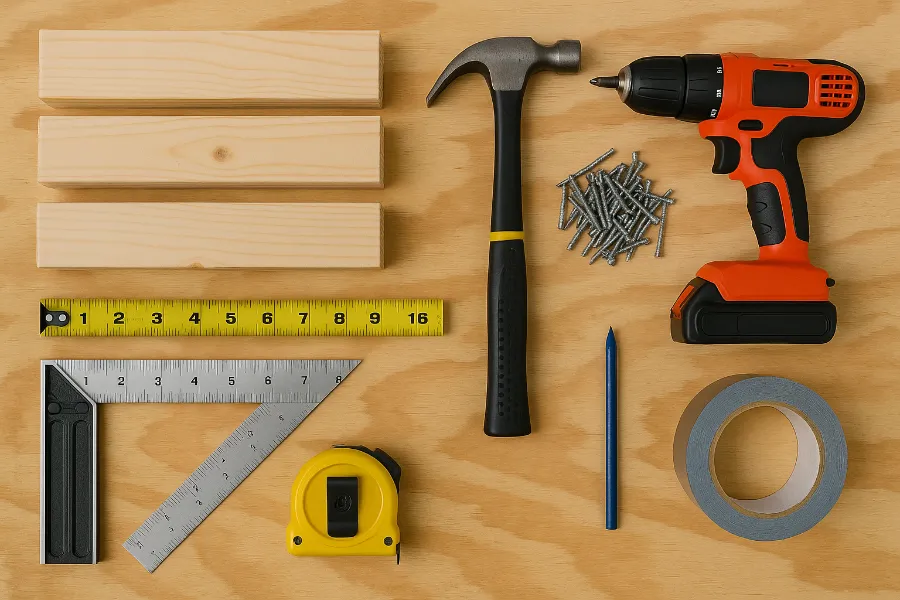
You don’t need a workshop full of tools. Here’s a straightforward supply list:
- 2×4 boards (two or three should be plenty)
- 1×2 or hardboard (for supports)
- Screws
- Saw (circular or hand saw works)
- Drill and drill bits
- Tape measure and pencil
- Optional: wood glue, sandpaper, paint or stain
This is one of those weekend projects that doesn’t take more than an hour or two, but the payoff is huge.
Step-by-Step Guide
Here’s a basic method that has worked well for countless DIYers:
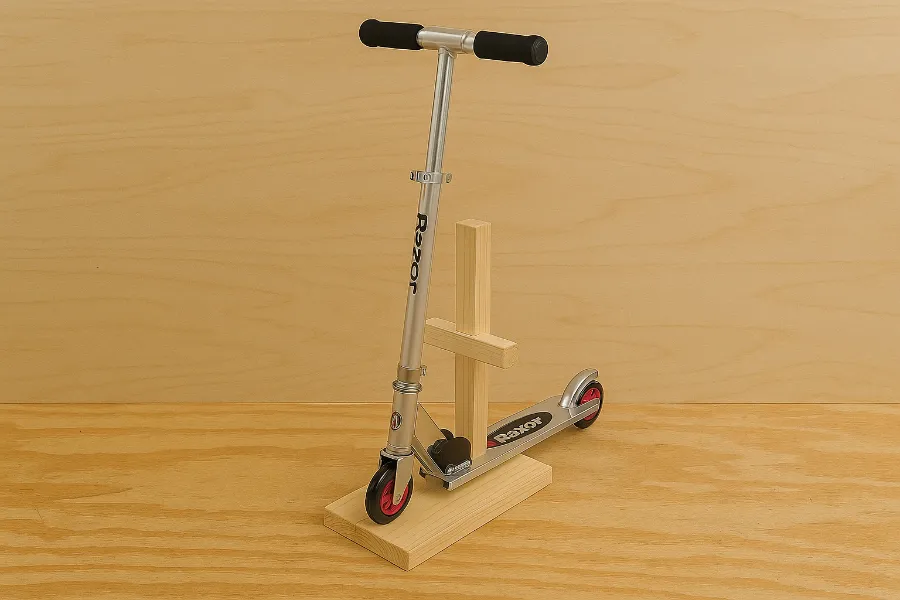
- Measure and mark – Decide how many scooters you want to store. Each stall should be about 3.5 inches wide to fit a Razor scooter wheel snugly. Mark your cuts accordingly.
- Cut the base – Use a 2×4 for the base. If you’re making four scooter slots, cut it long enough to accommodate all four with spacing in between.
- Cut the dividers – These are the short sections that create bays for each scooter.
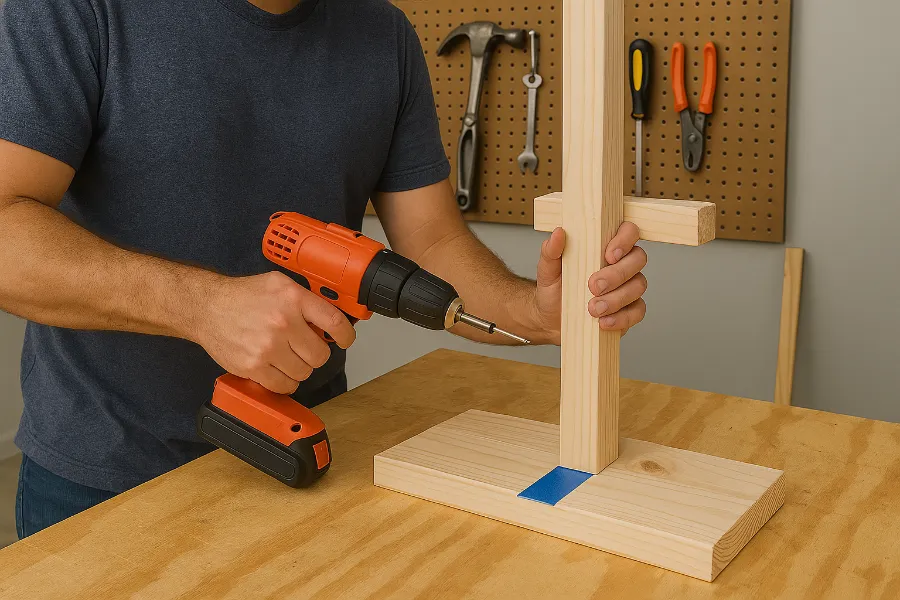
- Assemble the stalls – Screw the dividers upright into the base, leaving about 4 inches of space between them.
- Add a back support – A header piece across the back keeps everything aligned and prevents scooters from tipping backward.
- Sand and finish – If you want it to look cleaner, give it a quick sand and add a coat of paint or stain.
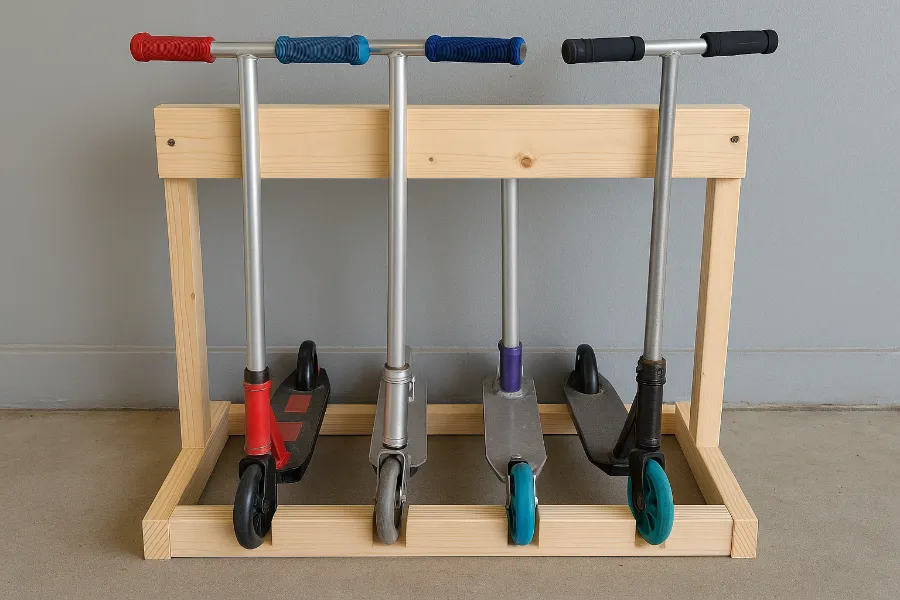
That’s it! A simple wooden rack that keeps scooters standing tall, organized, and ready to use.
Pro Tips for a Smoother Build
- Spacing matters – Leave enough room so handlebars don’t get tangled.
- Adjust for other gear – If your kids have ripsticks or skateboards, size a slot for them too.
- Think about floor placement – Place the rack against a wall or near the garage door so scooters are easy to grab and go.
- Paint for fun – Let kids pick a color and paint their scooter’s slot. Not only does it look great, it also helps them remember where to park.
Alternative Razor Scooter Storage Solutions
Not into building your own rack? No problem. There are plenty of other options that can work just as well.
1. Rubbermaid FastTrack System
This system is a go-to for garage organization. With different hooks and accessories, you can mount scooters (and bikes, helmets, even garden tools) right on the wall. It saves floor space and keeps things tidy.
2. Utility Hooks
Sometimes the simplest ideas are the best. Heavy-duty garage hooks can hold scooters vertically against the wall. Just make sure they’re mounted into studs for strength. This works especially well if you’re short on floor space.
3. Store-Bought Scooter Stands
If you’d rather buy than build, you can find plastic scooter stands online or in stores. These are usually lightweight and affordable, but they don’t always hold up as well as a wooden stand. Still, if you only have one or two scooters, this can be a quick fix.
Real-World Lessons From DIY Scooter Storage
Here’s the thing about DIY: it’s never 100% smooth. I’ve seen stands where the slots were too narrow and scooters wouldn’t fit. I’ve seen racks wobble because the base wasn’t heavy enough. And I’ve seen kids completely ignore the system if it wasn’t easy for them to use.
That said, most mistakes are easy to fix. If the slots are too tight, widen them with a quick saw pass. If the rack feels flimsy, add a cross-brace. If your kids won’t use it, let them decorate it—the buy-in makes a huge difference.
The beauty of DIY razor scooter storage is that you can tweak it until it works perfectly for your space.
Why Razor Scooter Storage Matters
At the end of the day, scooter storage isn’t just about looks. It’s about:
- Safety – No more tripping hazards in the driveway.
- Durability – Scooters last longer when they’re not constantly falling on concrete.
- Convenience – Kids can grab and go without hunting for their scooter.
- Peace of mind – An organized garage makes life feel just a little less chaotic.
And honestly, that’s worth the hour it takes to build a stand or hang a few hooks.
Conclusion: Take Back Your Garage
Razor scooter storage doesn’t have to be complicated. A simple DIY stand, a couple of hooks, or a wall-mounted system can completely change how your garage feels. Instead of scooters strewn across the floor, you’ll have a neat row of wheels ready to roll.
The best part? This is one of those projects that pays off every single day. Every time you walk into your garage and see things in order, you’ll be glad you spent the time to get it right.
So go ahead—grab some 2x4s, a handful of screws, and take control of that scooter chaos once and for all.


")


")