the moment you start repairing something whether it’s a hinge, a tool, or an appliance you suddenly realize just how much grime has been quietly collecting behind the scenes. Over the years, I’ve learned that degreasing isn’t just a cleaning step; it’s the foundation for almost every successful DIY fix. When you get rid of the grease, everything suddenly works better, paint sticks the way it should, adhesives bond more securely, and moving parts glide the way they’re supposed to. If you enjoy home projects as much as I do, mastering a few smart degreasing techniques will take your repair results to a whole new level.
Why Degreasing Can Make or Break a DIY Repair
It’s unbelievable how many repairs fail simply because the surface wasn’t clean enough. Grease acts like a barrier it blocks paint, weakens glue, clogs moving parts, and invites more dirt to pile on. Sometimes what looks like a broken part is just buried under a layer of sticky buildup. I’ve had “rusted” hinges magically come back to life once the grease and grime were removed. Before replacing anything, I always remind myself: clean it first. Half the time, the fix reveals itself once the grease is gone.
Figuring Out What Kind of Grease You’re Dealing With
One of the best lessons I’ve picked up over time is that not all grease is the same. Some of it is soft and sticky, some is thick and mechanical, and some forms a hardened crust over the years. The type of grease matters because it determines which cleaner works best. Kitchen grease think frying oils and vapors responds well to dish soap and heat. Mechanical grease, the kind on tools and garage equipment, often needs a stronger degreaser or a solvent. And then there’s that mysterious grime that forms where grease mixes with dust, creating a cement-like layer. It’s worth taking two seconds to identify the type before diving in; it makes choosing the right cleaner so much easier.
Sometimes the tough kitchen grease you’re fighting is actually a product of a chemical process similar to saponification, which is how fats break down into soap-like residues over time. Understanding why grease behaves the way it does makes it far easier to remove.
Softening Stubborn Grease With a Little Heat
If you’ve ever tried to scrape off hardened grease without loosening it first, you know exactly how frustrating that can be. Heat is one of my favorite tricks because it does half the work for you. Warmth softens the grease, making it easier to wipe away instead of fighting with it. A hairdryer on low, warm water for metal pieces, or even steam for kitchen surfaces works wonders. Just be careful when dealing with plastic parts or electronics too much heat in the wrong place can cause more harm than good.
Choosing the Right Degreaser for the Job
There’s no one-size-fits-all degreasing solution, so I keep a little “cleaning toolbox” of options depending on the situation. Dish soap is my everyday hero because it cuts through food-based oils almost instantly. Baking soda, mixed into a paste, gives that extra scrub without scratching surfaces. Vinegar is great for lighter residue, especially around the kitchen, although it’s not the best for heavy mechanical grease. Citrus-based cleaners remove sticky grime, and when I’m working on tools, hinges, or anything in the garage, I’ll grab a more heavy-duty degreaser or even rubbing alcohol.
The U.S. Environmental Protection Agency (EPA) offers a helpful resource on safer solvent alternatives for tough cleaning jobs, especially when you want something effective but not overly harsh. Their Solvent Alternatives Guide is worth checking out. It’s a great way to learn which cleaning agents are powerful enough for degreasing without being unnecessarily toxic for your home.
The key is matching the cleaner with the surface and always double-checking that it’s safe for the material before going all in.
Take Things Apart Whenever You Can
One thing I’ve learned the hard way is that grease hides everywhere. Cleaning only the outside of something is usually just scratching the surface literally. Whenever it’s safe and reasonable, I take things apart. Hinges come apart, fans come apart, tools have removable covers, and even drawer slides separate into different tracks. Once you pull something apart, you often discover that the real gunk isn’t where you expected it at all. Lay everything out neatly and clean piece by piece. Not only does the item function better afterward, but reassembly becomes much simpler when everything is already spotless.
Why the Two-Towel Technique Works So Well
It might sound silly, but using two towels instead of one really does make a massive difference. One towel grabs the grease and holds it; the other does the finishing pass. If you wipe grease over and over with the same cloth, all you’re doing is smearing it around. Using a clean towel at the end gives you that smooth, residue-free finish that makes the job feel complete. I learned this tip from an old mechanic who swore by it, and now I swear by it too.
Don’t Skip the Rinse Stage—It Matters More Than You Think
After you’ve lifted the grease, the surface still needs a rinse. Even if the cleaner says “no rinse needed,” I’ve found that rinsing leaves everything feeling fresher and more prepared for whatever comes next. Adhesives, paints, and lubricants all bond better when the surface is completely free of cleaner residue. A quick wipe with plain water or a final pass with a damp microfiber cloth leaves everything perfectly prepped.
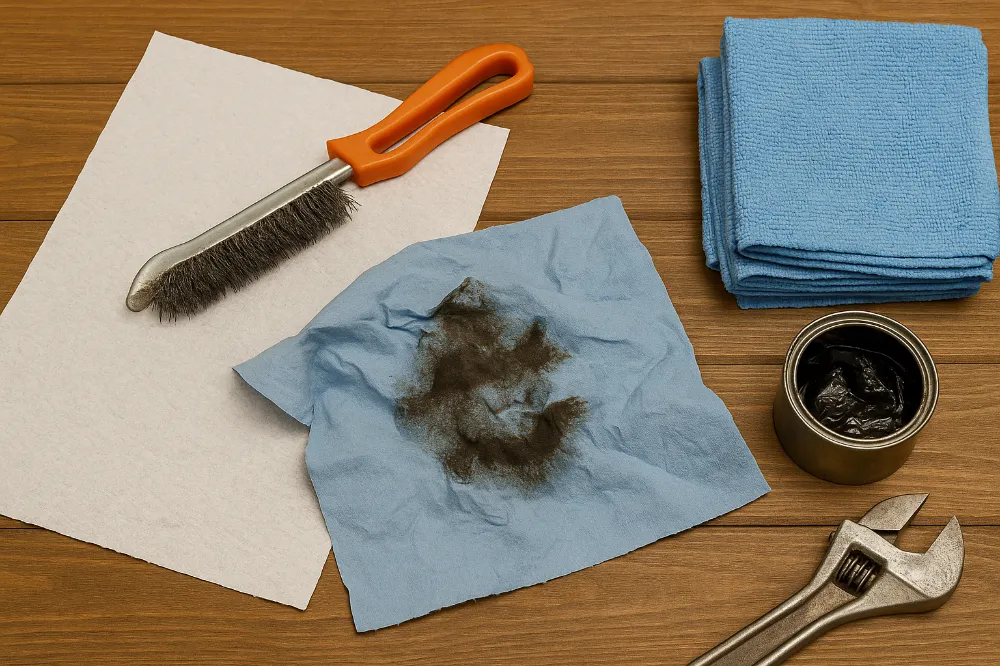
Using the Right Brush Makes Cleaning Much Easier
A brush can be your best friend or your worst enemy depending on the surface. Soft-bristled brushes are perfect for plastic, painted wood, and lighter grime. Medium bristles work great for tools and hardware. Wire brushes are only for raw metal or rust removal. And never underestimate a plain toothbrush—it gets into corners, threads, and crevices that cloths will never reach. When in doubt, start gentle and work your way up.
Never Mix Cleaners Unless You Know What You’re Doing
It’s tempting to mix cleaners when dealing with stubborn grease, but it’s genuinely dangerous. Some combinations create toxic fumes or corrosive reactions. Bleach with vinegar, bleach with ammonia, and peroxide with vinegar are the biggest no-no’s. I’ve made it a habit to rinse thoroughly before switching to a different cleaner. It’s the safest and most effective approach, especially when I’m working indoors.
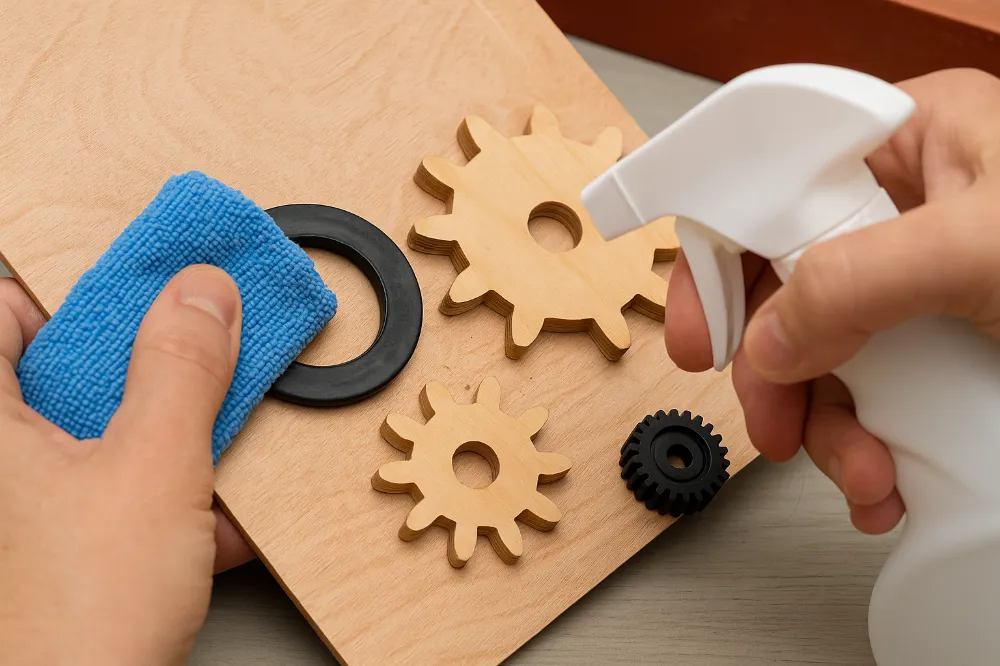
Be Gentle With Sensitive Materials
Not every surface can handle strong degreasers, and that’s something I had to learn through trial and error. Rubber gaskets, plastic gears, painted finishes, and wood veneers all require a softer touch. Whenever I’m unsure, I start with diluted dish soap or a mild cleaner. Testing a small hidden spot first is always a smart idea it can save you from costly mistakes down the line.
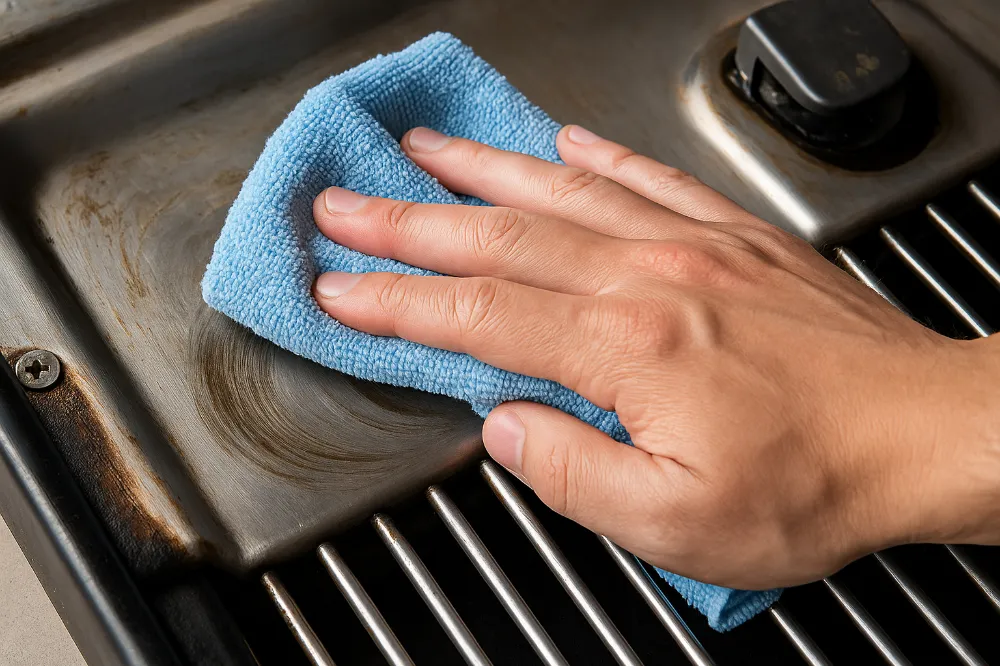
Why Microfiber Cloths Make All the Difference
Microfiber cloths have become my go-to for almost every cleaning job. The material actually grabs grease and dirt instead of smearing it around like cotton sometimes does. They leave surfaces looking genuinely clean, not “clean but still kind of shiny in a greasy way.” If you want a streak-free finish, microfiber is your best friend.
Don’t Forget to Relubricate After Degreasing
Degreasing is only half the job when you’re working with moving parts. Once everything is clean, dry, and reassembled, it needs fresh lubrication. Otherwise, metal parts grind and wear faster. I use silicone spray for tracks and sliding parts, lithium grease for heavier components, Teflon-based lubricants for tools, and food-safe lubricants for anything that touches kitchen appliances. Clean first, lubricate second that’s the formula for long-lasting repairs.
Developing a Routine Makes Degreasing Easier Over Time
One of the best habits I’ve adopted is light, regular maintenance. When you wipe things down frequently, grease doesn’t get the chance to harden into that stubborn, sticky mess. I clean my range hood filters monthly, my tools after every big project, my fan blades every season, and my hinges a couple of times a year. It only takes a few minutes each time, but it saves hours of heavy scrubbing later.
When Disposable Towels Are the Better Choice
While I love reusable microfiber, there are certain situations where disposable shop towels are simply the smarter choice especially when the grease is thick, old, or sticky enough to ruin your cloth. Old engine oil, lawn equipment grime, and blackened mechanical grease fall into that category. It’s much easier to clean thoroughly when you’re not worried about saving the towel afterward.
Degreasing Before Painting or Refinishing Is Non-Negotiable
If you’ve ever had paint peel or bubble after a project, there’s a good chance grease was the culprit. Even invisible residue can ruin a finish. Before painting anything walls, cabinets, metal pieces, or wooden surfaces I always degrease thoroughly, rinse, and then sand lightly. Paint sticks beautifully to clean, grease-free material, and the difference shows immediately in the final result.
Cleaning Electrical Parts Safely Without Water
Degreasing electrical components is a little trickier, but still manageable with the right approach. I always unplug the item first, then use rubbing alcohol on a cotton swab to remove the grease. Alcohol evaporates quickly, which makes it safer for electronics. A can of compressed air is useful for blowing away loosened dust. No water, no spraying directly into vents just slow, careful cleaning.
Final Thoughts: Why Good Degreasing Habits Pay Off
Degreasing may not be the most glamorous part of DIY repairs, but it’s easily one of the most important. When you start with a clean surface, everything else from painting to gluing to mechanical adjustments becomes easier and more reliable. I’ve seen simple projects turn frustrating purely because of hidden grease, and I’ve seen “broken” items come back to life after a good cleaning. Once you experience how much smoother your repairs go with proper degreasing, you’ll never skip this step again. It’s one of those small habits that makes a big difference in the longevity and quality of your DIY work.
FAQs
Degreasing removes buildup that can interfere with adhesives, paint, and moving parts, helping repairs last longer and perform better.
Dish soap and warm water work best for food-based grease because they break down oils gently without damaging surfaces.
Yes, vinegar can dissolve light grease, but it’s not effective for heavy mechanical grease. Avoid using it on stone surfaces.
Yes, but ensure good ventilation. Many strong degreasers contain solvents that require airflow to avoid inhaling fumes.
A medium-bristle brush or a toothbrush works well for tight spaces. For heavy metal parts, a wire brush may be appropriate.
Absolutely. Dish soap is gentle yet effective on many types of grease and won’t damage metal surfaces.
Use rubbing alcohol applied with a cotton swab and avoid soaking or spraying directly into vents. Always unplug the item first.
Apply heat first using warm water, steam, or a hairdryer. Heat softens old grease, making it easier to wipe away.
Yes. Once grease is removed, clean metal parts require fresh lubrication to prevent friction and wear.
Never mix cleaners unless the label says it’s safe. Combinations like bleach with ammonia or vinegar create toxic fumes.


