Outdoor pavers take a beating. They catch foot traffic, absorb rain and sun, gather dirt, and sit quietly while algae creeps across their surface. Over time, even the most beautiful patio or walkway can start looking dull and weathered. That’s where power washing comes in. Done correctly, it doesn’t just clean the surface. It revives the look, restores color, and helps your outdoor space feel polished and well cared for. But when done incorrectly, power washing can damage pavers, blast out joint sand, and leave the surface uneven and at risk of shifting. So precision matters. A lot.
Let’s walk through how to clean pavers the right way, step-by-step, without causing the headaches that come from using too much pressure, the wrong nozzle, or skipping crucial finishing steps.
Why Pavers Need Cleaning
Pavers look rugged and tough, and they are. But they’re also porous. That means they hold moisture. And where there’s moisture, there’s growth: algae, mildew, lichen, moss. Add dirt, pollen, foot traffic, and outdoor furniture marks, and the surface gradually fades. It happens slowly enough that you might not even notice until one day you look down and think, When did this get so dull?
Cleaning your pavers doesn’t just improve looks. It improves safety. Algae and mildew make walkways slippery. Damp patios become slick. If your outdoor space is used for gatherings, grilling, or kids running around barefoot, safety matters just as much as appearance.
When Should You Power Wash Pavers?
There are some clear signs it’s time to clean:
- The pavers look dark or muddy, even when dry.
- Algae or green streaks are visible.
- You see sand missing from the joints.
- The surface feels slippery.
- The color looks muted or washed out.
A good rule of thumb: clean your pavers once a year, typically in spring or fall. Those seasons have mild temperatures and more predictable weather, which helps the pavers dry evenly and safely after cleaning.
Power Washing vs. Soft Washing
Not all exterior cleaning involves blasting water at high pressure. Sometimes, lower pressure combined with the right detergent works better.
| Cleaning Method | Pressure Level | Best Use | Risks |
| Power Washing | Medium-to-high pressure | Concrete pavers, brick, stone | Can remove joint sand if too strong |
| Soft Washing | Low pressure + cleaning solution | Delicate stone, lightly soiled pavers | May require longer dwell time |
If your pavers are thick, sturdy, and heavily soiled, power washing is the right approach. If your pavers are fragile, hand-carved, or decorative, a soft wash might be safer.
Preparing Your Pavers for Power Washing
Don’t grab the washer and jump right in. Preparation makes the cleaning process smoother and safer.
1. Clear the Surface
Remove furniture, grills, planters, and décor. Give yourself room to work.
2. Sweep Thoroughly
Loose dirt turns into mud under pressure. Take a few minutes to brush it away.
3. Check the Joint Sand
If large gaps are visible between pavers before washing, plan on re-sanding afterward.
4. Pre-Treat Heavy Stains
Oil stains, rust, and plant stains often need a cleaner applied before washing. Let it sit for a few minutes to loosen buildup.
These small steps prevent mess and reduce the amount of pressure required to get the surface clean.
Choosing the Right Equipment
A pressure washer that’s too strong is just as bad as one that’s not strong enough. You don’t need a contractor-grade machine to clean pavers safely.
Ideal Pressure Range: 1,000–1,600 PSI is usually perfect for most residential paver setups.
Nozzle Selection:
- 25° (green) is a go-to for most surfaces.
- 40° (white) works well for delicate areas.
- Avoid 0° (red) — it’s powerful enough to cut grooves into stone.
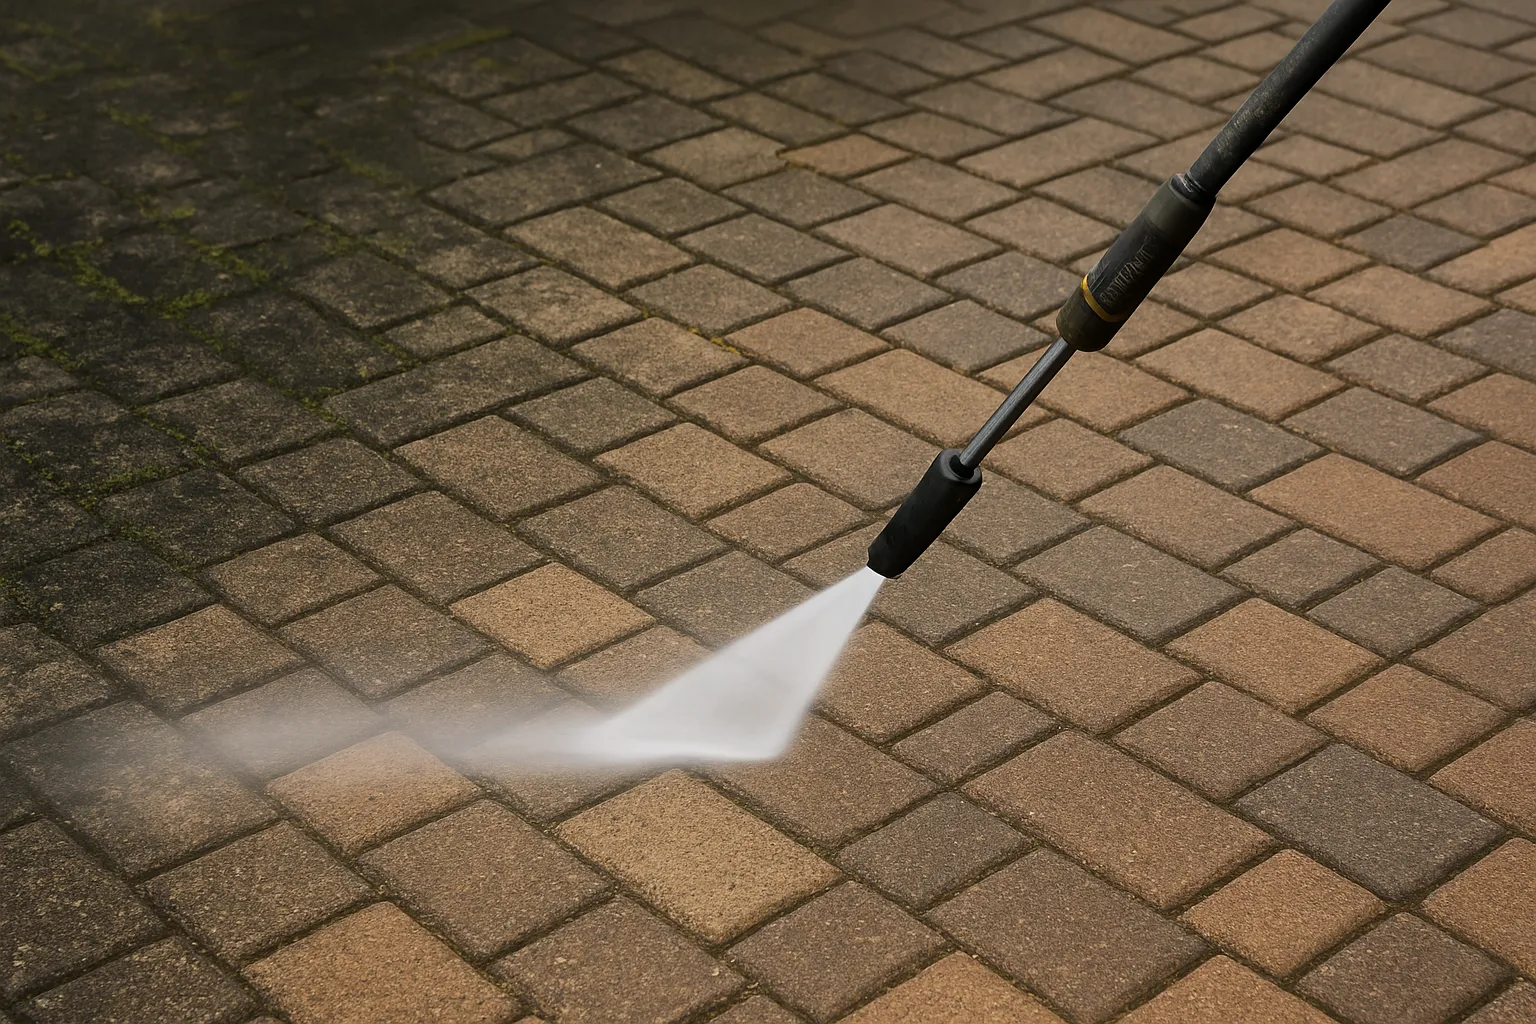
The key is controlled pressure and distance. More distance equals less direct force. Think sweeping motions, not stabbing motions.
Step-by-Step Guide: Power Washing Pavers Correctly
Here’s the process, broken down into clean, straightforward steps.
1. Start with a Rinse
Rinse the pavers to remove surface dirt. This lowers the amount of concentrated scrubbing required.
2. Test a Small Area
Choose a corner or hidden spot. Get a feel for how the pavers respond to pressure. Adjust distance if needed.
3. Work in Sections
Large patio? Break it into zones. Work systematically to avoid streaking.
4. Keep the Wand Moving
Hold the wand at a steady angle, about 8–12 inches above the surface. Move in smooth, overlapping passes.
5. Avoid Joint Lines
Direct pressure at joints displaces sand. Aim across the pavers, not directly downward.
Think of it like painting—smooth and steady wins. The goal isn’t to attack the surface. It’s to clean it evenly.
Mistakes to Avoid (These Matter!)
Some mistakes are common but costly:
| Mistake | Why it’s a Problem | Result |
| Using too much pressure | Damages surface and joints | Uneven pavers, etching |
| Holding nozzle too close | Concentrates force | Permanent marks |
| Skipping rinsing | Leaves residue | Sticky or cloudy finish |
| Washing sealed pavers without checking seal | Pressure can peel or haze old sealers | Patchy finish |
| Not re-sanding afterward | Pavers shift and weeds grow faster | Stability issues |
This is where many DIY attempts go wrong. The cleaning step is only half the job.
Re-Sanding the Joints After Washing
Once cleaned, your pavers will look fresh—but they’ll also need joint sand. That sand keeps everything locked in place.
Why Joint Sand Matters
- Prevents weeds from growing between pavers.
- Keeps pavers from shifting or sinking.
- Helps water drain properly.
How to Apply Joint Sand
- Let the pavers dry fully.
- Sweep polymeric sand across the surface.
- Fill joints completely and evenly.
- Sweep off excess sand from the surface.
- Mist lightly with water to activate binding.
Let the area cure for 24–48 hours. Avoid foot traffic if possible.
Should You Seal Pavers After Power Washing?
This step isn’t required, but it’s worth considering.
Benefits of Sealing
- Enhances the natural color.
- Adds protection against stains and weather.
- Helps lock joint sand in place longer.
- Reduces weed and moss growth.
There are two main finish options:
| Sealer Type | Look | Best For |
| Natural Look | Matte and subtle | Homes with earthy tones |
| Wet-Look | Glossy and bold | Homes where contrast and richness are desired |
Most sealers last 2–3 years before needing reapplication.
How Often Should You Power Wash Your Pavers?
For most climates, once per year is ideal. If the area is shaded, damp, or heavily trafficked, you may need to clean more frequently.
| Area Type | Cleaning Frequency |
| Shaded, damp patio | Every 6–12 months |
| Open sunny driveway | Every 12–18 months |
| Walkway with light foot traffic | Every 1–2 years |
DIY vs. Hiring a Professional
You can do this yourself. Many homeowners do. But there are situations where hiring help is just smarter.
DIY Makes Sense If:
- Your paver area is small or moderately sized.
- The surface is only lightly soiled.
- You already own a pressure washer.
A Professional Makes Sense If:
- Your pavers are large-scale or heavily stained.
- You need sanding or sealing done.
- You want long-lasting results with minimal trial and error.
Professionals have specialized tools like surface cleaners and calibrated pressure systems. They also understand how to prevent joint sand loss and uneven patterns. Ask about power washing services if your pavers need deep restoration or you’d rather not take the trial-and-error route.
Cost Expectations
Cost varies by region and condition, but here’s a baseline:
| Service | Average Price |
| Cleaning only | $0.25–$0.50 per sq. ft. |
| Cleaning + Re-sanding | $1.00–$2.00 per sq. ft. |
| Cleaning + Re-sanding + Sealing | $2.00–$4.00 per sq. ft. |
A typical patio can range from $150 to $800 depending on size and condition. Driveways cost more due to surface area.
Final Thoughts
Power washing pavers is one of the most rewarding exterior maintenance tasks. The transformation can be dramatic. A dull and dirty patio can turn into a bright, welcoming outdoor space in just a few hours. But the key isn’t just blasting away dirt. It’s doing it with the right pressure, the right motion, and the right follow-up steps.
Clean. Re-sand. Seal. That’s the winning formula.
If you take your time and follow the proper sequence, your pavers will not only look great now—they’ll keep looking great for years. And your outdoor spaces will stay safe, comfortable, and beautiful.
FAQs
Most concrete, brick, and stone pavers can be power washed, but delicate or hand-carved pavers may require lower pressure or soft washing.
Aim for 1,000–1,600 PSI to clean effectively without damaging the surface or joints.
It can if the pressure is too high or the nozzle is held too close. Proper technique minimizes sand loss, and re-sanding is recommended afterward.
Once a year is typical, though shaded or high-traffic areas may need cleaning more frequently.
Sealing protects the color, prevents stains, and helps maintain joint sand, making it a beneficial optional step.
Polymeric sand is best because it hardens when wet and helps lock pavers in place.
Oil often requires a pre-treatment cleaner before washing to break down the stain.
Allow them to dry 24–48 hours, depending on weather conditions.
Yes, if you use excessive pressure or the wrong technique. Controlled movement and proper nozzle choice prevent damage.
Wait at least 3–6 months so the sand can settle and the surface fully cures before power washing.


